
Recently, a separate class of devices has become widespread, designed to manage equipment, be used as small workstations, or to create simple servers. These are single-board computers such as the Raspberry Pi. Despite its size, it can be used as a hardware controller, small multimedia, email, file, or web server – not to mention as a thin client. There is only a question of controlling the single-board. It is, of course, possible to give commands directly into the console or control the desktop using the monitor, keyboard, and mouse. But every time you have to connect additional equipment for any action, it’s an unnecessary waste of time and labor. There is a way out, and the name is Secure shell. The original network protocol used for console access, a remote *-NIX like system, over time frolicked into a handy Linux management and file transfer tool.
The following information will mostly apply to the Raspberry PI 3 and older single-board models of the same name.
Secure Shell
As already described, SSH is a Linux file transfer protocol that is installed on the Raspberry PI 3 under the Raspbian name. And we are talking about text data and streaming video and audio broadcasts, images, and binary files. In full *NIX (Linux) systems, it is used to access screen controls and X windows, with the ability to run them on the host machine and display the result on the client machine. Unfortunately, for Raspbian, such a feature is not available as part of the standard Raspbian. Still, the named Debian clone has certain OS functionality restrictions, directly related to the relatively weak hardware of the single-board. Suppose you still need to get access to the desktop. In that case, the system’s official documentation recommends looking closely at the means of control over the VNC protocol, the use of which, as well as Secure Shell, was initially built into the Raspberry Pi.

What makes SSH different from Telnet is the presence of channel encryption. You do not have to worry about the security of the information you are sending since all data is encrypted at the same time. Another of the many features inherent in the Secure shell we can mention the compression of the data transmitted, which is activated by the appropriate option on the server or client. In some cases, this feature allows you to offload the SSH communication channel by reducing the data stream’s volume through compression.
Activation and Installation on Raspberry Pi
Organizing interface access to the console or SSH protocol capabilities starts with starting its server part on the Raspberry Pi. It is possible to do the named procedure in as many as three methods with a direct connection and one “headless”. Of course, the first ones will initially require direct access to the Raspbian Pi console, with a hardware keyboard and monitor. And in all cases, after the activation parameter is set, you need to reboot the Raspberry Pi to start the service.
First Method
The classic method that works on any Linux using systemd as the initialization system. Enter in the console:
sudo -s
# activate the service:
sudo systemctl enable ssh
sudo systemctl start ssh
Second Method
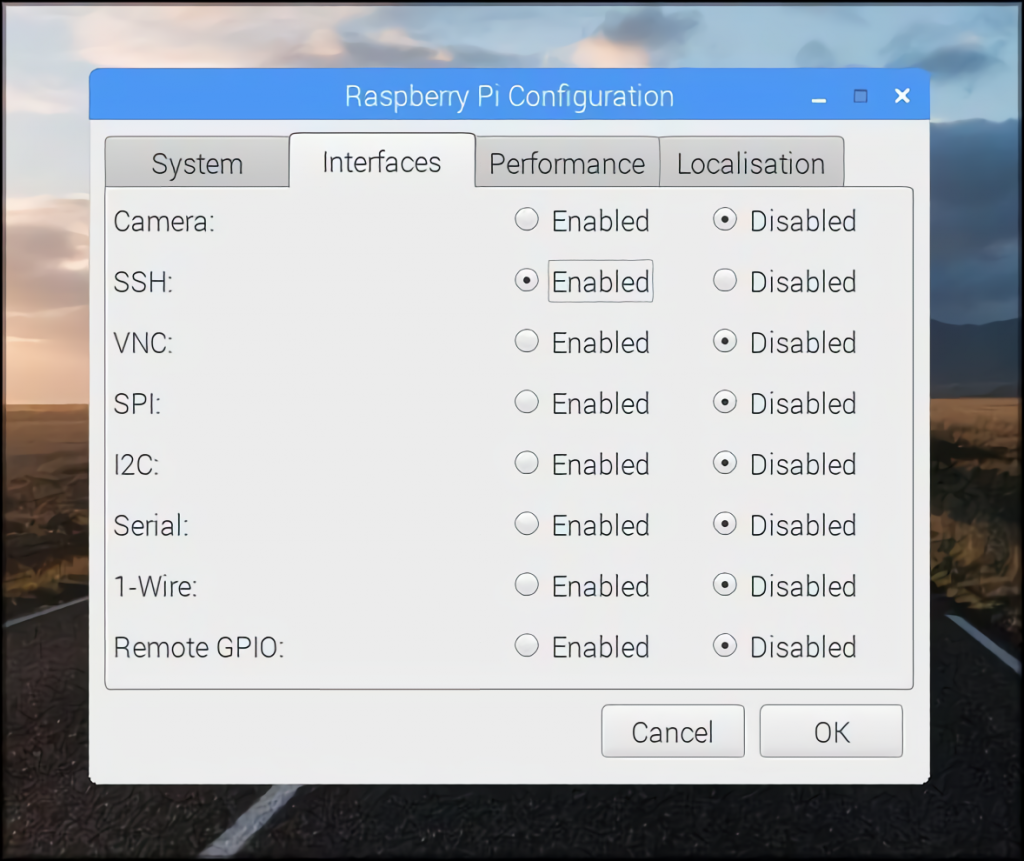
You are executed directly from the Raspberry PI 3 window system. In the “Preferences” menu, which is in a kind of “start” on the panel, you need to select “Raspberry Pi Configuration”. In the opened window, switch to the tab “Interfaces”. In the SSH item, set the switch next to it to “Enabled”. Then confirm the action by clicking “OK” at the bottom of the window.
Third Method
The server’s activation by the mentioned method is suitable for the cases when the graphical interface is disabled in Raspbian. You should type in the console:
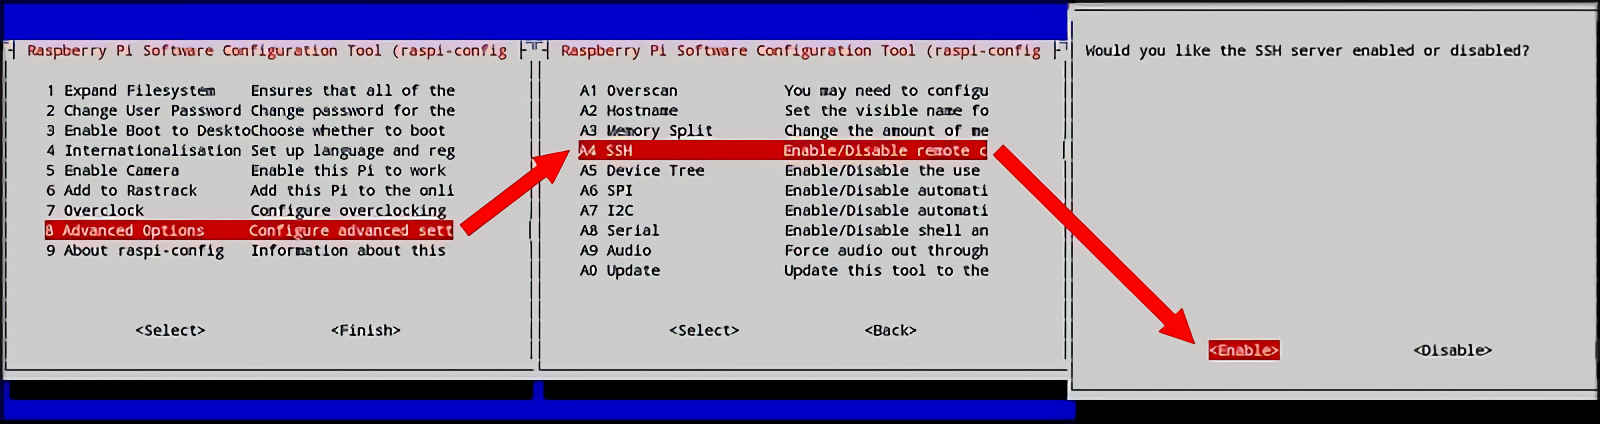
sudo raspi-config
After pressing “Enter”, the administrator password is entered on demand (for cases where its use is enabled by the rules specified by the /etc/sudoers.d/010_pi-nopasswd file). By default, the security prompt is disabled.
Then a text menu system opens, where you have to go to “Interface Options” using the keyboard arrow keys and the “Enter” key.
Entering the configuration point, move to the SSH section and activate “Enable” at the bottom of the screen, or “Yes” for some Raspbian versions. Then “OK”. In the next text window that opens with a list of settings, “Finish”.
Fourth Method
Finally, the method that works for those cases where there is no physical connection to the single-board computer and only a network connection. Here you need to make small changes to the SD card with Raspbian installed. On it, you need to find the boot partition. If you are installing a bare-metal operating system, it will be the smallest of the two on the card. In the root is a file with no extension and with any content, named “ssh”. Detecting it on boot, Raspbian will start a Secure shell server, with a blank security password and the user “pi” (without quotes).
This only works until the Raspberry PI is rebooted, and for permanent subsequent network access via the protocol, it is required to directly specify the SSH startup in one of the ways described earlier. The reason for this is the deletion of a file in the Raspbian boot partition after the system detects it and starts the required service once.
There is a question about accessing the named part of Raspbian from Windows. There is no problem in this case because the boot partition uses the FAT32 file system, which is native to Microsoft’s older operating systems. The main thing here is the presence of the physical SD card reader itself.
Connecting
So, we have solved the activation of the Secure shell on the Raspberry Pi. Now we need to connect to it via network and try the protocol’s possibilities for controlling the Raspberry Pi console.
Linux or macOS
Your Linux or macOS distribution comes with the ssh utility as standard, and it can be run from terminals in these operating systems. To connect to the Raspberry Pi, you will need to know the single board’s IP address in the network. So, in order to set up access to the Raspberry Pi ssh in the console:
ssh pi@<ip single-board address>
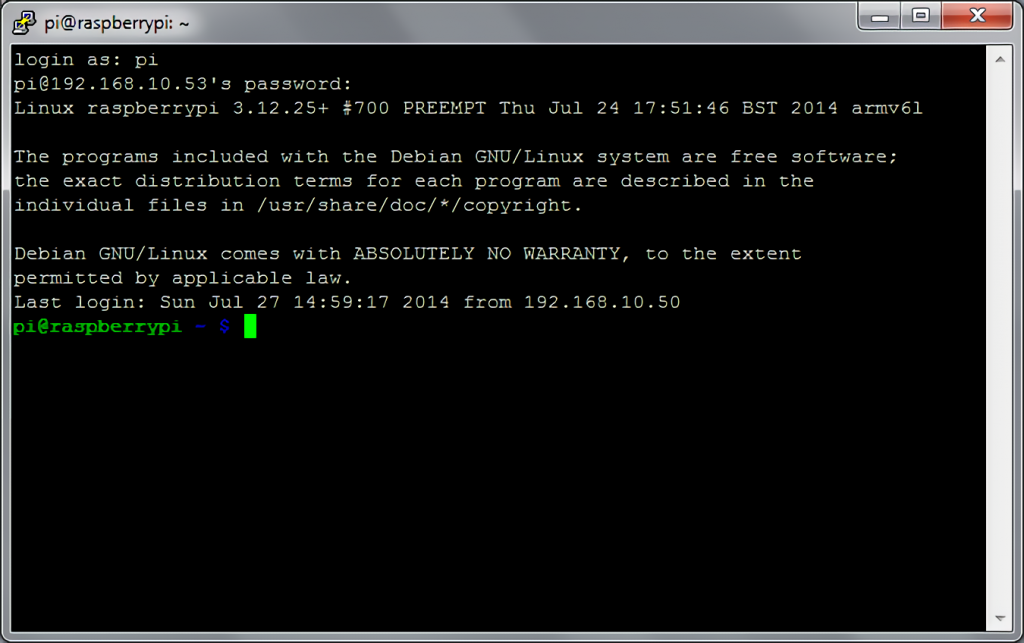
The answer will be a password request, which by default is done by pressing “Enter”. After that, the Raspberry Pi command line will be opened, giving you access to the single board console.
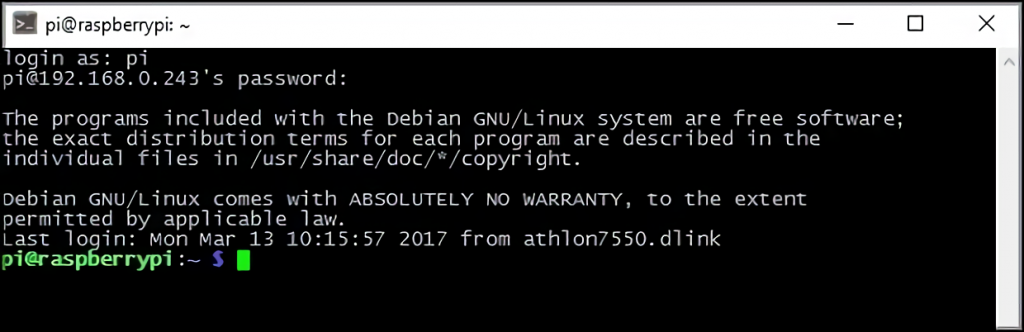
In the case where the standard user name has been changed, the new one is indicated in the previously demonstrated command line, instead of “pi”. However, it is possible to make it easier by removing everything written before “@”, including it, from ssh startup parameters and enter login and password (if set) directly into the displayed “login as:” prompt.
Windows
Secure shell control from Microsoft Windows is done with a third party and free software called “PuTTY”. It is quite easy to find it by typing the name into the Google search bar and downloading the archive offered in the pages on the highlighted links.
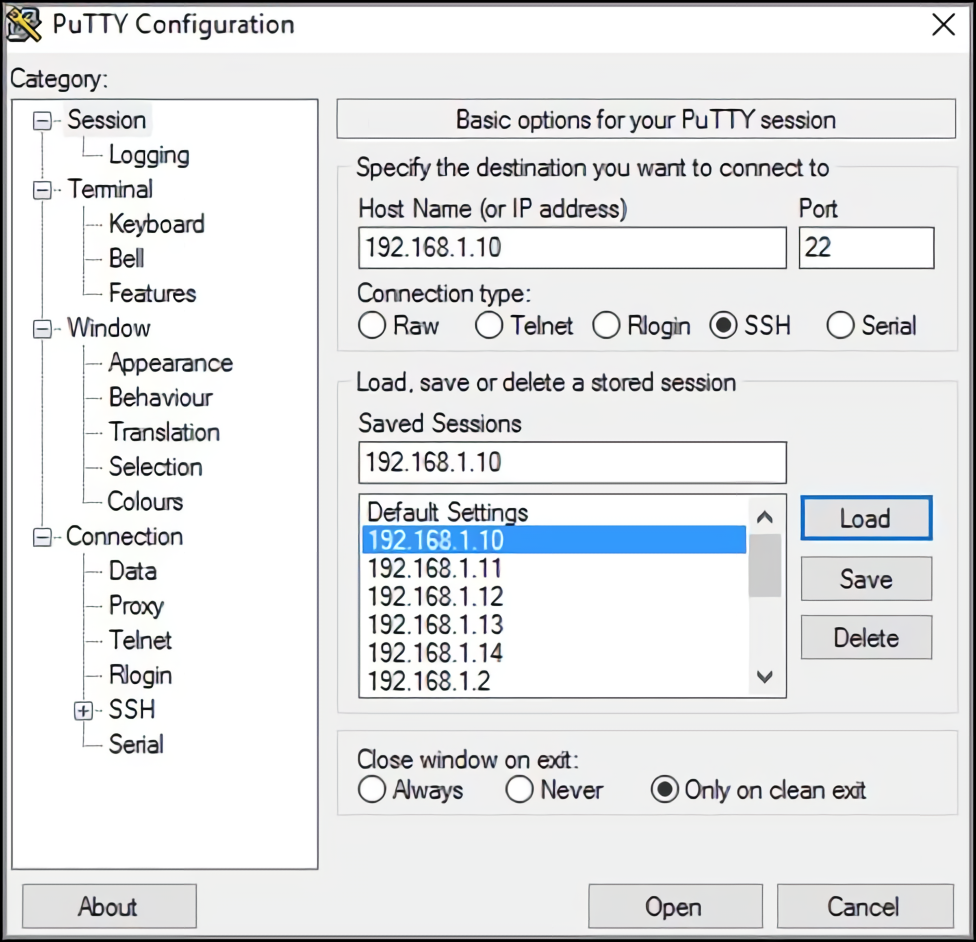
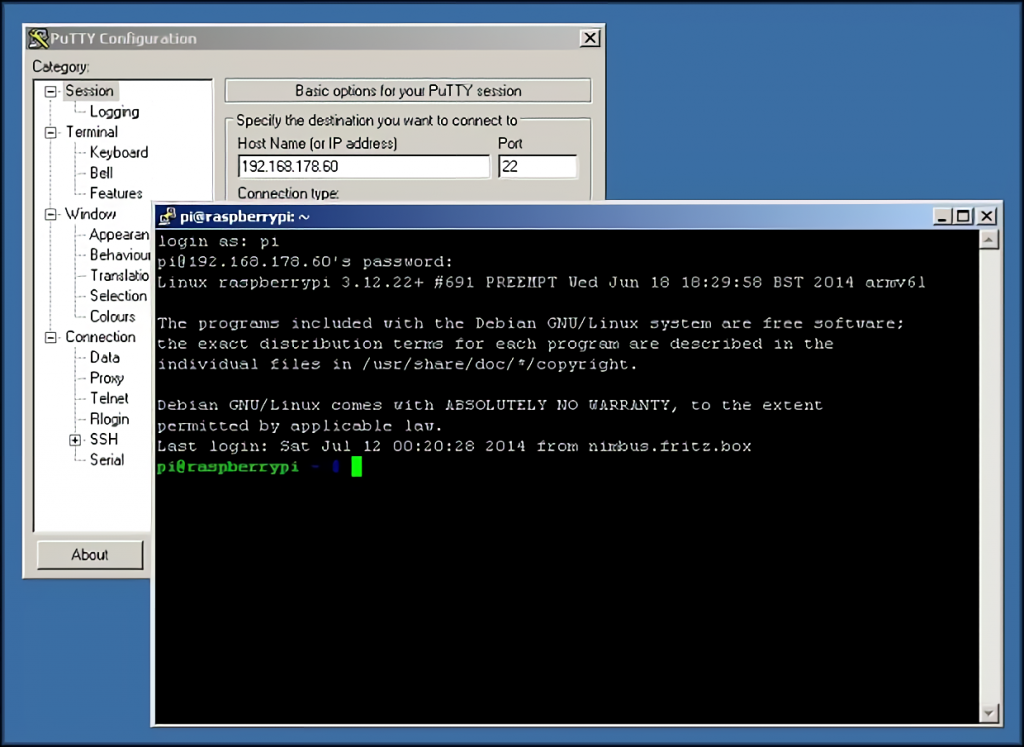
Having opened the program (you can access it from a normal user), to connect, go to the section “Session”. Then, in the window tab on the screen, but the choice of groups “Connection type” in the position “SSH”. Next, the field “Host Name (or IP-address)” is filled with the Raspberry Pi address. “Port” should be equal to 22. “Saved session” is entered as desired – then you can use the saved information in two clicks without entering it manually. The final action to make the connection is to press the “Open” button, after which the console window to the Raspberry PI will pop up, inviting you to enter your user name.
Some Observations
After setting up the Secure shell access, it is recommended to make the connection secure even if you intend to use the Raspberry PI as a non-Internet connected device. As they say, everything has to be considered in security. Sooner or later, it will be possible to make a global entrance to the network. And it depends on a simple forgetfulness when arranging the safe access. You can simply be lazy or “run around” and do not set a password for login or sudo, leaving everything by default. Accordingly, in other words, putting at the disposal of a potential attacker the computing power of the Raspberry PI running in the local network.
Basic security recommendations, all commands in relation to which are executed in the Raspberry Pi console:
Setting the root password. This is done in one of two methods, via
sudo raspi-config
Selecting the second item of the program and acting within the instructions on the screen. The other way is simpler – in the command line, you type the following:
sudo passwd root
followed by entering the password and its confirmation, set in the lines “Enter new UNIX password” and “Retype new UNIX password”:
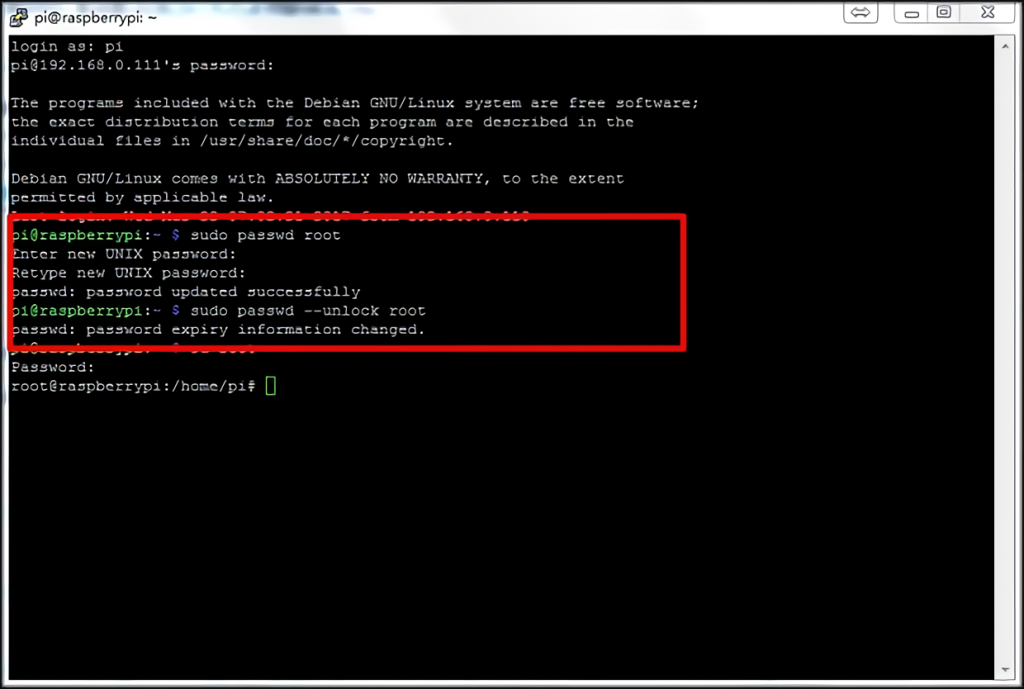
The last command is shown in the screenshot, sudo passwd - unlock root unlocks the administrator account, which in turn is still useful later.
Restrict use of sudo without a password. Executed by opening an access configuration file for editing with the command
sudo visudo /etc/sudoers.d/010_pi-nopasswd
And it is replacing the entry in the default user line with pi ALL=(ALL) PASSWD: ALL. If a new login has been added, it is required to specify the above line for it as well, by writing it after the name of the added login used for logging in.
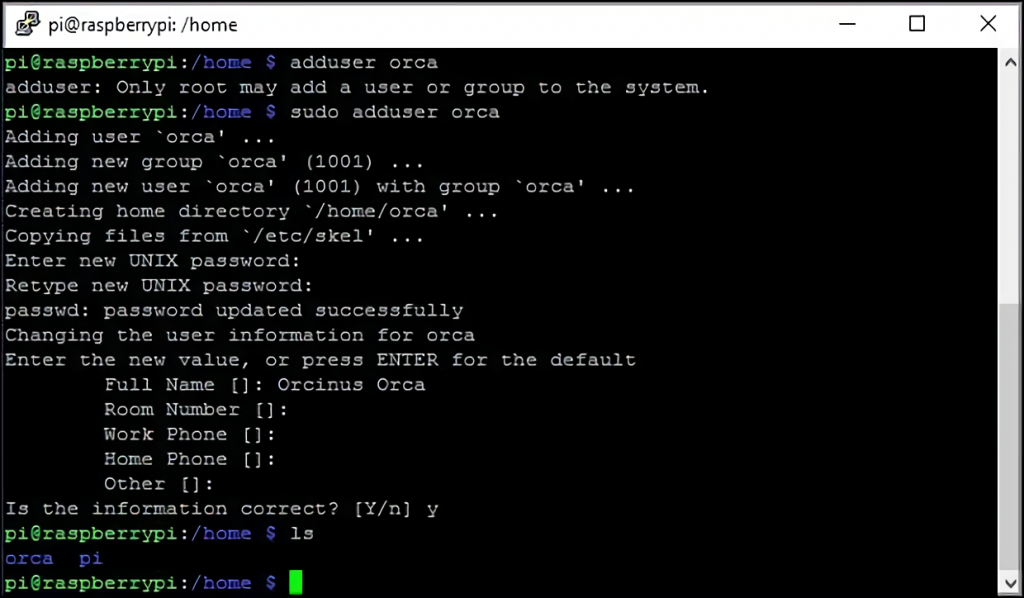
Adding a non-standard user (to be entered instead of
sudo -s
# add the user. After entering the command, you will be asked for the password
# for the new user with a line containing "password"
adduser <login>
# we give him his rights (participation in access groups)
usermod -a -G \
adm,dialout,cdrom,sudo,audio,video,plugdev,games,users,input,netdev,gpio,i2c,spi <login>
# removing the standard pi. But there is a nuance - in the documentation of the
# Raspberry PI's documentation advises against this because
# some applications must have it on the system
pkill -u pi
deluser -remove-home pi
If the default user is not removed (the last two lines should be ignored for input), – it is recommended to give him a password different from the default one. This is done by typing sudo passwd pi in the console.
What Else
Separately we would like to consider the case of connected users via SSH with a traffic compression option. Linux and macOS use a command modifier with the "-C" option to start compression mode. Accordingly, the access program call looks like this:
ssh -C <Raspberry Pi address>
The compression method works not only in remote console control cases via SSH but also when files are sent over the secure shell protocol. The SCP command, which is part of the common remote control software package, is used here. The format is compressed, and you can copy the file from the Raspberry Pi:
SCP -C pi@<<the Raspberry Pi address>:<path to the file along with its name> /where/locate/file
Or by using ssh back to the Raspberry PI:
SPC -C <file name> pi@<address Raspberry Pi>:/where/drop/file

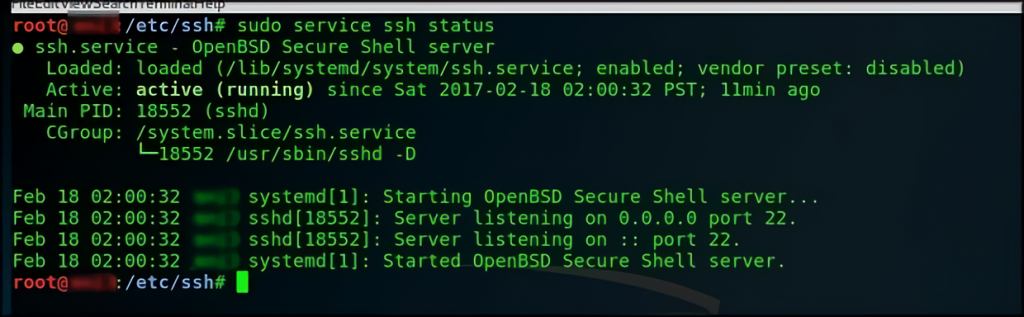
Connection problems
It would seem to be connected after setup. But, no, sometimes the “Raspberry pi ssh connection refused” error happens. At the same time, the network ping to the Raspberry Pi is going on. The only reason for this may be only one – the Secure shell is not running or is blocked by the firewall of the internal router or the OS itself. First of all, you need to check SSH status by connecting to Raspberry Pi directly and then checking the settings of the client operating system for network protocol limitations. And if it doesn’t help, deal specifically with the router’s blockers.
Useful Video: Raspberry Pi 4 SSH Setup With and Without Monitor/Keyboard (Headless)
Conclusion
You have learned how to enable SSH on your Raspberry Pi. Now you can log into your dashboard and add common sysadmin tasks via the command line. Linux and macOS users can simplify their workflow by defining all SSH connections in the SSH configuration file.
If you have any questions, please leave a comment below.


