
The default operating system for the Raspberry Pi is Raspbian. It was specially designed for the microcomputer and contains the packages needed for the device to perform common tasks. But it is also possible to deploy the usual desktop or server Linux on the RPi, for example, one of the versions of the popular Ubuntu distribution. Running under Ubuntu, the Raspberry Pi 3 becomes a complete miniature workstation or server.
Let’s take a look at the installation process of Ubuntu on Raspberry Pi 3.
Ubuntu Mate
For the example, we’ll use the lightweight version of Ubuntu Mate, built specifically for the Pi. It is necessary to prepare:
- Raspberry Pi 3 single-board;
- memory card;
- OS image;
- a utility to write the system image to the card;
- keyboard, mouse, monitor.
The capacity of the memory card should be 6 GB or more, preferably using SDHS 6-10 class for better performance.
Downloading the Image
The image file of Ubuntu installed on the Raspberry Pi is downloaded in a standard way – from the official website of the Ubuntu Mate developer.
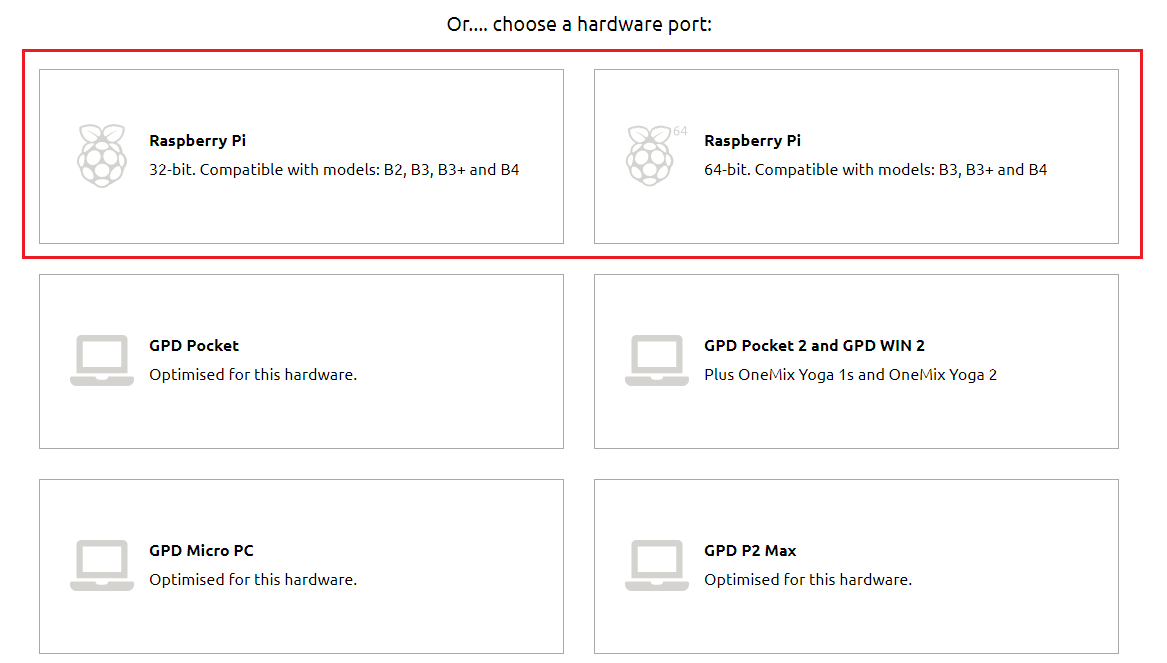
Here you should select the version for the Raspberry (not the Experimental branch), then the current version.
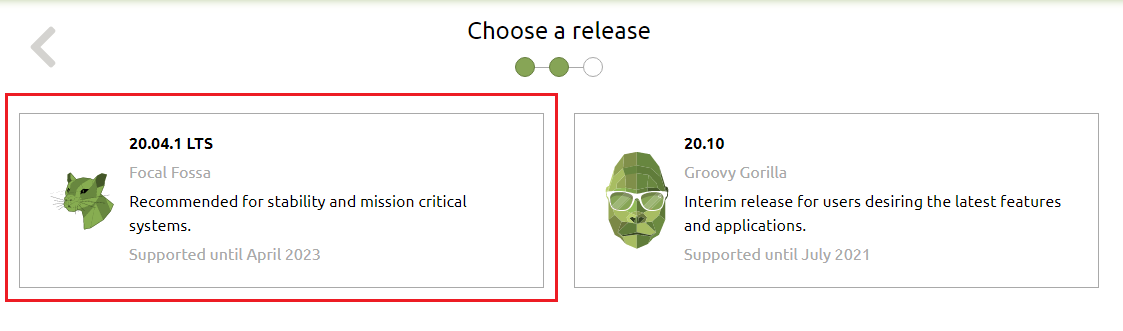
Clicking the link will take you to the image download page.
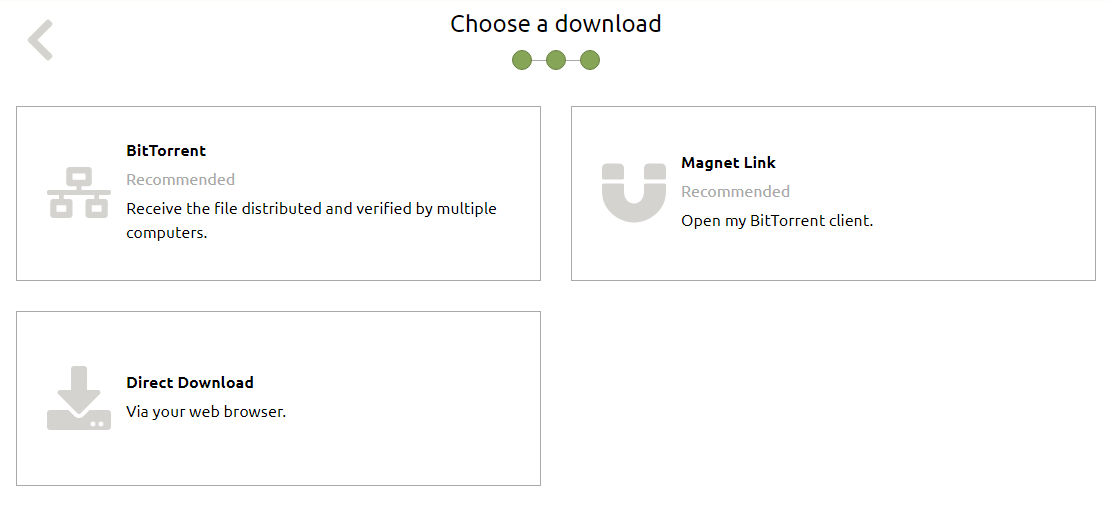
The Ubuntu image for Raspberry Pi comes in a .xz archive containing an img file. Before burning it, you need to extract it from the archive using any convenient method – the usual archiver for Windows, xz-utils for Linux, etc.
Recording the System to a Memory Card
To “fill” Ubuntu Mate you will need an image burning program. The Etcher utility, downloadable from the official website, will do the job.

You will need to install the program, then just insert the SD media into your computer, select the previously downloaded image, specify the memory card to be written and click Flash.
For Linux or macOS you can use the utility ddrescue or dd. The console Linux command for burning:
sudo ddrescue -D --force [filename].img /dev/[sdx]
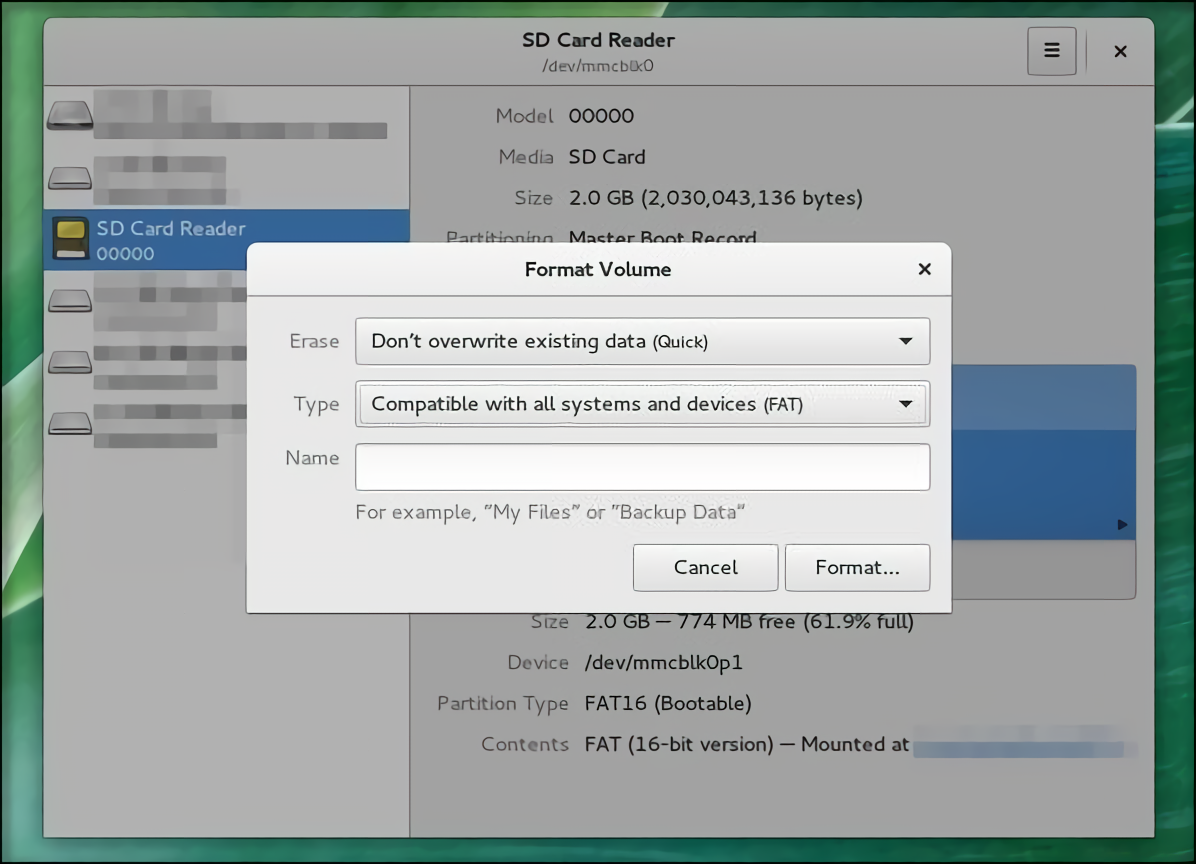
Here filename is the name of the image file and sdx is the name assigned to the flashcard by the OS. If it is not known, you can have a look at the list of devices, e.g. with the command lsblk or via the graphical manager. In the same manager, the card is formatted, if necessary.
First Startup
So, the deployment process is completed. Next, insert the memory card into the Raspberry Pi and perform the first power-up.
To simplify the process, it is advisable to connect the minicomputer to a monitor/TV, as well as connect a mouse and keyboard. And after that, turn on the RPi.
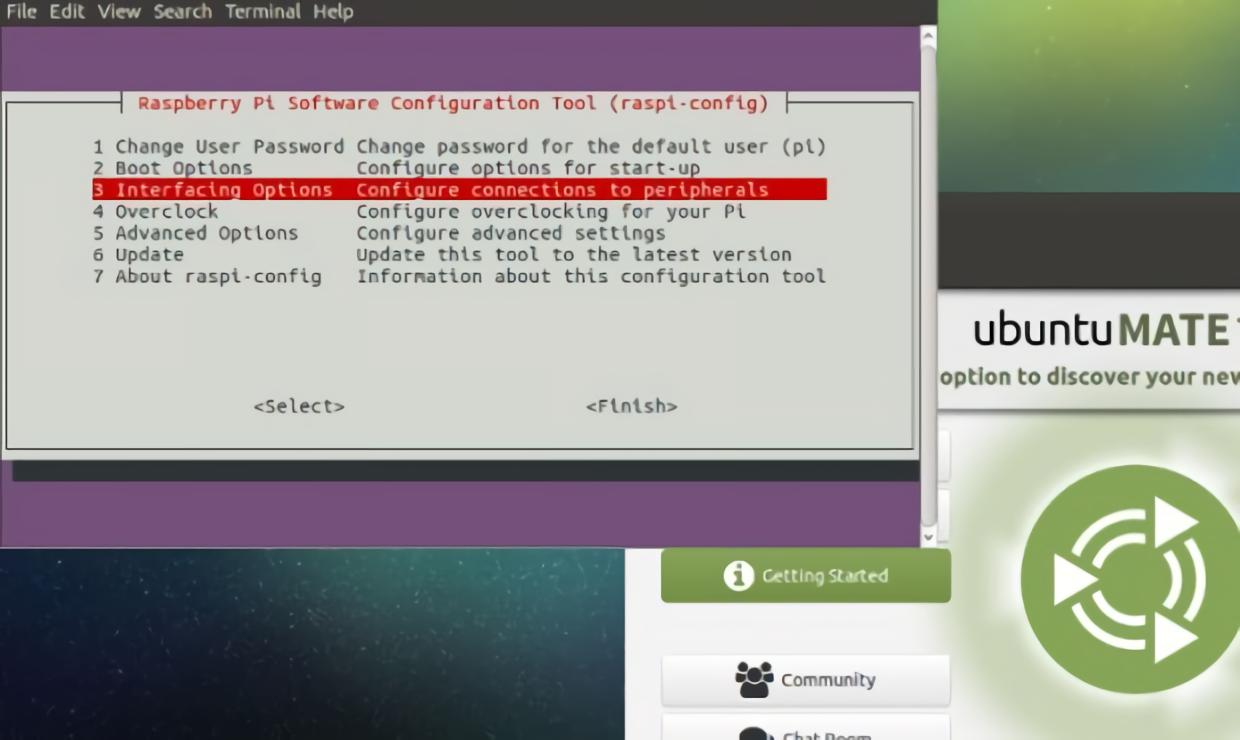
The initial configuration interface will appear on the display. In the startup dialog box you can:
- change the pi user password (present in the default OS);
- configure the connection to peripherals and the network (wired or Wi-Fi);
- change the boot parameters;
- check additional settings.
After completing the configuration in this utility, driven by a freshly installed Ubuntu, the Raspberry Pi 3 is ready to go. The operating system can be accessed either locally or via a given network address via VNC or SSH.

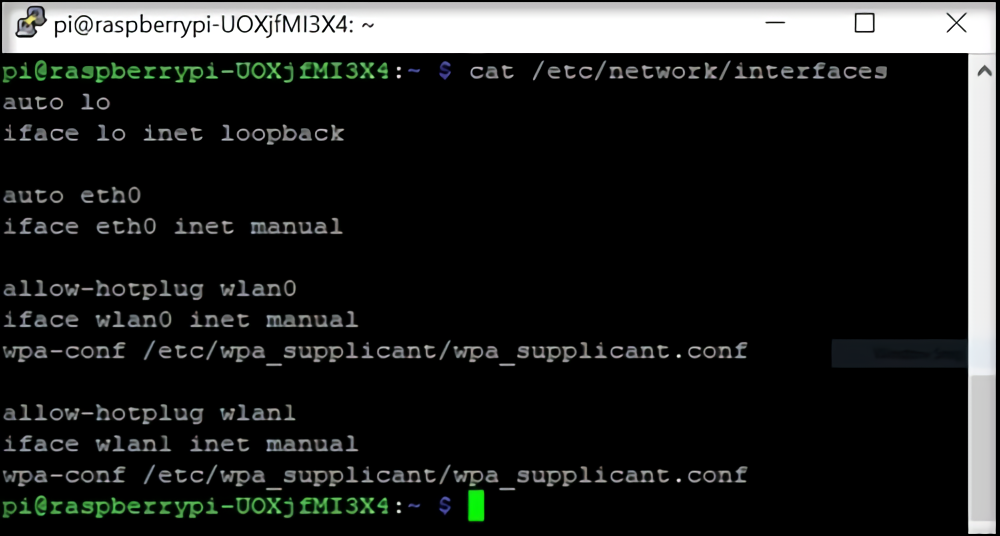
The network is configured by editing the file /etc/network/interfaces.
Ubuntu Server
For those who don’t need the full desktop experience, you can choose the Ubuntu Server version. It contains a set of packages that run various network services and is also optimized for the Raspberry Pi.
The Raspberry Pi 3 image can be downloaded from the ubuntu website.
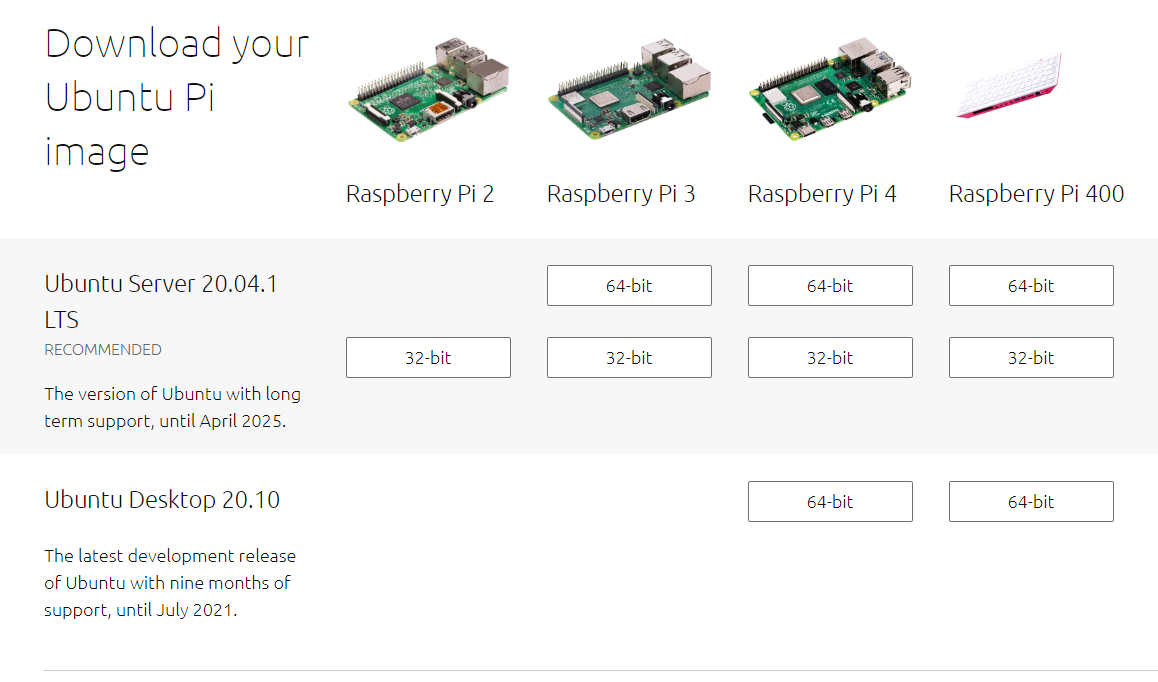
Choose Raspberry Pi 3. It is possible to choose between LTS and regular distribution, as well as architectures.
The process that follows is much the same as installing a regular Ubuntu. You should:
- save the archive to your computer;
- Insert the memory card;
- Unzip the image;
- write it to the card any way you like;
- insert the SD into the Raspberry Pi;
- configure the system.
Initial Setup
It is also desirable to conduct it with a monitor and a mouse and keyboard.
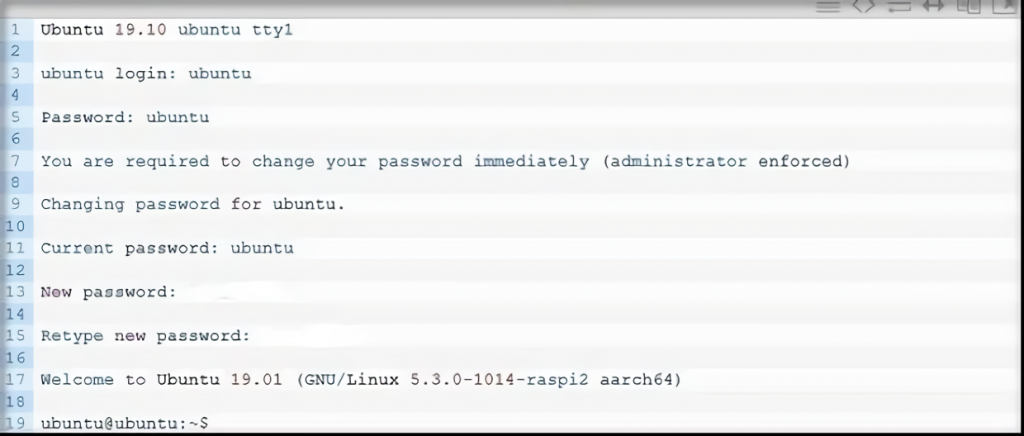
First of all, the OS will offer to change the user password. The default login and password is ubuntu:ubuntu.
After that, you can start configuring the network settings, installing the software, and so on.
Enabling SSH
Ubuntu Server is initially without any graphical desktop environment packages, and all the work with the operating system is performed via console and SSH. SSH is not initially enabled and needs to be enabled.
There are several ways to do this:
- Add a file named ssh without an extension to the system-boot directory. The next time Ubuntu boots, it will enable SSH access;
- Install an OpenSSH server.
For the latter, the packages are updated beforehand:
sudo apt update;
sudo apt upgrade.
After that, OpenSSH is loaded:
sudo apt install openssh-server.
Next, it should be enabled:
openssh server enable;
openssh server start.
The last two commands, like the others, are executed via sudo.
If everything is done correctly, the Raspberry will be accessible via SSH.
Adding Graphics
Despite the lack of a graphical desktop, it is possible to add one. To do this, xubuntu-desktop software is installed through the package manager. The lxde (lubuntu-desktop package) interface is also available for the Raspberry Pi, and Kubuntu, but it is advisable to remove the desktop effects so as not to slow down the resource-constrained system.

Should I Install Ubuntu on my Raspberry Pi?
Raspbian and Ubuntu are similar in many ways. Both operating systems belong to the Linux family and come from the same ancestor Debian. This is indicated by similar interfaces and the same apt package manager. But there are also differences – in code, package sets, and so on. In addition, Ubuntu under RPI has a relatively slow update cycle and a small community. If you have any questions, it may be harder to find answers than for the basic version.
Raspbian, in contrast to Ubuntu, is designed and built for Raspberry Pi and contains all packages needed for it. The system is fully tested and provides the best possible performance for the hardware it manages. Nevertheless, installing an adapted Ubuntu can be recommended:
- distribution enthusiasts;
- Experts who want to perform any experiments and manipulations on an alternative operating system;
- Those who are accustomed to the Ubuntu environment and do not plan to give it up;
- Those who want to solve the problem: “raise” a small and fast Ubuntu-server without changing the usual software ecosystem.
Installation of all Ubuntu versions is almost the same – downloading the image, unzipping, unzipping it to an SD-card, and loading and then configuring. The only difference is in the configuration process.
Useful Video: Installing Ubuntu Mate on Raspberry Pi 3
Conclusion
Ubuntu proves its reputation as a universal Linux distribution. It runs on workstations, servers, laptops, tablets, cell phones, and even on hardware that was never intended for it. Of course, Ubuntu-community couldn’t pass over the growing segment of powerful single board computers and created builds for Raspberry Pi 3 and other versions of Raspberry Pi.
Despite the initial non-adaptation of Ubuntu for “single-board”, it demonstrates a confident and stable work on these computers. With its help, you can organize a simple workplace, server, or media center – all with minimal power consumption, heat dissipation, and decent performance. Users who are used to this operating system won’t have to adapt again to a changing software environment. The installation is as simple as possible and won’t be difficult even for non-specialists.
Comparative tests with Raspbian show slightly reduced performance on the same hardware, but it is not fatal and allows to work comfortably on the device.


I’ve been a fan of Ubuntu for a while now, and when I heard that the Raspberry Pi 3 could run it, I was intrigued. I decided to give it a try, and I’m glad I did!
The installation process was a breeze, and everything just worked. The UI is snappy and responsive, and all my favorite applications are available.
Overall, I’m really happy with the experience. The Raspberry Pi 3 is a great little machine, and running Ubuntu on it is a joy. If you’re looking for a cheap, easy way to get started with Linux, the Raspberry Pi 3 is definitely worth considering.