
In today’s Internet of Things world, it’s easier than ever to connect devices and control them remotely. One famous device is the Raspberry Pi, a tiny single-board computer with endless possibilities. With just a few steps, you can set up your Raspberry Pi to receive online commands from anywhere in the world! This opens up exciting opportunities to build remote-controlled projects like surveillance cameras, home automation systems, environmental monitors, and more. In this guide, we’ll walk through the process of setting up remote access to a Raspberry Pi in a secure way and look at different methods to send commands to it over the Internet.
Key Takeaways
Sending commands to a Raspberry Pi over the Internet allows you to control and monitor your Pi remotely. The key is to set up port forwarding on your router to forward requests from the Internet to the Pi’s local IP address. You’ll also need to enable SSH on your Pi and, ideally, set up SSH key-based authentication for security. With this setup, you can SSH into your Pi to run commands and scripts as if you were logged in locally. Consider options like creating a web API on your Pi for more complex integrations to define endpoints that trigger actions. With a bit of setup, the possibilities for remotely commanding your Pi over the Internet are endless.
Method 1: SSH (Secure Shell)
Establishing a remote command line connection to your Raspberry Pi using SSH (Secure Shell) is one of the most common and convenient ways to send commands over the Internet. With just a few steps, you can securely log in to your Pi’s terminal from anywhere and control it as if sitting right in front.
SSH allows encrypted connections between devices, making it a secure protocol for remote access. Setting up SSH involves:
- Enabling it on your Pi.
- Configuring port forwarding on your router.
- Using key authentication for secure logins without passwords.
With this simple setup, you can access your Pi’s command line to run programs, edit code, and automate tasks, all from another computer or even your mobile device.
Enable SSH on Your Raspberry Pi
SSH is disabled by default on Raspbian, so you must enable it first. This can be done in a couple of ways:
- Create an empty file named ‘ssh’ (no extension) in the /boot directory on your Pi’s SD card. On the first boot, SSH will automatically be enabled.
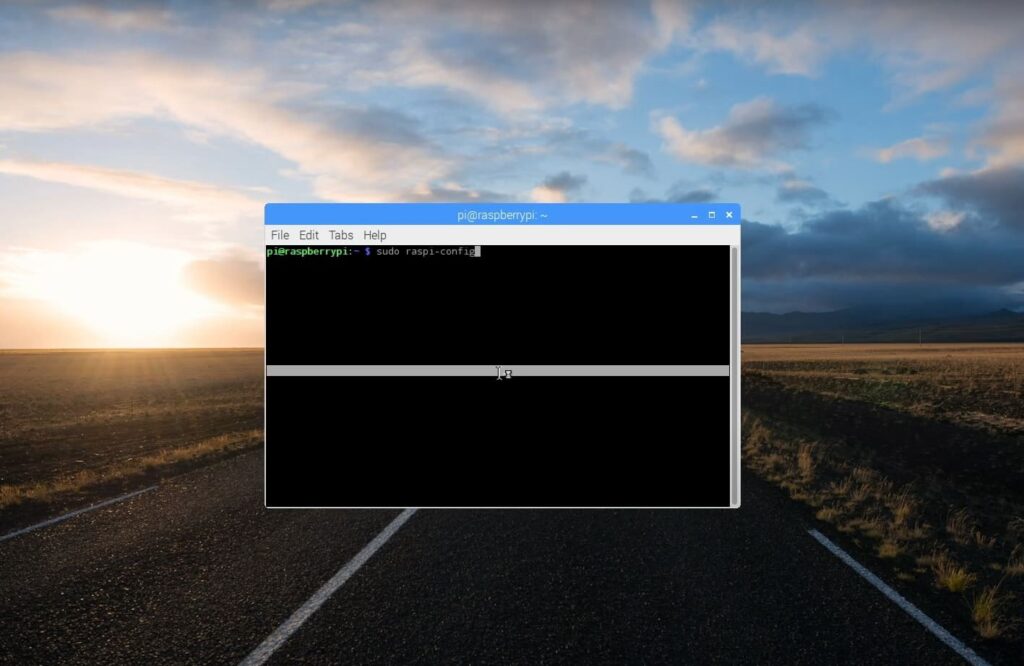
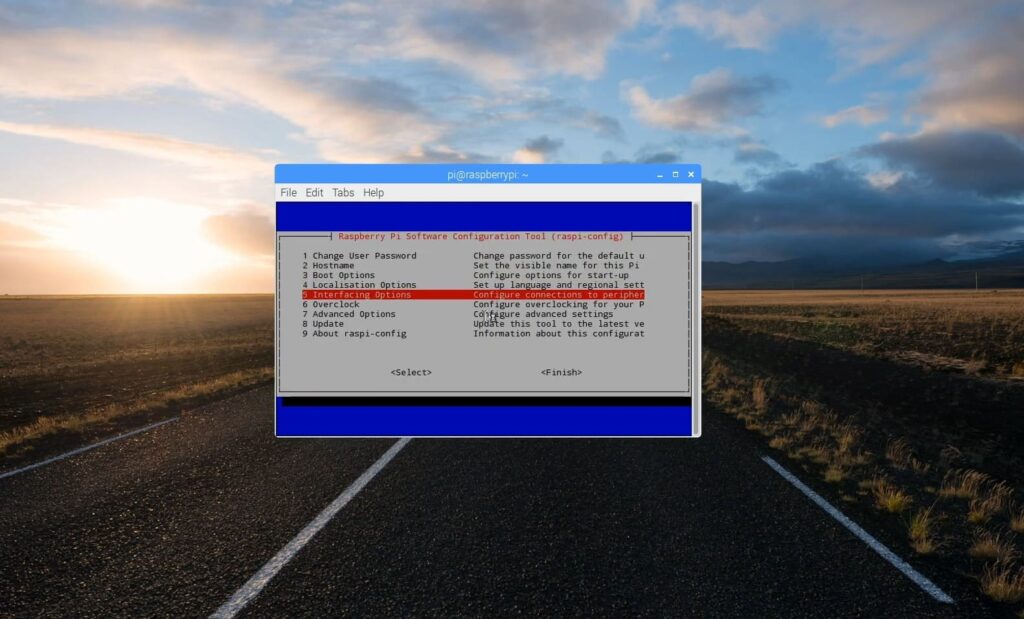
- Use the Raspberry Pi configuration tool raspi-config to enable SSH under Interfacing Options. You can run this when logged in to your Pi.
Set Up Port Forwarding on Your Router
Since your Pi is on a private network, you’ll need to forward a port on your router to access it remotely. In your router’s firewall settings:
- Forward a high port like 2222 to your Pi’s local IP address on port 22 (SSH’s default port).
- Find your Pi’s local IP (starts with 192.168.X.X) to use in the forwarding rule.
- External requests to yourrouterIP:2222 will now be directed to your Pi.
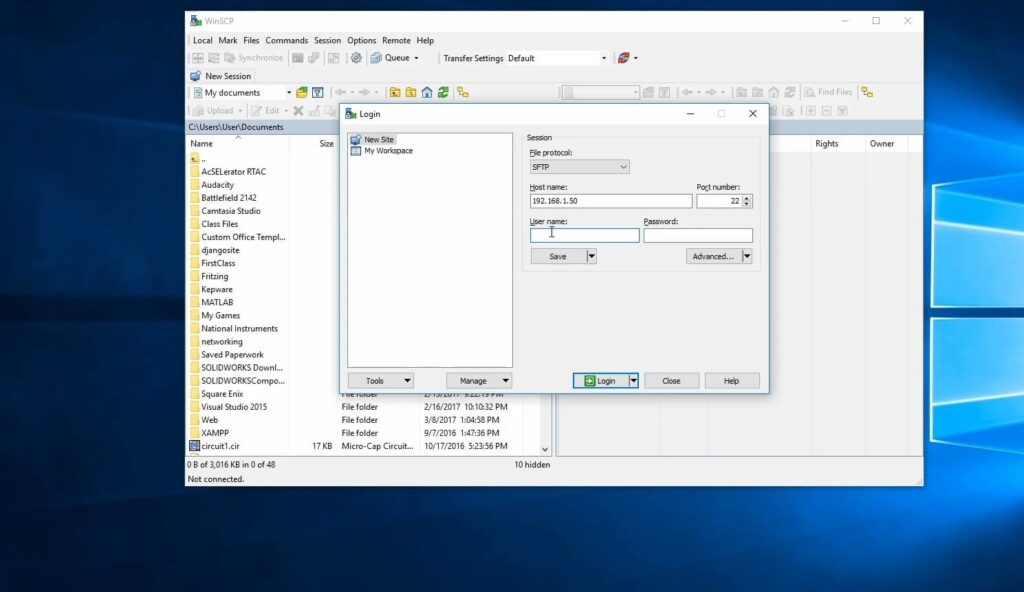
Connect to Your Pi via SSH
On the client computer, use the ssh command to connect to your Pi:
ssh pi@yourrouterIP -p 2222
This will open an SSH session into your Pi’s command line.
Set Up SSH Key Authentication
For better security, set up key-based SSH authentication so passwords aren’t required:
- From the client, generate keypair: ssh-keygen
- Copy the public key to Pi: ssh-copy-id pi@yourPiIP
- Disable password auth in Pi’s sshd config
- Now you can ssh in without passwords!
With those steps completed, you now have secure remote command line access to your Raspberry Pi over the Internet. SSH provides an encrypted tunnel, and keys prevent brute-force attacks. Now, you can control your Pi projects from anywhere!
Method 2: Port Forwarding and Dynamic DNS
While SSH provides secure remote access to your Raspberry Pi, it does require your home router’s public IP address, which can change periodically. Setting up dynamic DNS and port forwarding allows you to connect to your Pi using an easy-to-remember domain name that will always point to your current public IP.
Port forwarding enables directing traffic from your router’s public IP to your Pi’s private IP on your local network. Dynamic DNS services map a domain name to your frequently changing public IP. Together, these technologies provide a reliable way to access your Pi without knowing your latest public IP address.
Configure Port Forwarding on Your Router
Port forwarding allows traffic coming to your public IP on a specific port to be forwarded to a device on your private network:
- Log in to your router’s admin console and navigate to port forwarding settings
- Create a new rule forwarding a high port like 8081 to your Pi’s local IP at port 80 for the HTTP protocol
- Save changes and take note of your router’s public IP address
Sign Up for a Dynamic DNS Service
Dynamic DNS, or DDNS, maps a domain name to your public IP address, automatically updating automatically when your ISP changes your IP.
- Sign up for a DDNS provider like No-IP or DuckDNS
- Select a subdomain that will map to your IP (e.g., mypi.duckdns.org)
- Install the DDNS client on your Pi to keep the mapping updated
Update Your Pi to Host a Web Server
Your Pi will need to run a web server to respond to incoming HTTP requests:
- Install a web server like Nginx or Apache on your Pi
- Create a basic HTML page that will be served when accessing the domain
- Make sure the server is running on port 80
Access your Pi Remotely
Now you can access your Pi from any internet-connected device:
- In your browser, go to your chosen DDNS subdomain (e.g., mypi.duckdns.org)
- Your Pi’s web page will load, confirming remote access is working!
With port forwarding and dynamic DNS, you can reliably access your Raspberry Pi remotely through an easy-to-remember domain name that will always resolve to your current public IP address. This provides a seamless remote access experience.
Method 3: MQTT (Message Queuing Telemetry Transport)
MQTT is a popular lightweight messaging protocol for Internet of Things devices like the Raspberry Pi. It provides a simple way to publish and subscribe to messages between devices and servers, making it ideal for sending commands and receiving data.
MQTT uses a publish/subscribe model and works over TCP/IP networks. Messages are printed with a topic name. Clients subscribe to topics they are interested in and receive all notifications published on those topics. This decouples the sender and receiver.
Install an MQTT Broker
You’ll need an MQTT broker for clients to connect to:
On a server or PC, install Mosquitto, an open-source broker – Clients connect to the broker’s IP address and port
Enable MQTT on the Raspberry Pi
On your Raspberry Pi:
- Install the MQTT Paho Python client library
- Import paho.mqtt.client in your Python script
Publish Messages to the Broker
To send commands to your Pi:
- Connect a publisher client to the broker
- Publish messages with a command topic name
- Statements contain the command payload
Subscribe to Messages on the Pi
To receive commands on your Pi:
- Connect a subscriber client to the broker
- Subscribe to the command topic name
- Define a callback to handle received messages
Example Python Scripts
Publisher:
- Import paho.mqtt.publish as publish
- publish.single(“raspberry/commands”, “LED ON”, hostname=”brokerIP”)
Subscriber:
import paho.mqtt.client as MQTT
def on_message(client, userdata, msg):
print(msg.topic+” “+msg.payload)
client = mqtt.Client()
client.connect(“brokerIP”)
client.subscribe(“raspberry/commands”)
client.on_message = on_message
MQTT provides a lightweight pub/sub messaging system perfect for IoT devices like the Raspberry Pi. With an MQTT broker, you can easily send commands and data between devices over the Internet.
FAQ
How do I enable SSH on my Raspberry Pi?
SSH is disabled by default on Raspbian. To enable it, create an empty file called ‘ssh’ (without any extension) in the /boot directory on your Pi’s SD card. On your first boot, SSH will be enabled. You can also enable SSH remotely if you can access the Pi’s terminal. Just run ‘sudo raspi-config’ and navigate to the Interfacing Options to enable SSH.
What is port forwarding, and why do I need it?
Port forwarding allows incoming requests to your router’s public IP to be directed to a device on your private network, like your Pi. Without it, you could not initiate an SSH connection to your Pi from the Internet. In your router’s port forwarding settings, forward a high unused port like 2222 to your Pi’s local IP on port 22. Now, you can SSH to your public IP:2222 from anywhere.
How do I find my Pi’s local IP address?
You can find your Pi’s IP on your local network using ‘hostname -I’ or ‘ifconfig’ on the Pi itself. Alternatively, check your router’s admin interface, where connected devices are usually listed with IP addresses. Your Pi’s IP will likely start with 192.168.X.X or 10.0.X.X. This is the address you need for port forwarding.
Is SSH secure for remote access? What about VPNs?
SSH is secure as long as you use key-based authentication instead of passwords. VPNs can add an extra layer of encryption during transit. But for most uses, SSH with keys is sufficient, more manageable to set up, and less resource-intensive than a VPN. Just make sure to turn off password authentication in the SSH daemon configuration. Also, consider changing the default SSH port for obscurity.
What are other methods besides SSH for remote access?
If you don’t want to expose your Pi to the Internet, look into options like VPNs, reverse SSH tunnels, or using a cloud service like AWS IoT to manage devices. RealVNC can also allow remote graphical control. For web APIs, Flask provides a good Python framework. Or you can use command line tools like curl to trigger scripts via HTTP requests. It depends on your specific application.
Related Video: How to Access your Raspberry Pi via SSH over the Internet (port forwarding)
Summarize
With just a bit of configuration, it’s easy to access and control a Raspberry Pi remotely over the Internet. By setting up port forwarding, SSH, and keys, you can securely log into your Pi from anywhere and run commands as if you were right in front of it. This opens up many possibilities for IoT and remote control projects. Just remember the basics – enable SSH, set up keys for security, configure your router correctly, and test your connections. With these steps taken care of, you’ll be able to remotely trigger scripts, run programs, reboot your Pi, and more. The power of the Raspberry Pi is now at your fingertips from anywhere you have an internet connection.


