

Today you usually have a connected monitor with you. a telephone, computer or tablet.
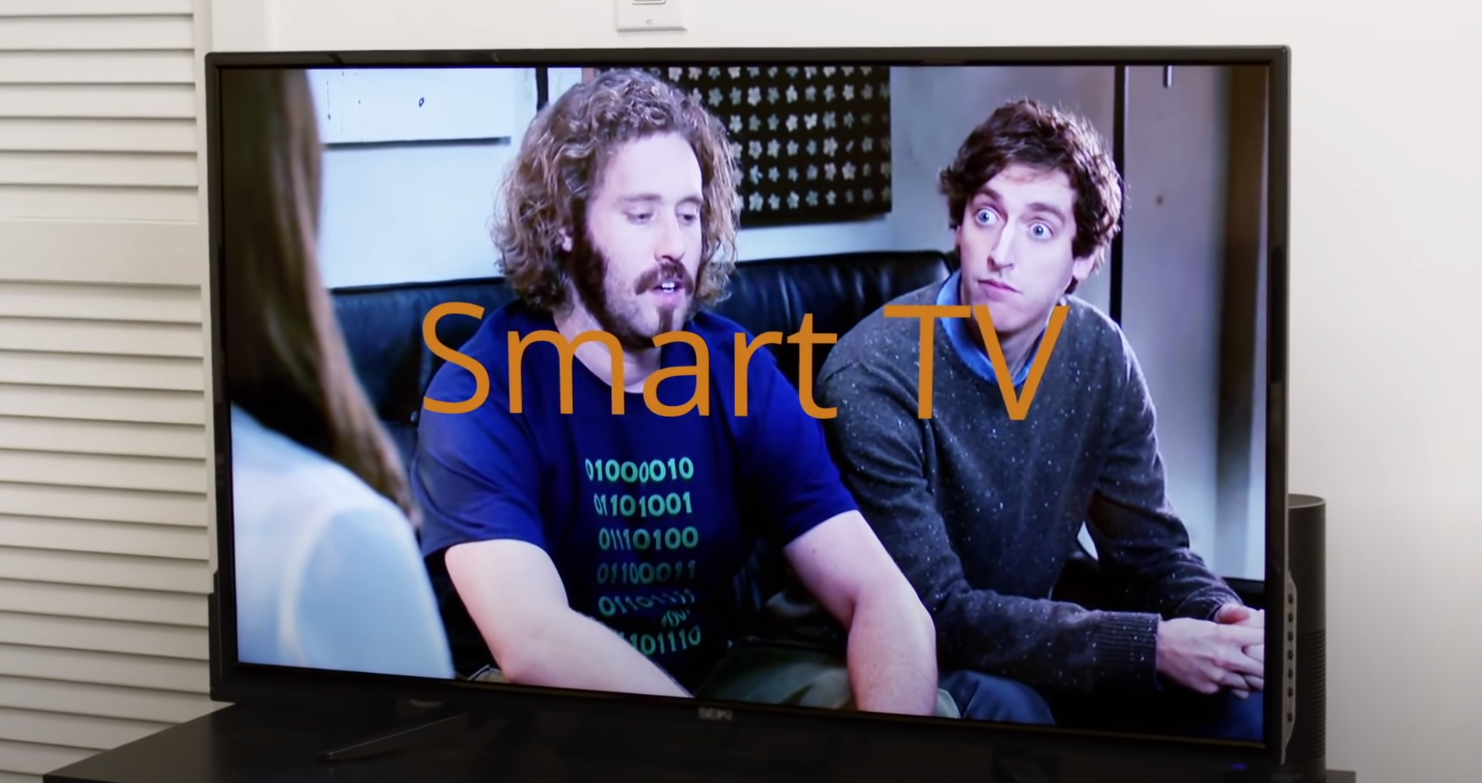
At the same time, many of us have an excellent digital library of movies, series, music, and pictures, which, unfortunately, often can only be played back in front of the computer screen or, at best, on the TV via an HDMI cable.
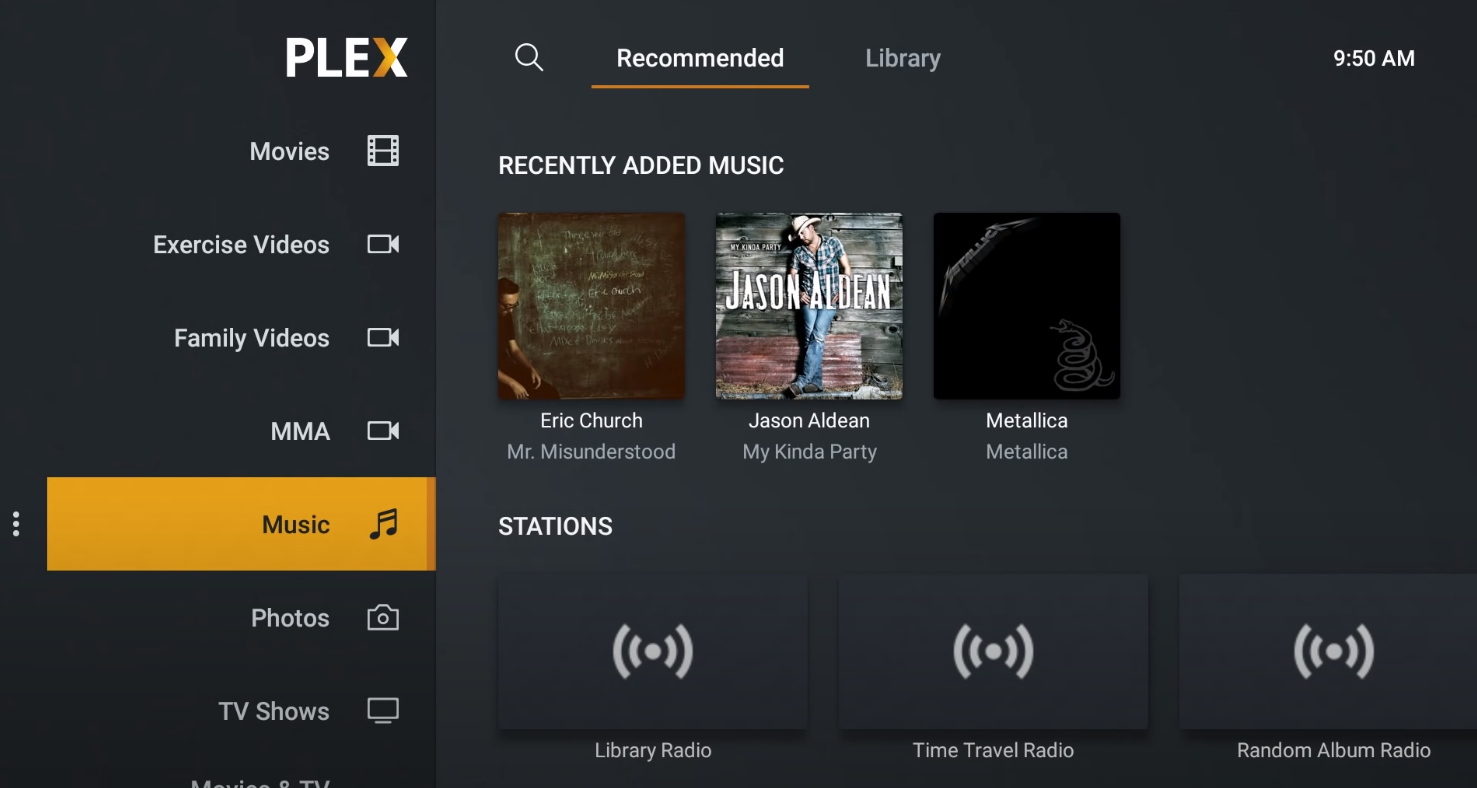
Surely, now that you still have all these connected screens with you, it would be convenient to have easy access to your media libraries no matter where you are. The solution is Plex! Here we show you how!
Homemade. By building our own NAS, all files can be sent to our smartphones and other devices in the correct format.
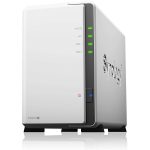 Synology NAS DiskStation DS220j is a 24/7 file server for your household. It’s an integrated media server to support multimedia content streaming.
Tablets, smartphones and TVs have become a part of our everyday life over the last few years, but unfortunately, they are far from the same hardware and the same programs behind all screens.
The cell phone is of the Android type, the tablet is an iPad, the computer runs the latest Windows, and the TV has its small operating system. The different programs do not read the same file type and are often not smart enough to understand what the other platform is talking about.
For those of you who want to relax with a movie on the bus ride, this means that you have to re-encode the movie you want to watch and then transfer it to your iPhone or Android.
To finish watching the movie later in the evening, you either need to continue watching the phone or connect a USB memory device to your computer, copy the movie, insert the memory device into the TV, and fast forward to where you didn’t see the bus anymore.
Stream smarter
We want to store all our video, music, and image files on network-attached storage in this manual. In other words, a storage computer is connected to the network.
We will then use the free Plex Media Server software to distribute our entire media library so that it can be accessed from any of our network devices, regardless of brand, model, or geographic location.
If you already have your own NAS, you can install Plex directly on it. However, depending on the model, it’s not certain that your NAS can send all of the material to all devices.
Read on, and we will explain more and describe the advantages of this solution!
Determining the Plex Media Server Hardware
Plex Media Server works like any other program and can run on various platforms. The first thing you need to decide is what hardware you want to use for your installation.
Plex can be installed and run on a standard computer running Windows, OS X, Linux or the free Freebsd operating system. It can also be installed directly on many pre-built NAS solutions from Netgear, Qnap, Unraid, Drobo, and Synology (see plex.tv/downloads for a complete list).
According to these instructions, Plex Media Server acts as a server, collecting all of your media and sending it to the desired device. The file can be sent to the selected device in two ways. The first is to send it exactly as it is, i.e., it will not be re-encoded or resized.
This is, of course, desirable, but as you know, not all devices can read all file formats. Also, due to the size, it is not very convenient to stream, for example, a Blu-ray movie over a 3G connection to the phone. This introduces us to the second method Plex uses to send files: Conversion / Re-encoding.
Depending on the device you are using, Plex Media Server detects that you are on that particular device and then encrypts the file to match the hardware and software you are using. This happens in real-time while you are viewing the file!
You can also tell Plex that you would like a slightly lower quality streaming movie, for example, to make the phone’s 3G network load less (i.e., useless surfing).
However, this conversion causes a necessary evil – it requires some processing power. For this reason, very few of the ready-made NAS solutions on the market are capable of encoding film material into a particularly large number of devices. In fact, some versions of Plex Media Server only offer the option to stream material directly, as the NAS processor is simply too weak to re-encode the material.
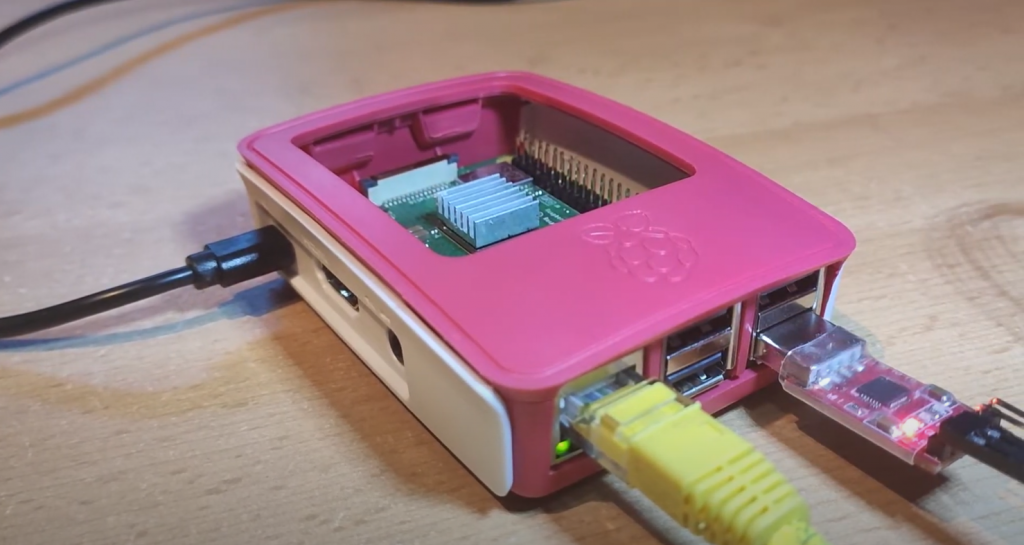
We will therefore build our own small storage computer, or NAS if you like. This computer must be turned on and connected to our network at all times for Plex to work. Of course, you can also install Plex Media Server directly on your regular computer. Note, however, that it must always be turned on for you to access your material and that the computer will be largely unusable for other purposes when re-encoding and sending a movie.
Build your own NAS
We will not delve too deeply into our NAS’s actual construction, as it is completely free to use almost any compatible hardware for a Plex Server installation. Otherwise, we build a computer like any PC.
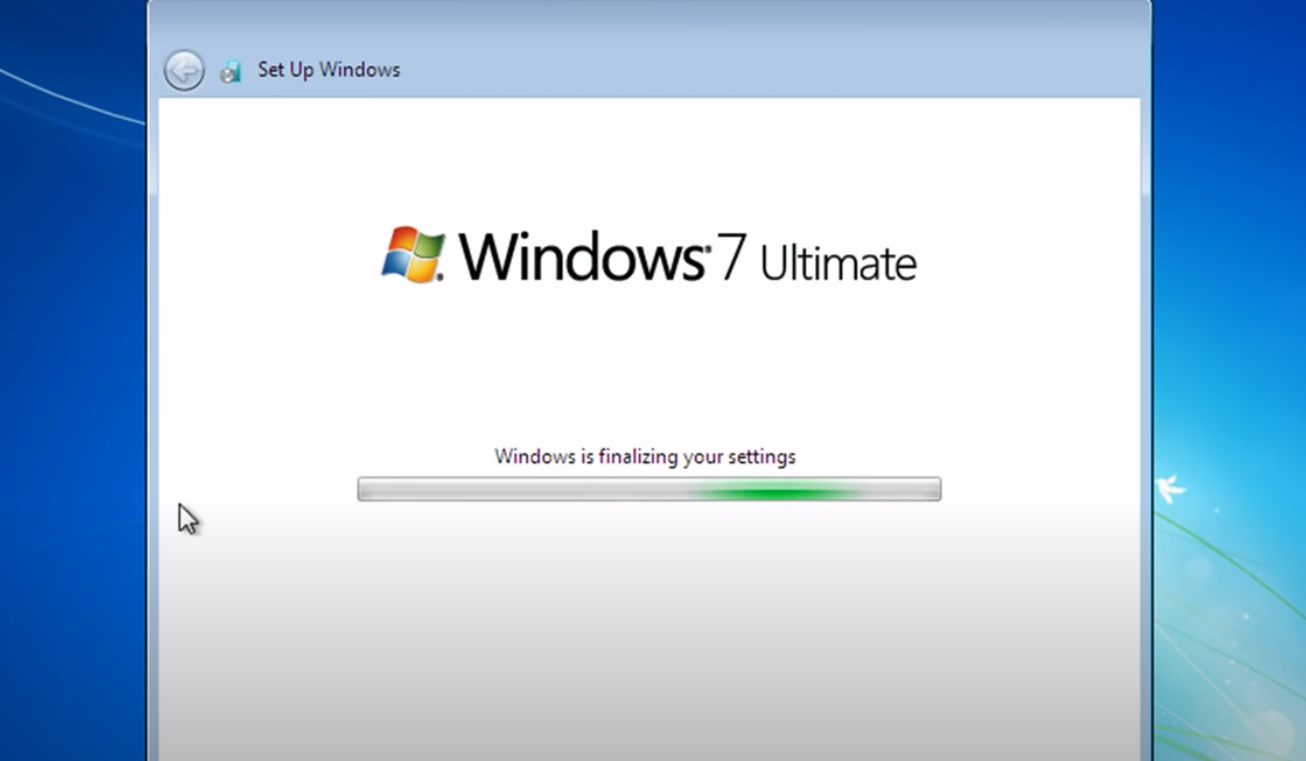
For simplicity, we use Windows 7 as the operating system. However, the installation process and the construction do not differ much if you use, for example, Linux as an operating system. At support.plex.tv you will find instructions and help for the other available operating systems.
The minimum requirement for running Plex Media Server without transcoding capabilities is an Intel Core 2 Duo 1.6 GHz or equivalent processor. However, we want our server to be able to re-encode not only one but two or three movies at a time without any problems.
According to Plex’s specifications, at least a 2.4 GHz Intel Core 2 Duo processor is recommended. Since we have an Intel Core i3 processor that works horizontally at 3.06 GHz, this seems to be a good choice.
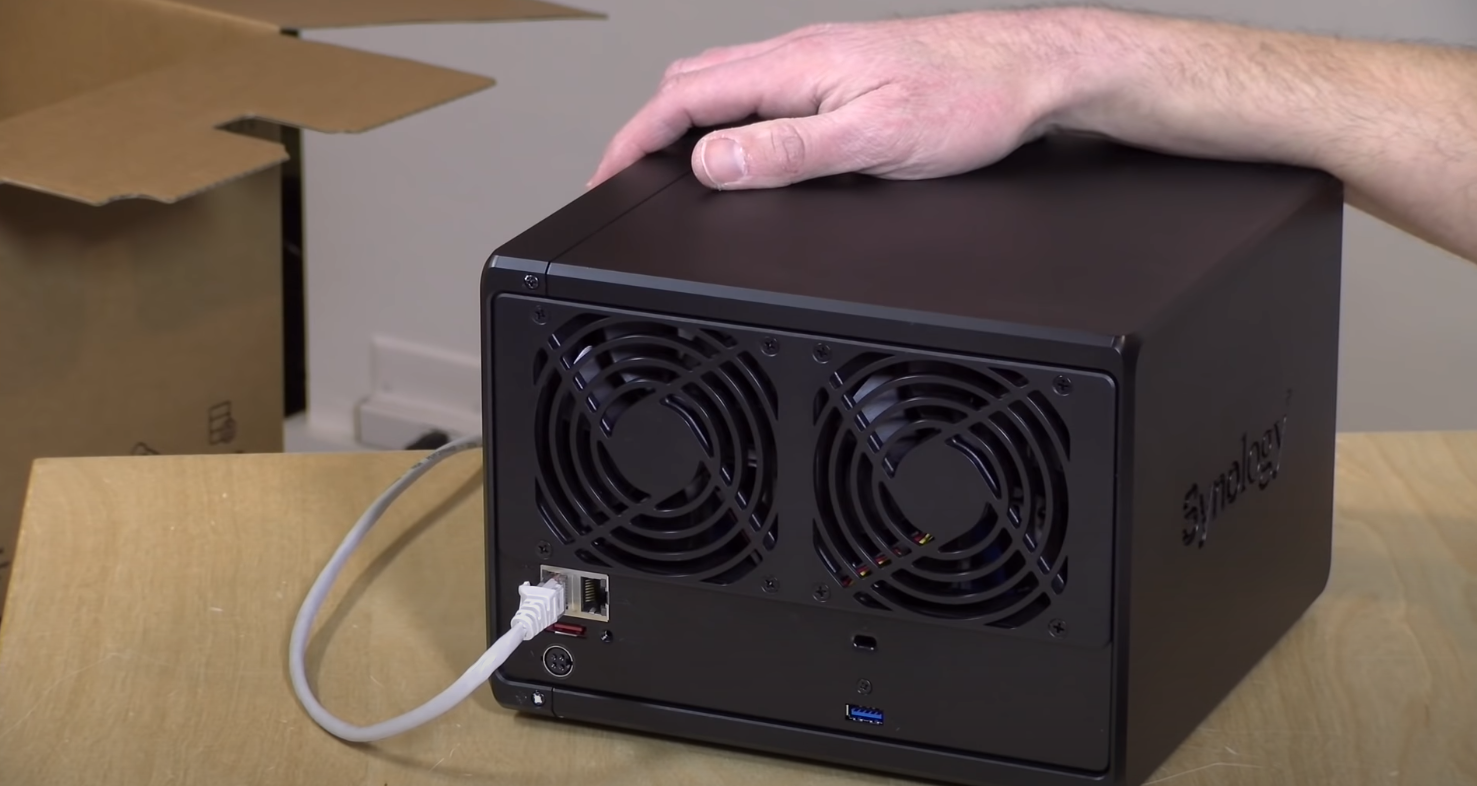
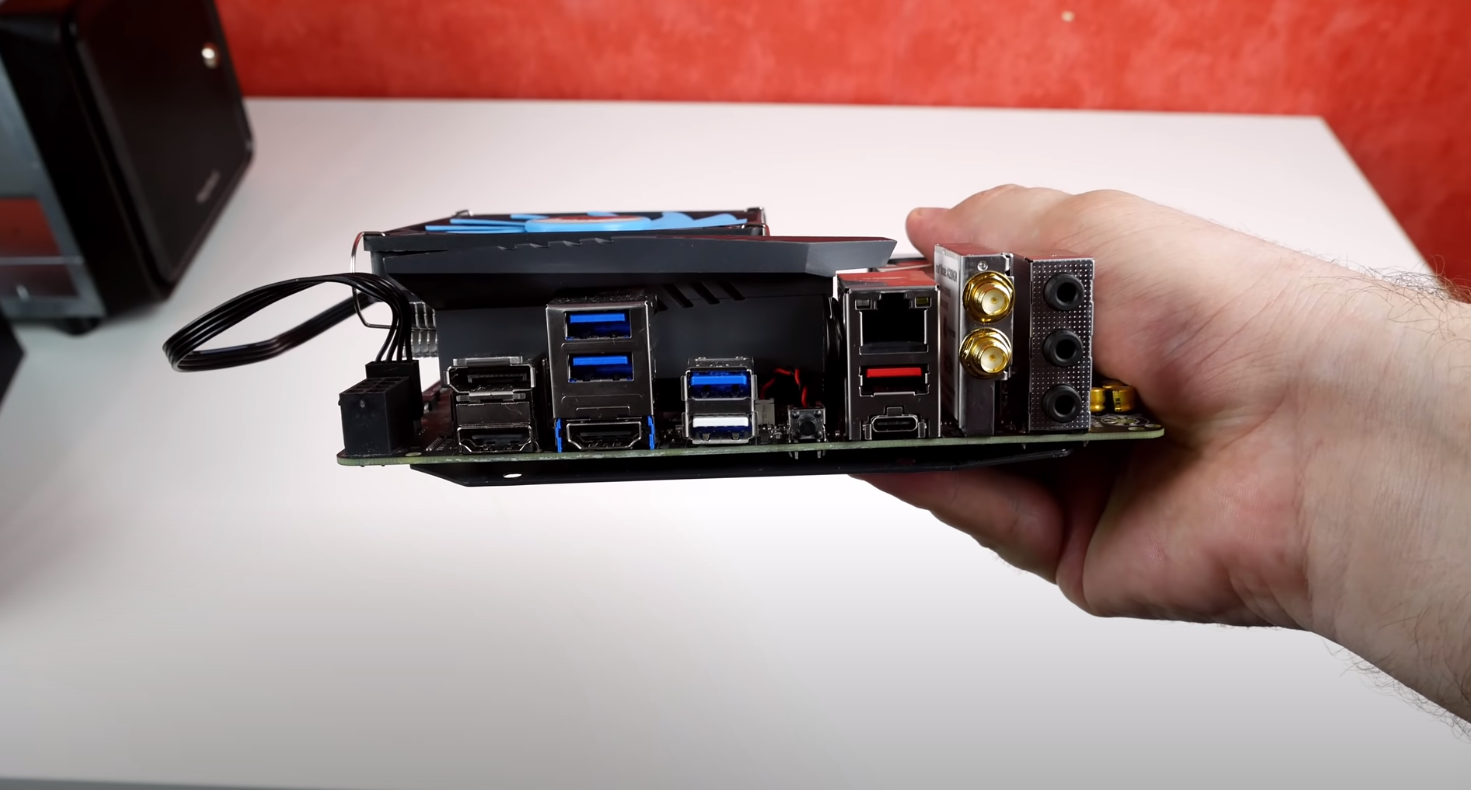
The processor is complemented by a mini-ITX motherboard from Zotac (with room for six SATA units), 4 gigabytes of RAM and a Kingston V300, a 120 gigabyte SSD hard drive and a modular Corsair CX 430M power supply for the power supply.
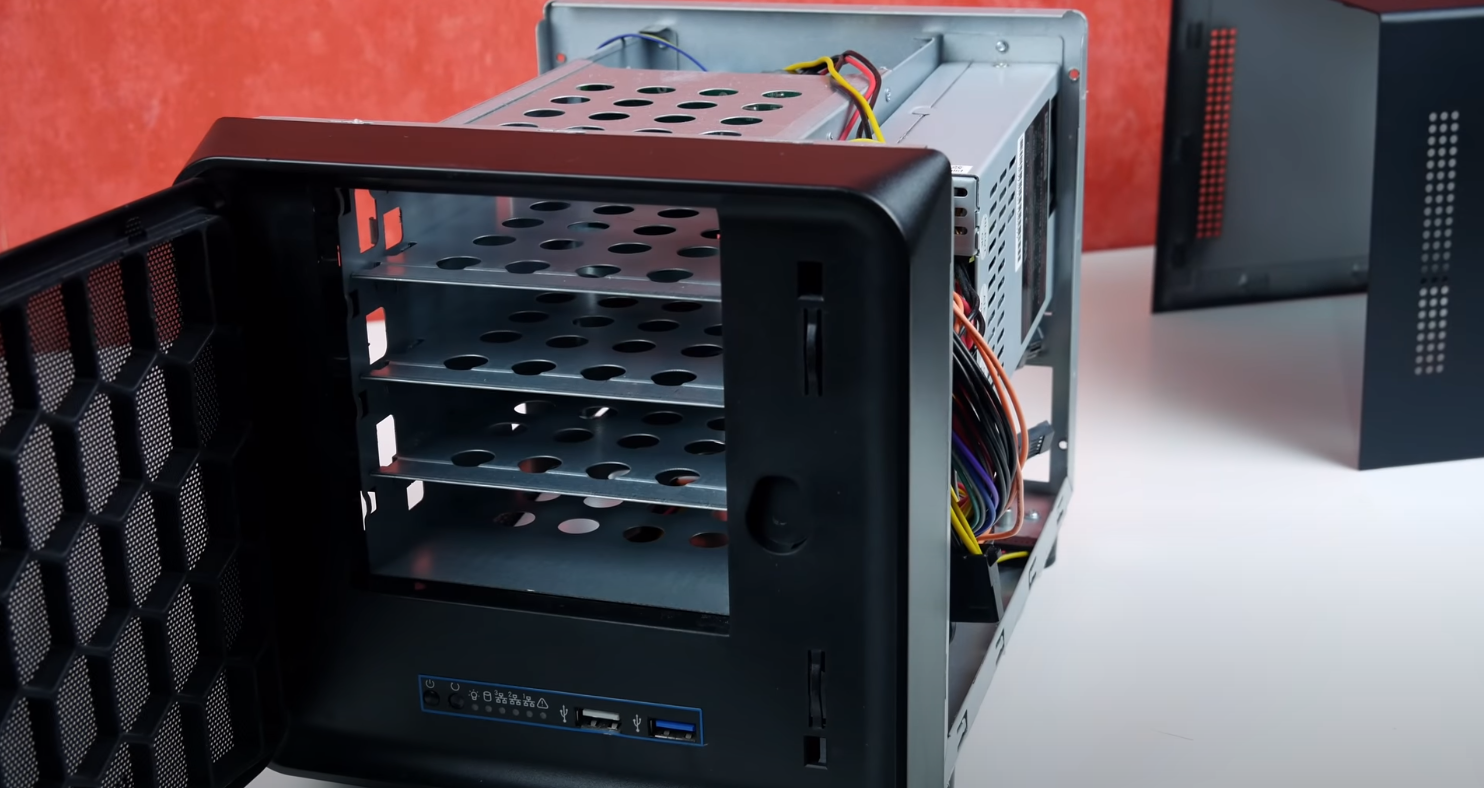
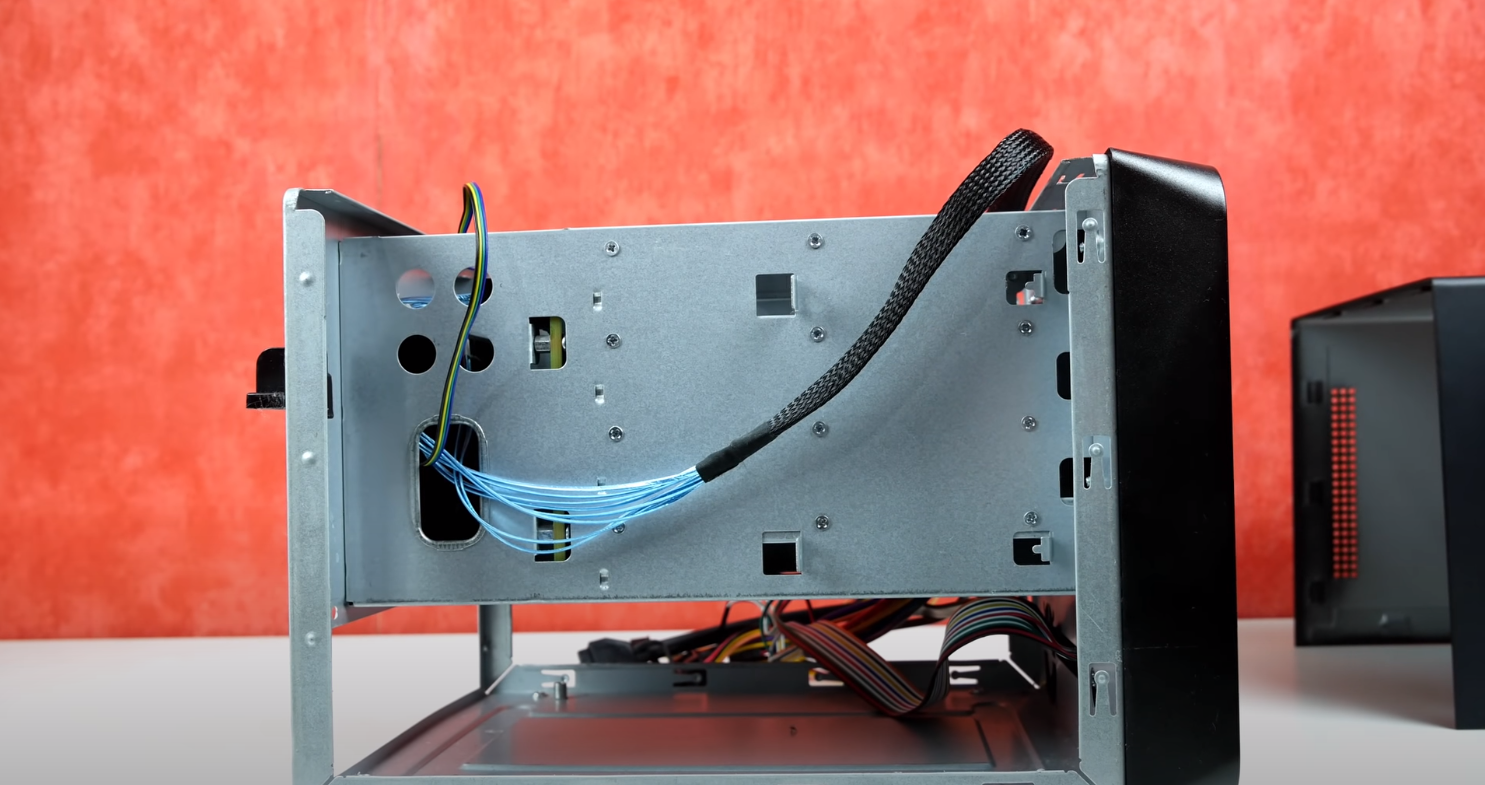
We use two standard 3.5-inch hard drives with a total of 6 terabytes to store our files, which should be enough for a while. When it comes to choosing a case, we want a relatively roomy case with room for more hard drives if we need more space in the future. Since we have a Lian-Li PC-TU200, which is currently used for nothing special, we use it.
1. We start by connecting the processor to our motherboard and mount the processor cooler, a Noctua NH-L9i. Of course, you can use the processor’s included cooler just as easily, but since we want the system to be as quiet as possible, a new fan was a good investment.
2. Next, it’s our internal memory connected to the motherboard. This completes the motherboard.
3. We now unscrew both sides of our case and attach the motherboard’s supplied backplate to the case.
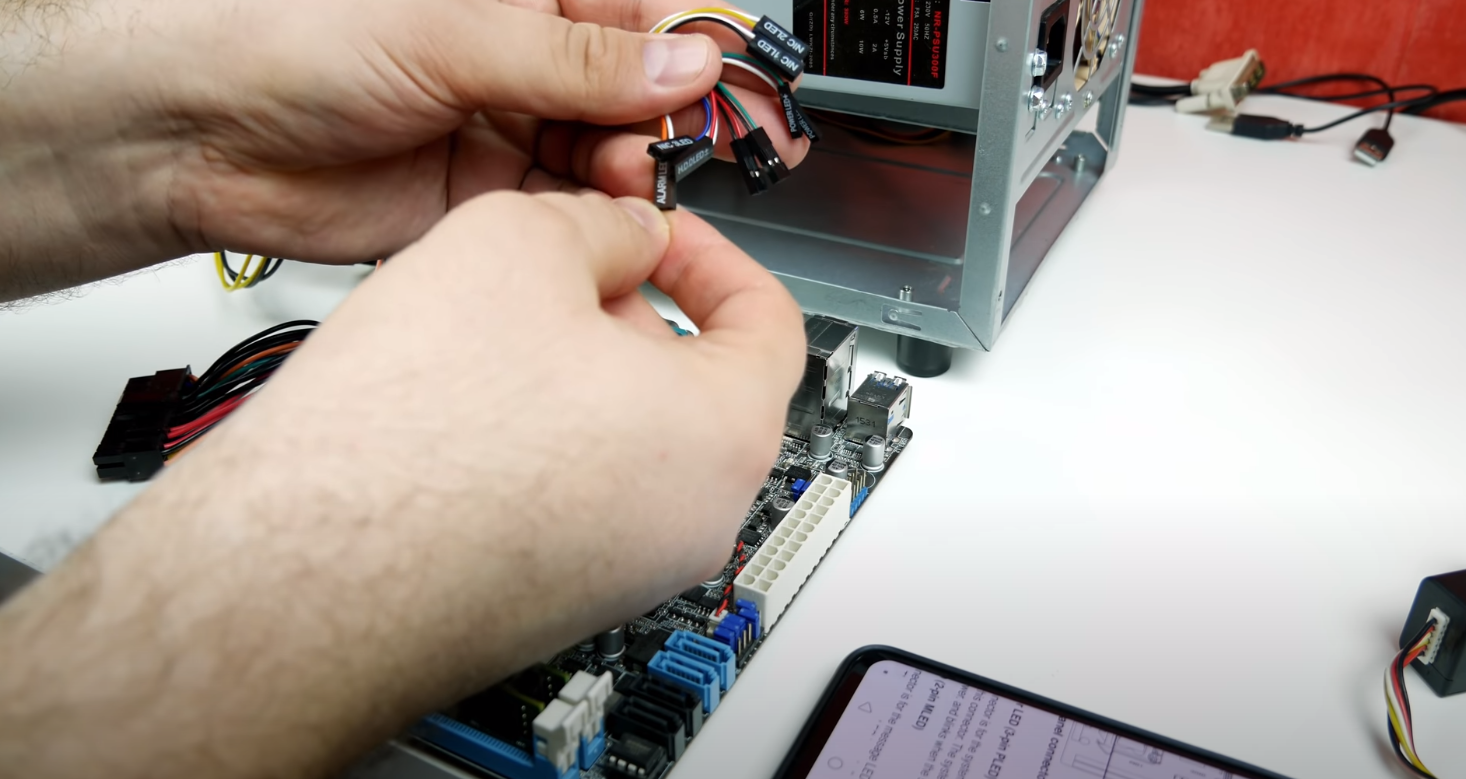
We mount the motherboard on the pre-installed spacers and screw it on and connect the cables on the front of the case to the motherboard’s corresponding jack (switch, lamp and work lamp and USB ports).
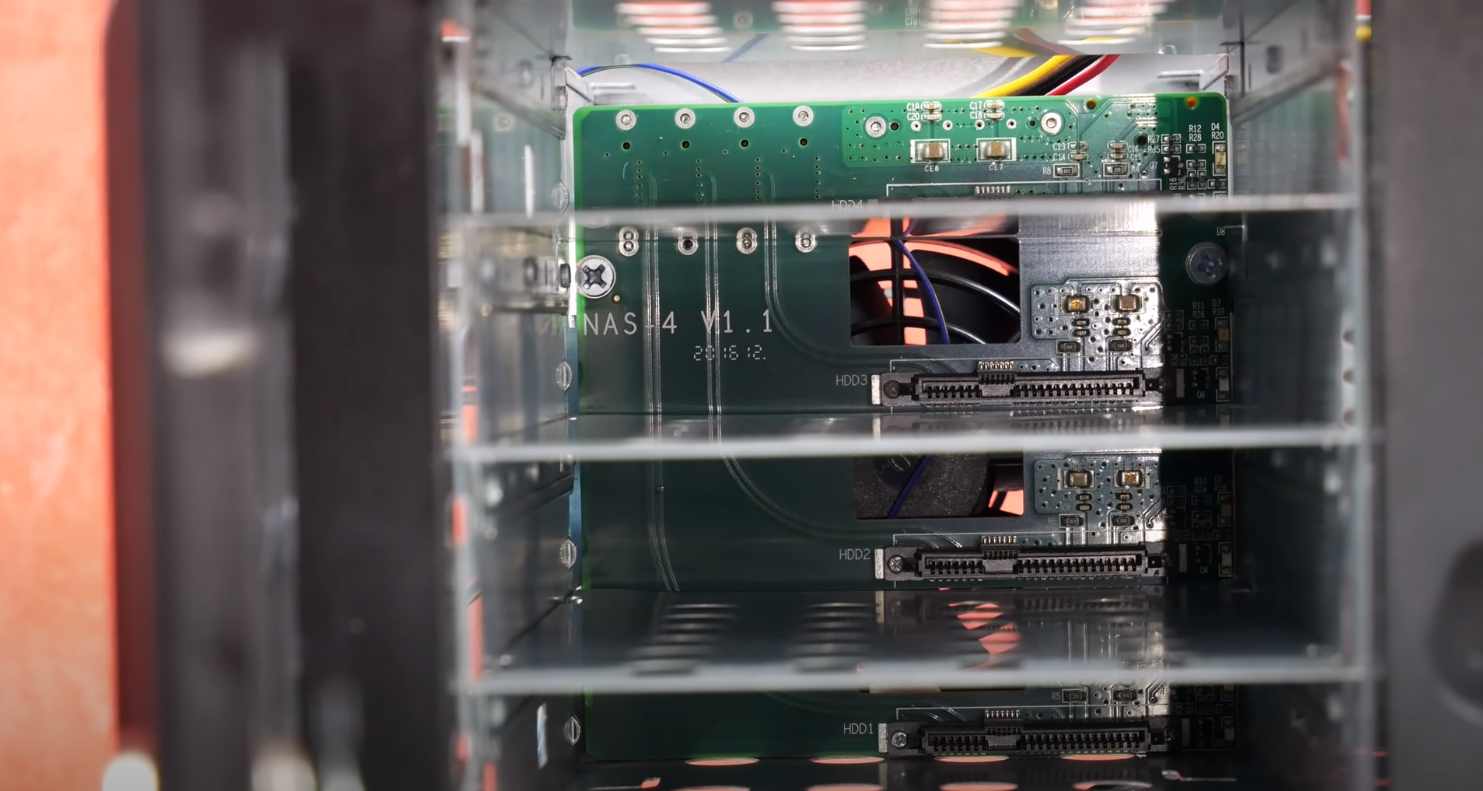
4. The case has a removable cage for four 3.5-inch hard drives, which we unscrew and remove from the case. We turn the hard drive cage around and screw our SSD to the bottom. The SSD acts as a system disk for our Windows installation. We also make sure to connect a SATA cable to the hard disk.
On the back of the hard drive, we connect four more SATA cables and one of the removable power connectors from the power supply. We decided to use a modular power supply to avoid having unnecessary cables in the case. Two SATA power connectors are used to power all 3.5-inch hard drives.
5. When all cables are mounted in the hard drive cage, we screw them back into the enclosure and secure our two 3.5″ hard drives by inserting them into the cage and locking them with the quick release fastener on one side of the cage. Then we pull out all our SATA cables and attach them to the SATA slots on the motherboard.
Finally, we connect our power supply to the 24-pin connector on the motherboard and the ATX12V (P4) connector for powering the processor. We also connect the power cable from the hard drive cage and an additional power cable from our SSD hard drive to the power supply.
Then we snap back both sides of the case and temporarily connect the computer to a monitor. We also connect a mouse and a keyboard to the computer. We need these to install Windows and Plex Media Server on our NAS.
Advantages and disadvantages of self-built and pre-built Plex Servers
Installing Plex on a pre-built NAS solution (Readynas, Synology and more) is often a little cheaper than building your own. Completed buildings usually consume less electricity and are physically usually slightly smaller than their own buildings. Therefore, if you only use Plex to send material to, for example, an HTP PC running Plex Home Theater, you can manage this very well with your regular NAS.
On the other hand, if you intend to stream material to a cell phone or other devices that require transcoding, unfortunately, most of the ready-made NAS solutions work because they simply do not have the strength. Users have compiled a list of which NAS devices are compatible with which types of transcoding options (see Support Articles). If you build your own NAS, you can also choose the size of the case, components, cooling and more.
Install Windows 7 and take the temperature
Since we don’t have a DVD reader in our NAS, we follow a guide to install Windows 7 from a USB memory device.
What is needed is a USB memory of at least four gigabytes, a serial number for the operating system we want to install, a Microsoft proprietary program to create a bootable USB flash drive. Windows 7 USB / DVD download tool (downloaded at Microsoft website) and Windows installation files in ISO format.
After preparing our USB memory stick according to the instructions, we put it into our NAS and start it. Then we install Windows without making any changes during the installation. We use our SSD hard disk as an installation disk.
Having the operating system on an SSD in a NAS is especially advantageous because these types of hard drives do not generate heat or make the slightest sound. They are also faster than traditional mechanical hard drives, which are instead more suitable for storing data.
After installing Windows, we activate it with our serial number and install all updates of Windows Update, graphics and motherboard drivers according to the motherboard manual. After a few reboots, everything is ready.
Important measuring temperature
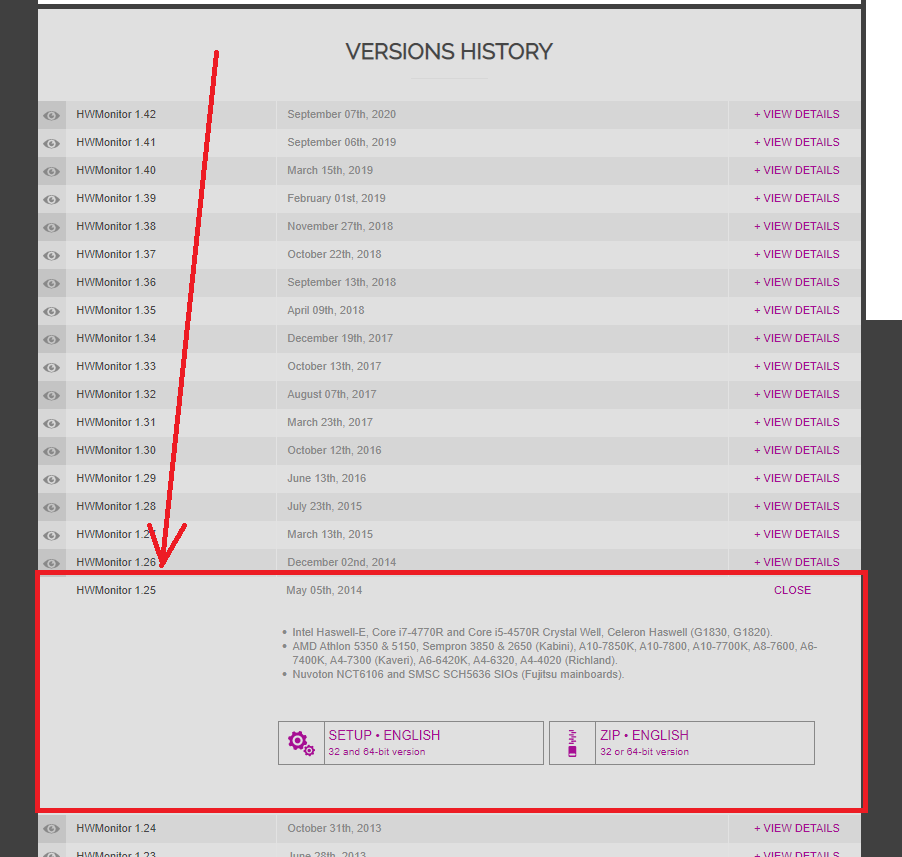
Before we start installing Plex, we want to check our NAS temperature both during charging and idle. Therefore, we go to the official website and download the program HWMonitor by clicking on 1.25 setup under Download the latest version.
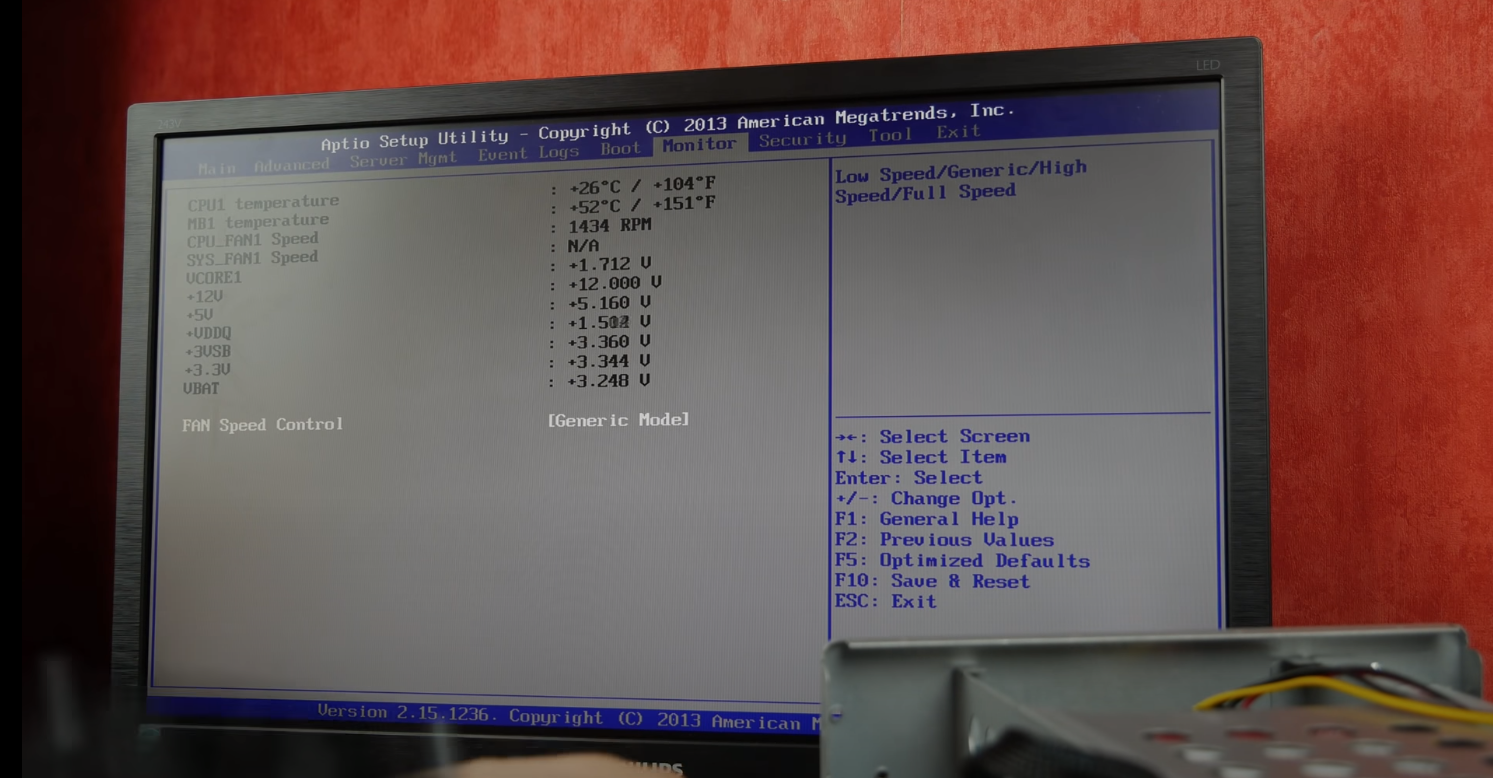
We install the program with the default options and start it. In the displayed box, we see a variety of values, including the fact that both cores of our processor are at 32 and 35 degrees – a perfectly acceptable temperature.
However, we want to see how our NAS does when it is working at maximum. So we download the program Prime95 by clicking on the official website under “Setup Instructions for New Users”. The program does not need to be installed but has to be started by double-clicking on exe file.
When the program starts, we select the preselected blend option and click OK. Prime95 immediately starts to put maximum load on the processor and memory, and you can see directly in Hwmonitor that temperatures are rising. Different processors can handle different maximum temperatures.
For our i3, we prefer not to exceed 165 degrees at maximum work. We let Prime95 run for a few hours to make sure our NAS is stable while tracking temperatures in Hwmonitor. Fortunately, our Noctua fan seems to keep the processor at an acceptable 65 degrees under full load.
A computer that runs too hot isn’t good for the components’ life or its functionality. When a computer gets too hot, most motherboards have a built-in function that ensures that it shuts down.
Time to install and configure Plex Media Server
We’ve finally reached the heart of this manual – it’s time to install Plex Media Server. We go to plex.tv and click on Downloads.
Since we want to install Plex on our NAS, we actually choose computers instead of NAS under Plex Media Server (NAS in this sense are instead programs for pre-built NAS solutions like Qnap, Synology and more). We choose Windows and click on Download English.
We start the file and choose Install. After that, Plex installs itself on our self-made NAS. We then start the program by clicking on Start. Plex Media Server is then started as a small orange and black icon at the bottom of the taskbar. We right-click on the icon and select Media Manager.
Plex Media Server is managed through a standard web interface. We click on the settings icon (screwdriver and wrench) in the upper right corner and select server. Here we first give our server a name. We click on Connect and select Register. We fill in the information and set a server password. Finally, we press Register.
To view Plex only on our network, we do not need to create an account. However, to access our media library from other networks, Plex must send all our files to the correct device.
There are several other Plex Media Server settings, and it can be a good idea to go through them even if you don’t change anything. Especially take a look at the playback quality under Web, Player!
This is where you decide the maximum quality of a file sent either locally or to other networks. If your movies stop during playback, you should take a look at it first!
Create a convenient and intelligent media library
Before we add media files to Plex, it is important that they are correctly categorized and intelligently named. You can work with different RAID solutions for the hard drives themselves or use Storage Spaces under Windows 8 to merge your hard drives into one.
However, we use one of our two hard drives for movies, music and pictures, while the other one is allowed to record our stored TV series. Depending on the file type, the recommended directory structure for Plex to find the right material looks slightly different.
Movies should be stored in the same folder with the file name corresponding to the movie title, e.g., Movies / The Lion King.avi, or in a separate folder with the same name as the movie, e.g., Movies / The Lion King / The Lion King.avi. We prefer option two because some movies have subtitles that are located in separate files (file extensions srt or sub). Subtitles should be named exactly the same as the movie file, but with a separate suffix (The Lion King.srt).
Instead, series are divided into seasons according to the structure Series / Lost / Season 1 / Lost.S01E01.avi The same rules for subtitles also apply here. Music is categorized similarly: Music / Daft Punk / Random Access Memories / 1.give life back to Music.mp3.
The last category of media is its own movie and picture files like vacation movies. These are conveniently stored in the same folder and given the name that you think fits, e.g., Home Movies / Hundpromenad 2007.avi for movie files. For images, Plex retains the folder structure that is present when you add them. It is up to you how you want to sort them.
1. When all our files are correctly structured, we click back to the Plex homepage (the house on the top left). Here, we click on the small plus sign in front of our NAS, and then we get the opportunity to add a new library.
2. We click on Movies (because that’s what we’re going to add) and choose a name for our new library (we call it Movies) and click Next.
We click on Add Folder, find the folder that contains our movies and click on Add. If you have more folders with movies, they can be added. However, we are satisfied with our movie folder and click Add Library.
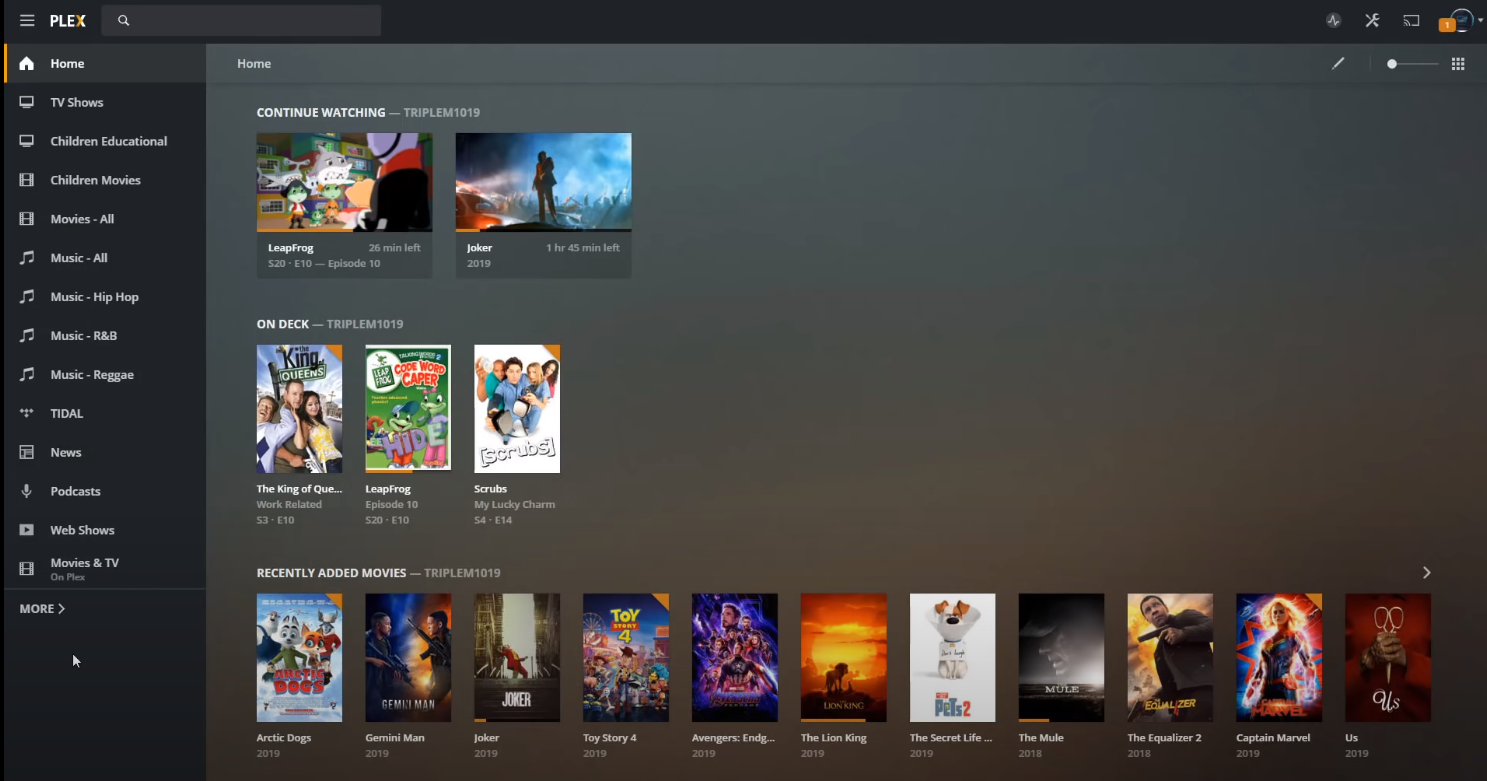
4. Plex now starts working and, after a while, reads what movies are in our library and compares them to a database containing both images and text for each movie.
When we click on one of our movies, a detailed overview of the current movie and the possibility to play it directly in our browser window is displayed. We can also correct a wrong match, change text and image information and much more.
5. Now, we know how to add libraries. So we repeat the above steps for our TV series, pictures and music and let Plex download all the information for them.
Different ways to play files
Then we can finally start playing our material! Plex clients and Plex apps are available for a variety of systems. IOS, Android, Windows 8 and Samsung Smart TVs, to name a few. The most advanced client is Plex’s own desktop client, Plex Home Theater, available for Windows, Mac and Linux. It is downloaded directly from plex.tv/downloads and is free. The procedures for downloading each app are similar. We start by installing the iOS app on our phone.
1. Via the App Store, we search for Plex and download the app and pay the $5 that it costs.
2. Once the app has been downloaded and installed, we open it and are greeted by a sad sight. If your phone is connected to the same Wi-Fi network as your Nas, all media will probably be found directly. However, since our phone only has 3 grams activated, it still has no idea what to do.
3. we click on the social activities icon (the two faces) and select Sign in. Then, we enter the information we previously created for our Plex account.
4. We are logged in, and our entire library can now be viewed directly from our phone.
The Android app is free and is installed the same way.
Another cool feature is the Plex web service, which allows you to play files from any networked computer or tablet without installing any software on the device. We surf to plex.tv/web and sign up.
A few seconds later, we get our entire media library here too and can play all the files and make all the settings we could have made if we were logged right on our NAS. add new libraries, change descriptions and more.
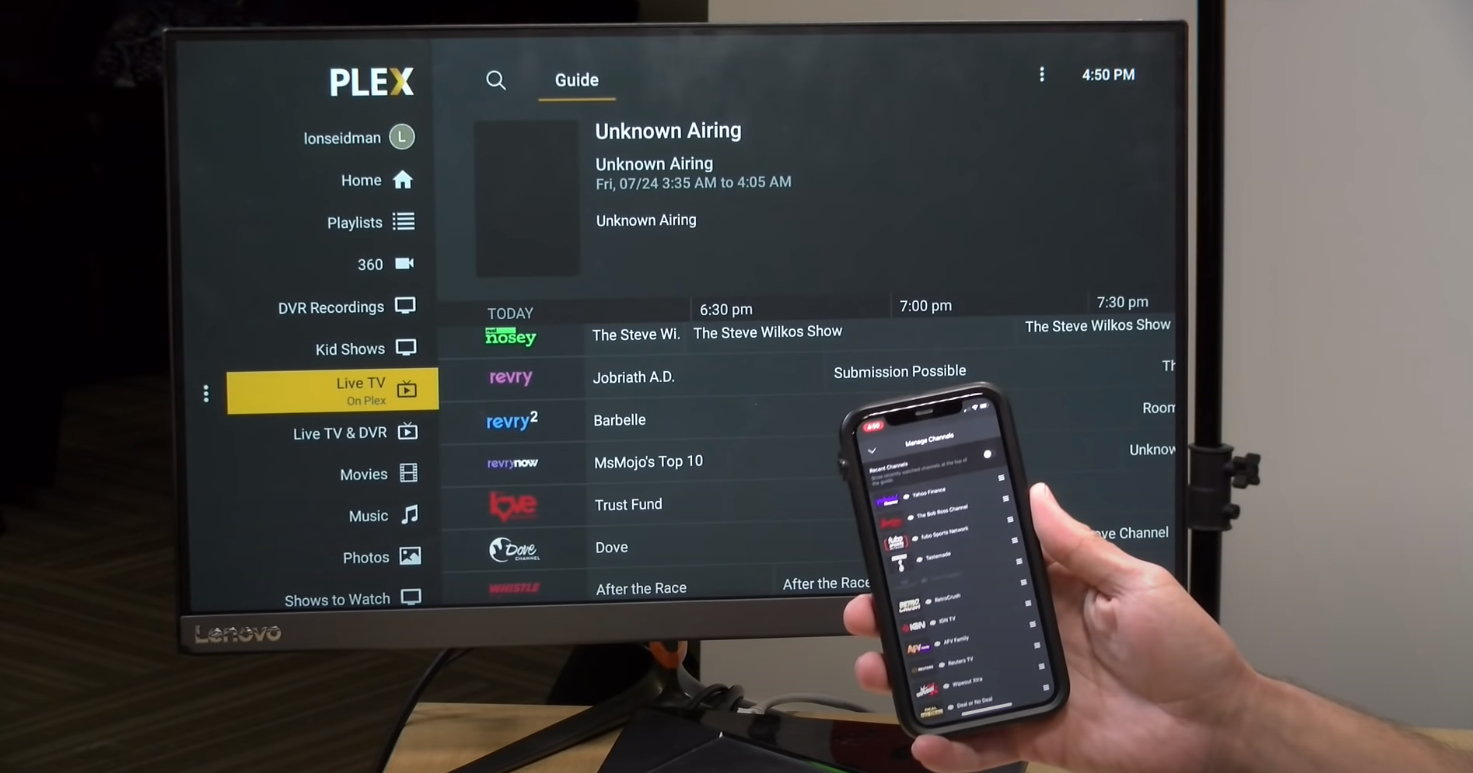
Simply send Plex to Chromecast
If you have a Chromecast connected to your TV, you can send all your media directly to the TV by simply tapping on the Chromecast icon, which is then displayed at the bottom of the Plex app. Smooth!
How to control our NAS without a screen
The intention is that our NAS should be basically independent and that we copy new material to it via the usual Windows network file sharing. As soon as we place a new movie or another file in our specified folders, Plex Media Server intercepts it and immediately retrieves all information about the file and adds it to our library.
Sometimes, however, it may be necessary to access the desktop on our NAS despite the excellent web service and make changes, copy material, rename files, and the like, preferably without connecting a screen and mouse/keyboard each time.
Therefore, we go to uvnc.com/downloads/ultravnc and download the latest version of the UltraVNC program (at the time of writing 1.2.4.0). The program consists of a server part and a client part, where the client part can take control of the computer on which the server part is installed.
We start the installation and click until we have the possibility to select the part of the program we want to install. We select Only UltraVNC servers and click Next until the installation is complete without changing any other options.
In the start menu, we then click on UltraVNC Server, and a small icon in the shape of an eye appears in the taskbar. We right-click on the eye and select “Install Service” and then “Start Service”. Then we select Admin Properties in the same list and enter an optional password under VNC Password and click OK. We leave the other settings alone.
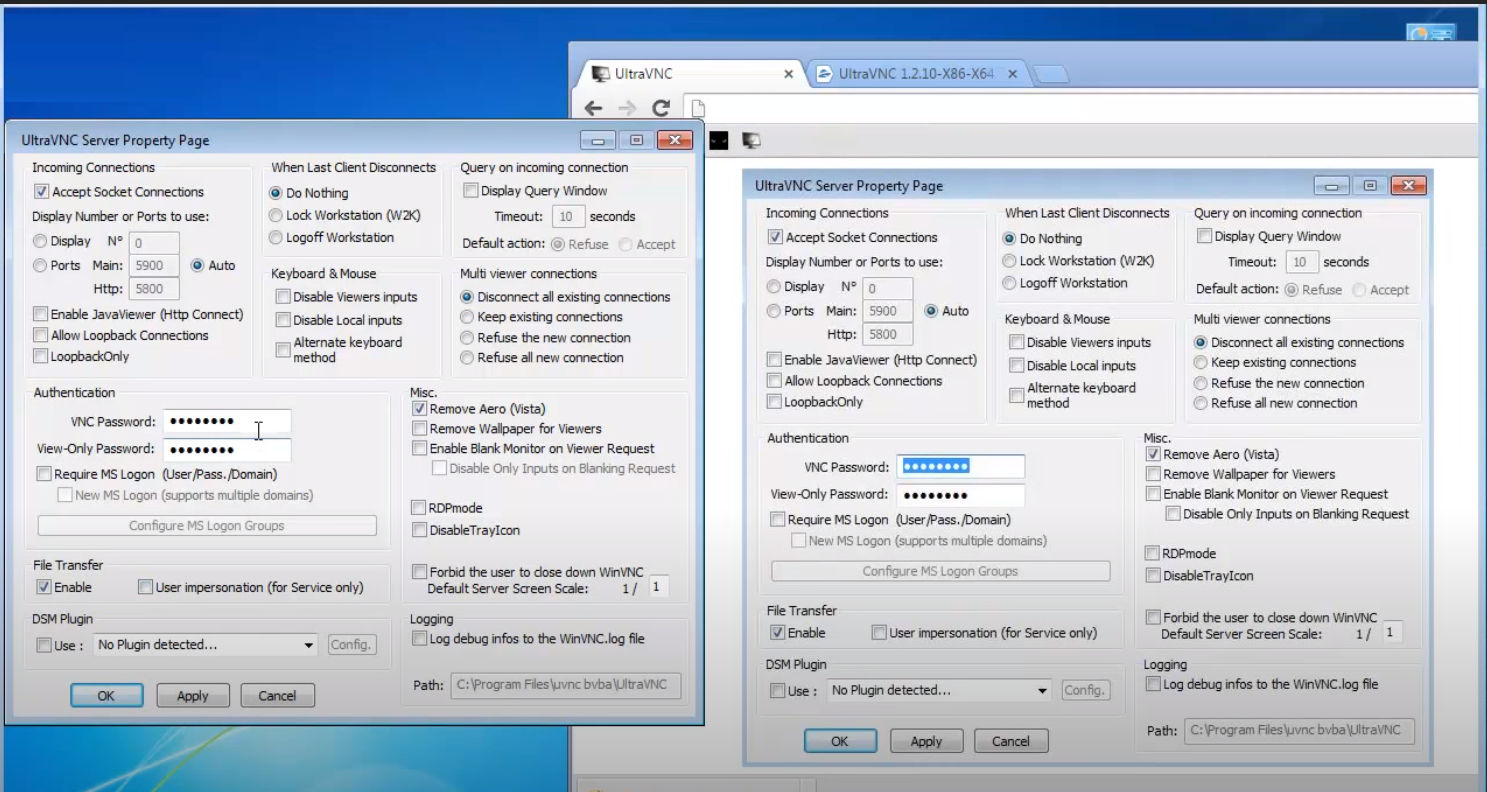
On another computer in the same network, we download UltraVNC again. Instead of installing the server part of the program, we only reject the UltraVNC Viewer. We install the program and start it.
Under VNC Server, we enter our NAS IP number. We see this by holding the mouse pointer over the eye symbol on our NAS. We click Connect, enter the password we just created on our NAS and click Login. Now we can control it as if we were sitting in front of it.
Comparison of Plex Server Build Options
This table compares various indicators of different Plex Server build options. Plex is a popular media server software that allows you to organize, stream, and access your media content across devices. The table presents key features and considerations for different server setups to help you choose the best option for your needs.
| Build Option | Hardware Requirements | Transcoding Capability | Storage Capacity | Network Bandwidth | Cost |
|---|---|---|---|---|---|
| DIY Desktop Build | Powerful CPU, 8GB+ RAM | Excellent | Varies (Depends on HDDs) | 1 Gbps | $$ |
| NAS (Network-Attached Storage) | Integrated CPU, 2GB+ RAM | Good | Up to several TBs | 1 Gbps | $$$ |
| Dedicated Plex Server | Powerful CPU, 16GB+ RAM | Excellent | Varies (Depends on HDDs) | 1 Gbps+ | $$$$ |
| Cloud-Based Server | Virtual Machine | Good | Scalable (Pay-as-you-go) | Depends on Internet Speed | $$-$$$ |
Explanation:
- DIY Desktop Build: This option involves building your own Plex server using a desktop computer. It offers excellent transcoding capabilities and storage capacity, allowing you to use multiple HDDs. The cost can vary depending on the components you choose.
- NAS (Network-Attached Storage): NAS devices come with integrated CPUs and sufficient RAM for media streaming. They offer good transcoding capabilities and can hold several terabytes of media content. However, they can be relatively expensive compared to a DIY build.
- Dedicated Plex Server: A dedicated server offers high-end CPUs and ample RAM, providing excellent transcoding performance and storage capacity. It can handle multiple HDDs and offers faster network bandwidth, but it comes at a higher cost.
- Cloud-Based Server: This option involves using a virtual machine in the cloud to run your Plex server. It offers good transcoding capabilities and scalable storage (you pay for what you use). However, its performance depends on your internet speed, and the cost can range from moderate to high, depending on your cloud provider and usage.
Choose the build option that best aligns with your budget, transcoding needs, and storage requirements to create the perfect Plex server for your media streaming needs.
Related Video: Setting up the Ultimate Plex Media Server on the Synology DS1019+
Conclusion
Thanks for reading this guide. I hope it was useful for you, and now you know how to build your own Plex Server. If you have any questions, use the form below, I’ll answer you!


According to my experience, building a DIY Plex server is a great way to save money while still getting all of the features and functionality that you need. Not only will you be able to save money on the hardware, but you’ll also be able to save money on the monthly fees associated with running a Plex server.
Thanks for sharing, Sam!
Building a Plex server is a great way to have your own personal media library. I’ve been using Plex for years, and it’s a fantastic way to keep your movies, TV shows, and music all in one place.
I recently decided to build my own Plex server, and it was a great experience. I learned a lot about building computers, and it was really satisfying to see everything come together. If you’re thinking about building your own server, I would highly recommend it!