
Printed circuit boards (PCBs) are essential components in nearly all modern electronics, but cutting them neatly and accurately can be tricky. From gathering the right tools to employing proper techniques, properly cutting a PCB requires care and precision. In this brief guide, we’ll cover the basics of PCB cutting, from understanding the materials involved to step-by-step instructions for making smooth, clean cuts. Whether prototyping new circuits or manufacturing PCBs, you’ll learn tips and tricks to ensure your boards are cut cleanly and ready for assembly. Let’s get started on demystifying the art of cutting printed circuit boards.
Snapshot Summary
Cutting PCB boards requires some care and the right tools for quality results. The key steps are first to review the board layout and clearly mark any required cut lines using a sharp tool like a utility knife. Use a scoring tool to lightly score along the marked lines without fully cutting the copper traces for straight cuts. Be sure to secure the board so it doesn’t shift during scoring. Next, snap the board by placing it on a rigid surface like a workbench and carefully bending it along the scored line until it separates. Use a rotary tool like a Dremel with an abrasive wheel or drill bit for curves, holes, or complex shapes. Allow it to reach full speed before cutting, and let the tool do the work. Always wear eye protection and minimize debris when cutting. After cutting, use a file or sandpaper to smooth any rough edges and thoroughly clean both sides of debris. Proper precautions and techniques help achieve clean, precise PCB cuts without damaging traces or components. Allow sufficient time and take your time with the process for best results.
PCB Cutting Made Easy
Cutting a printed circuit board (PCB) is a common task required in electronics design and prototyping before soldering components. It physically separates the PCB substrate to form the desired board shape and size. Properly cutting a PCB requires selecting the right cutting tool, careful planning to avoid damaging traces or components, and taking safety precautions. This guide covers the steps and techniques for accurately and safely cutting various PCB materials.
Selecting the Optimal Cutting Tool
Choosing the right tool for cutting a particular PCB depends on the physical properties of the substrate material, thickness, and complexity of the required cuts.
For simple straight-line cuts in thin boards, a handheld scoring tool is commonly used to lightly score along the cut lines and then snap the board. For thicker boards, a table saw outfitted with a diamond-tipped blade makes smooth, straight cuts.
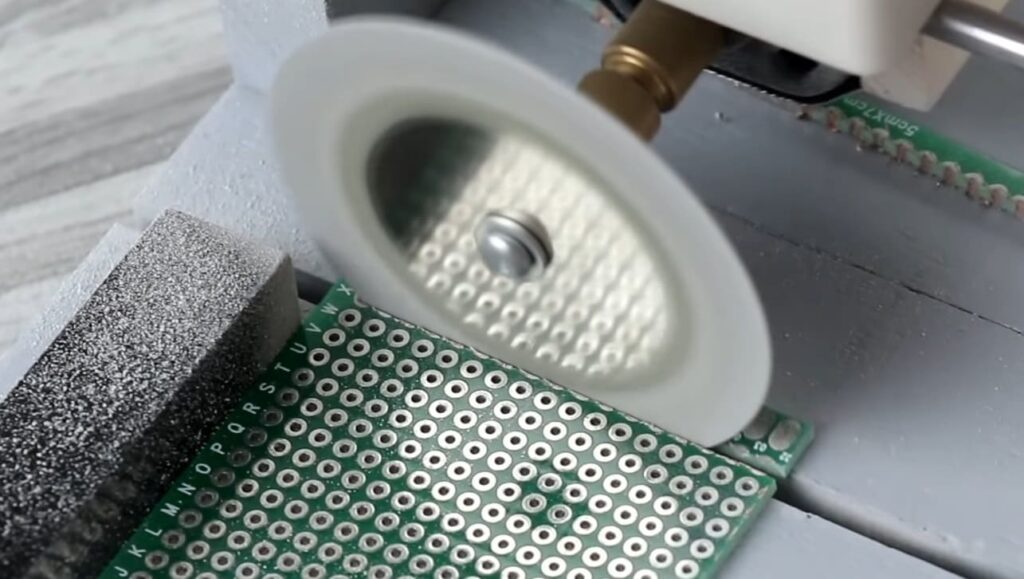
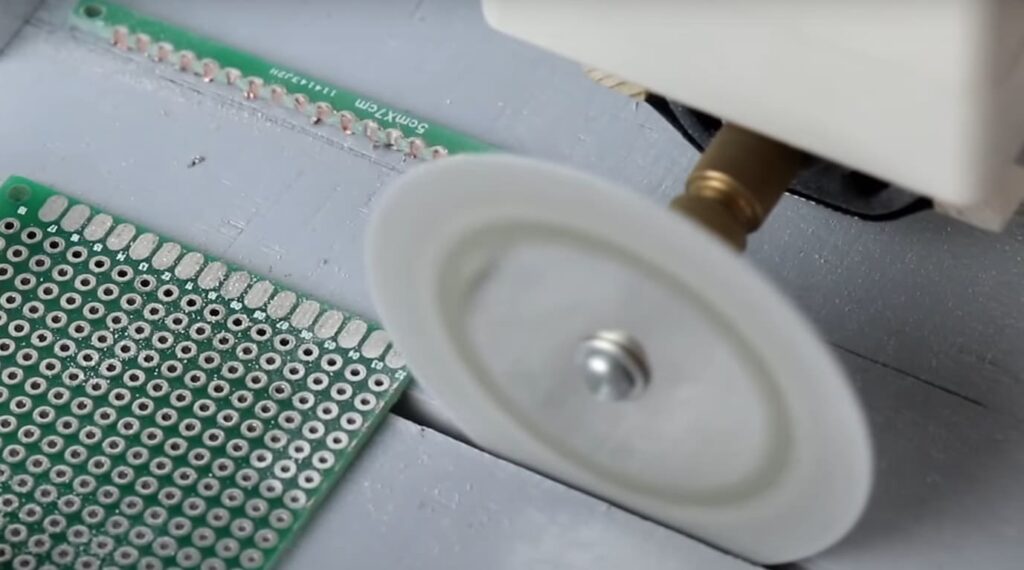
Rotary tools like a Dr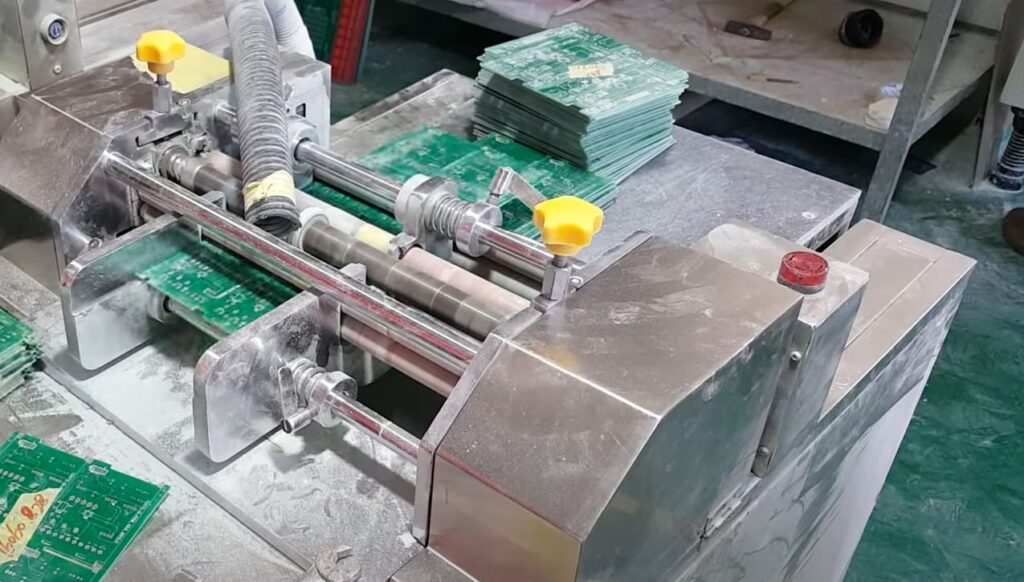 emel with a small abrasive wheel can make curved, irregular, or internal cuts. Fine-grit cut-off wheels work better for tight radii and detail work.
A band saw with a fine-toothed blade is ideal for making complex cutout shapes while minimizing substrate chipping and copper burrs.
Drill presses are indispensable for cleanly cutting holes or openings before the final PCB outline cut. Carbide bits give the best results across multiple substrate types.
Safety Considerations
Cutting PCBs poses some unique safety hazards. Always wear eye protection like safety glasses when using any cutting tool and a dust mask to avoid inhaling glass fiber particles or other irritating fumes. Use a bench vise and keep hands clear of cutting surfaces. Never cut a powered board due to shock hazards.
Carefully clean the workspace after cutting to remove conductive debris that could cause electrical shorts. Consider doing PCB cutting outdoors or in a well-ventilated area.
Planning Cuts and Marking
The first step is reviewing the board layout or dimensions and clearly marking where cuts need to be made. Verify no components or traces are intersecting the cut lines. This may require making small jogs in the cutting path to go around obstructions.
Use a sharp knife or fine-tip marker to scribe the cut lines onto the board surface before cutting. Rulers help keep lines straight and accurately positioned. Double-check all key dimensions and hole positions before starting.
Scoring and Snapping
For straight-line cuts in thinner PCBs, scoring the board partway through along the marked lines allows it to be cleanly snapped by hand. This prevents splintering and burring of the copper traces.
Secure the PCB in a vise and use a scoring tool or utility knife to cut partially through the substrate and traces in multiple light passes. Then, remove the board and carefully bend it back and forth until it snaps along the scored line.
Cutting with Rotary Tools
Rotary tools like a Dremel offer greater cutting precision for curved paths, holes, and detail work. Tape down or clamp boards to prevent shifting while cutting. Let the tool spin up to full speed before starting the cut.
Use light pressure and smooth motions to guide the cutting wheel or bit along the marked lines at an even rate. Smaller diameter wheels and bits allow tighter turns. Clearing debris frequently helps prevent buildup from impeding cuts.
Drilling Holes
For clean results, drilling PCB holes starts with a smaller diameter bit to make a pilot hole before using the final desired size. This provides cleaner entry and exit points in the substrate material. Clamp the board down with minimal pressure, allowing the drill bit to cut the hole.
Finishing Edges
Inspect all board edges after cutting. Use a deburring tool, file, or fine-grit sandpaper to gently smooth down any rough areas, copper burrs, or fibers. Fully clean both sides of the board with compressed air and isopropyl alcohol to remove stray conductive debris.
With care and the proper cutting tools, PCBs can be shaped with great precision. Ensuring clean cuts and smoothed edges creates professional-looking boards ready for soldering and installation.
FAQs
What are some important things to consider before cutting a PCB board?
When cutting a PCB board, it’s crucial first to review the board layout and clearly identify any required cut lines, slots, or holes. Carefully check for any components, traces, or other features that may intersect the cut lines and require special attention. Also, confirm the finished board dimensions after cutting to ensure you are cutting to the correct size. Select a cutting method that is appropriate for the board thickness and complexity of the required cuts. Always use proper safety gear, like eye protection, when cutting. Taking the time to prepare and review the layout thoroughly helps avoid damaging the PCB during cutting.
What tools are typically used for cutting PCB boards?
For simple straight-line cuts, a scoring tool is commonly used first to lightly score the copper traces along the cut lines. This helps prevent the tearing of the copper when snapping the board. A bench vise can secure the PCB while scoring. Then, the board can be snapped along the scored line by placing it on a rigid, flat surface and carefully bending it until it breaks. For more complex cuts like curves, slots, or holes, a band saw, or rotary tool with a diamond cutting wheel is used to cut the PCB outline precisely. A drill press with carbide bits can drill any hole. Files help smooth and clean up any rough edges after cutting. Always use proper feed rates and cutting depths to avoid damaging the PCB.
What safety precautions should be taken when cutting PCB boards?
Cutting PCBs presents some unique safety hazards to be aware of. Always wear safety glasses or goggles when scoring, especially using power tools like a band saw. A face shield provides even better protection. Wear a dust mask or respirator as you cut to avoid inhaling fine particles of glass fiber and dust from the board substrate material. Use a bench vise and keep your hands away from the cutting tool. Never try to cut an energized or powered board – residual electric charge can pose a shock hazard. Finally, thoroughly clean the workspace after cutting to dispose of conductive debris which could cause shorts. Taking basic safety precautions helps reduce risk when PCB cutting.
What steps should I follow to score and snap a PCB board?
Scoring and snapping is a quick manual method for straight-line PCB cuts:
- Carefully review the layout artwork and mark the required cut lines clearly on the board, for example, with a fine-point permanent marker. Double-check for any components or traces along the cut path.
- Secure the PCB in a bench vise and use a handheld scoring tool to apply light pressure along the marked line without cutting completely through the copper traces. Multiple scoring passes help fracture the glass fibers in the substrate.
- Move the PCB to a sturdy, flat surface like a workbench or rigid board. Align the score line slightly over the edge.
- Holding the PCB securely in both hands, bend the board until it snaps cleanly along the scored line.
Avoid excessive twisting or skewing of the board during snapping. Deburr and smooth any rough edges with a file if needed.
How can I accurately cut curves and holes in a PCB?
Making curved and hole cuts in PCBs requires a rotary cutting tool rather than scoring and snapping. For prototyping, a rotary tool like a Dremel is commonly used. First, mark the board outlines and hole locations based on your layout diagrams. Tape the board down firmly to a cutting mat or other protective surface. Install a diamond cutting wheel of the appropriate size in the rotary tool – smaller wheels work better for tight curves and holes. Allow the tool to reach full speed before contacting the board. Then, gentle pressure and smooth motion guide the cutting wheel along the marked lines. Let the tool do the cutting; don’t force it. For holes, start with a smaller bit and reach the final diameter. Flushing with compressed air helps keep the cut area clear of debris. Finally, inspect the board and use a file to smooth any irregular edges.
What should I do to smooth the edges after cutting the PCB?
After making all required cuts in the PCB, visually inspect the edges of the board to look for any rough areas or copper tears. These can be smoothed using a file, deburring tool, or sandpaper. For exposed copper traces along cut edges, use light filing motions or fine grit sandpaper to gently smooth without damaging the traces. Beveling the sharp corners prevents potential cuts and injury during handling and assembly. Remove any conductive debris using compressed air or a vacuum cleaner. Wiping clean both sides of the board with isopropyl alcohol also helps eliminate stray particles that could cause electrical shorts. Carefully filing and cleaning freshly cut PCB edges helps create a professional finish ready for prototype assembly or production.
How can I avoid common problems when cutting PCB boards?
Cutting PCBs does take some skill to avoid mishaps. Rushing through scoring or cutting risks damaging traces or ruining the board. Take the time to mark carefully and double-check cut lines against the layout before starting. Secure the PCB properly in a vise or use temporary adhesive to prevent shifting. Let the tool do the cutting rather than forcing it through the board. Frequently clear debris buildup during longer cuts. Use an appropriately sized wheel or bit and slow feed rate for holes to prevent tool breakage. Avoid cutting too deep through the substrate. Practice first on scrapboards if unfamiliar with the cutting process. Check finished boards thoroughly for any cracks, tears, or rough edges needing additional smoothing. Remaining patient, using proper technique, and inspecting after cutting help prevent problems.
What safety gear should I use when cutting PCBs?
Cutting PCB material can generate irritating dust and debris containing glass fibers and particulates. Always wear safety glasses or goggles for eye protection and an N95 face mask to prevent inhalation exposure. Closed-toe shoes and long sleeves help protect skin from sharp debris. Use appropriate gloves – cut-resistant for manual scoring and standard work gloves when handling and snapping the boards. Operating a band saw or rotary tool requires more extensive protection – a face shield, hearing protection, dust extraction, and no loose clothing. Ideally, perform PCB cutting in a well-ventilated area away from electronics or other sensitive equipment. And fully clean up and dispose of conductive debris to prevent shorts. Following basic safety protocols when cutting helps minimize hazards to your eyes, lungs, and electronics.
What are some best practices for precision PCB cutting?
Achieving clean, accurate cuts requires attention to detail and proper technique. Always use the board layout artwork or drawings as a guide, double-checking dimensions and cut lines. Lightly score traces before snapping. Work slowly when using rotary tools, applying only gentle pressure. Choose the right tool for the job – small cut-off wheels for tight spaces, larger diameters for long cuts. Drill undersized starter holes for large diameters. Keep the board surface and tools clear of debris buildup. Allow time after cutting for edge smoothing and cleanup. Perform test or practice cuts first on scrap material if possible. Having sharp, undamaged tools also helps achieve precision cuts. And work carefully to avoid rushing. Following best practices for PCB cutting helps ensure clean, smooth, and dimensionally accurate cuts.
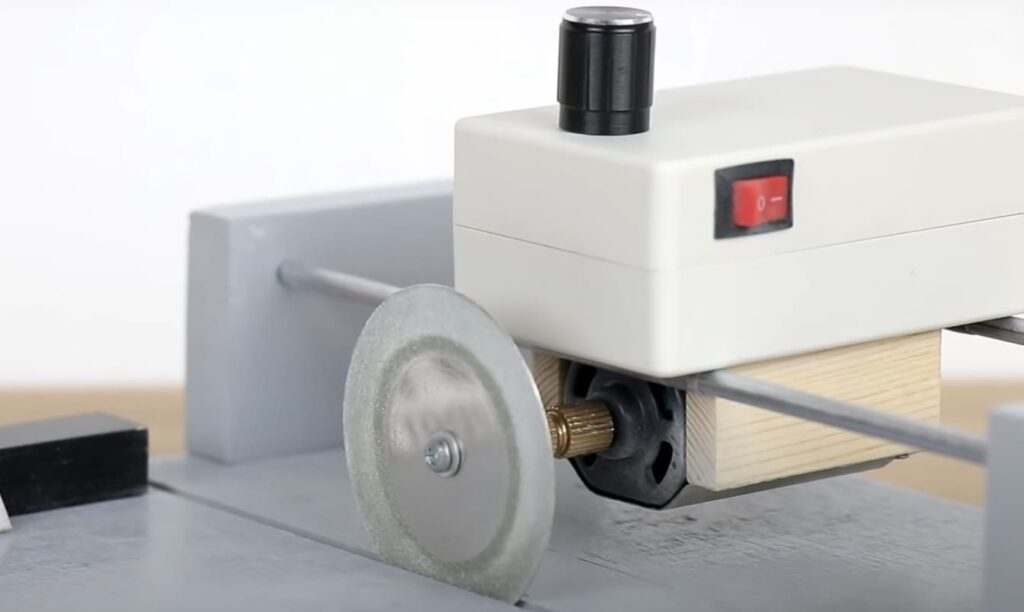
Related Video: How To Make PCB Cutting Machine
Summarize
Cutting printed circuit boards requires careful planning and the right tools for a quality result. First, thoroughly review the board layout and mark all cut lines needed to achieve the final dimensions. For straight cuts, use a scoring tool to lightly score the copper traces before snapping the board by hand along the score lines. To avoid damaging traces, secure the PCB and don’t twist it excessively during snapping. For curved, slotted, or internal cuts, use a rotary tool like a Dremel with a small diameter abrasive wheel or drill bit. Allow the tool to reach full speed before gently guiding it along the marked cut lines. Always wear eye protection and minimize airborne debris when cutting. After cutting, inspect the edges and use a file or fine sandpaper to smooth any rough areas or copper burrs gently. Eliminate stray conductive debris using compressed air and cleaning with isopropyl alcohol. With good technique and proper preparation, PCBs can be accurately shaped for prototypes or production. They were rushing the job or using dull tools to risk permanent damage. Allow sufficient time for careful cutting and edge finishing to produce clean, precise results.


