
Connecting a microphone to the Arduino is a simple basic procedure that allows you to create full-fledged, very exciting audio projects. You can use devices that will convert the audio signal to digital, record the presence of sound, measure its volume (and then it all depends on your capabilities and preferences).
Using a Microphone With an Arduino: Main Steps
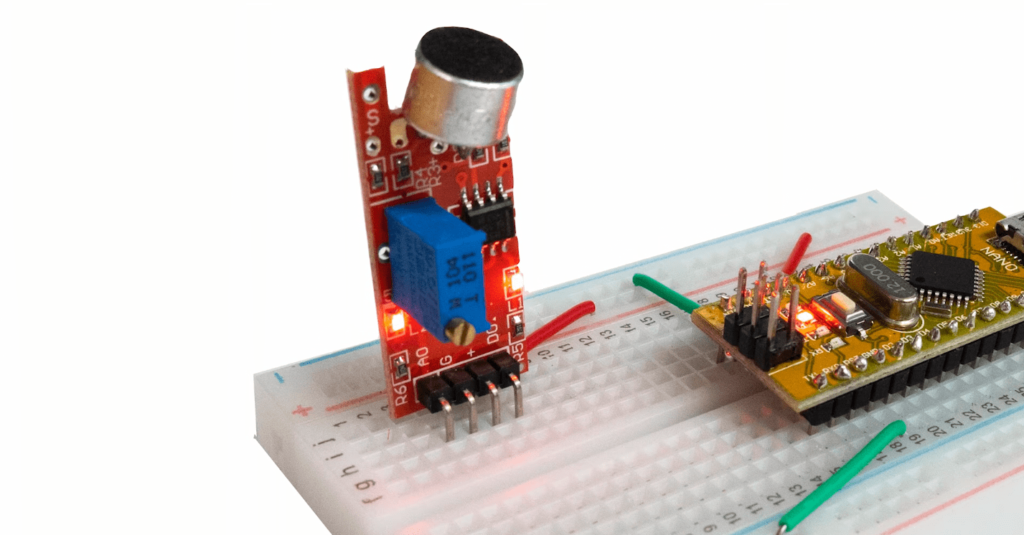
Microphone module (condenser∕electret microphone) is a simple device. It usually consists of a compact board with connection ports to the Arduino controllers (e.g. Nano). There is also a sound amplifier, a resistor and an electronic microphone, which is particularly sensitive to sound. By the way, with the sensitivity control you can easily and simply adjust the sensitivity of the microphone, and decide from what level of noise your sensor will be triggered in the future.
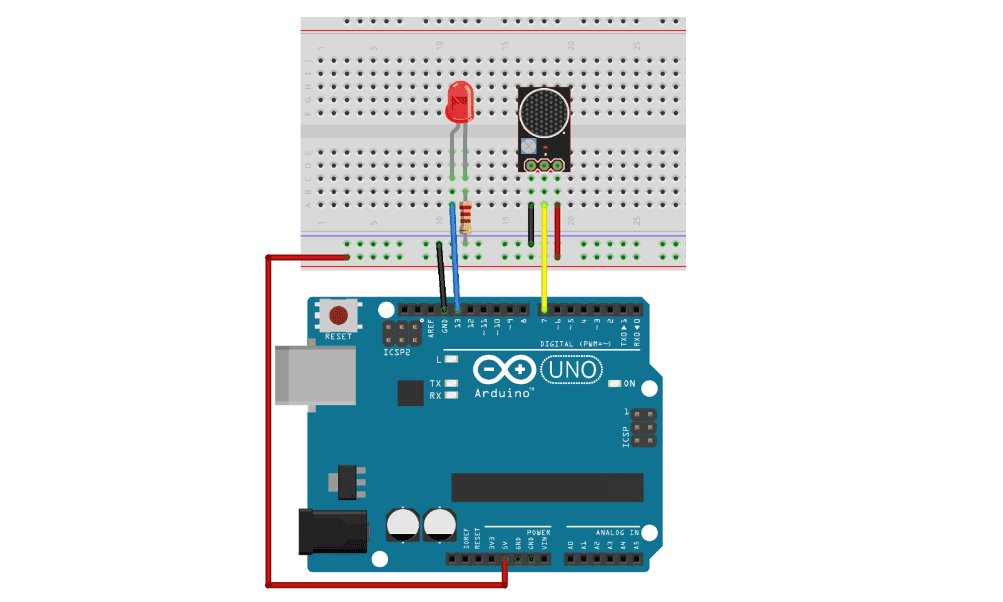
Of course, we will look at a few projects to familiarize ourselves with the practicality of using such a sensor. Let’s start with a little “warm-up” – let’s determine the intensity of the sound. For this wiring diagram (see the image below) we need the following hardware components:
- Arduino UNO expansion board;
- A sound sensor with a microphone (like KY-038);
- breadboard;
- LED;
- resistor;
- jumpers.
Load the sketch to check the functionality of the assembly:
int ledPin=13;
int sensorPin=7;
boolean val =0;

void setup(){
  pinMode(ledPin, OUTPUT);
  pinMode(sensorPin, INPUT);
  Serial.begin (9600);
}

void loop (){
  val =digitalRead(sensorPin);
  Serial.println (val);
  // when the sensor detects a signal above the threshold value, LED flashes
  if (val==HIGH) {
    digitalWrite(ledPin, HIGH);
  }
  else {
     digitalWrite(ledPin, LOW);
  }
}
We didn’t use any special libraries – everything is super-simple!
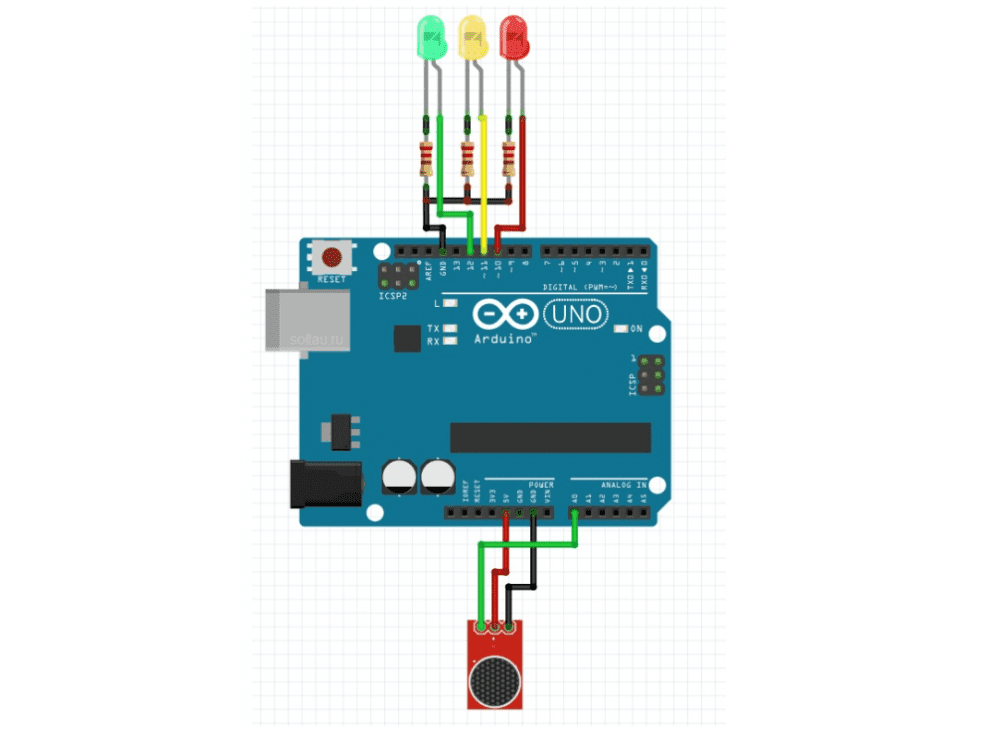
If you want, you can build and tune a simple equalizer. Pay attention to the circuit:
Example software firmware:
const int micPin = A0;
const int gPin = 12;
const int yPin = 11;
const int rPin = 10;

void setup() {
    Serial.begin(9600);
    pinMode(gPin, OUTPUT);
    pinMode(yPin, OUTPUT);
    pinMode(rPin, OUTPUT);
}

void loop() {
    int mvolts = analogRead(micPin) * 5.0 / 1024.0 * 1000.0; // values in millivolts
     Serial.println(mvolts); // output to the port
    /* LED thresholds are adjusted by
        by you experimentally: */
    if (mvolts < 2100) { //green led threshold, mV
      digitalWrite(gPin, HIGH);
      digitalWrite(yPin, LOW);
      digitalWrite(rPin, LOW);
    }
    else if (mvolts < 2125) { // yellow LED threshold, mV
      digitalWrite(gPin, HIGH);
      digitalWrite(yPin, HIGH);
      digitalWrite(rPin, LOW);
    }
    else if (mvolts < 2150) { // red LED threshold, mV
      digitalWrite(gPin, HIGH);
      digitalWrite(yPin, HIGH);
      digitalWrite(rPin, HIGH);
    }
}
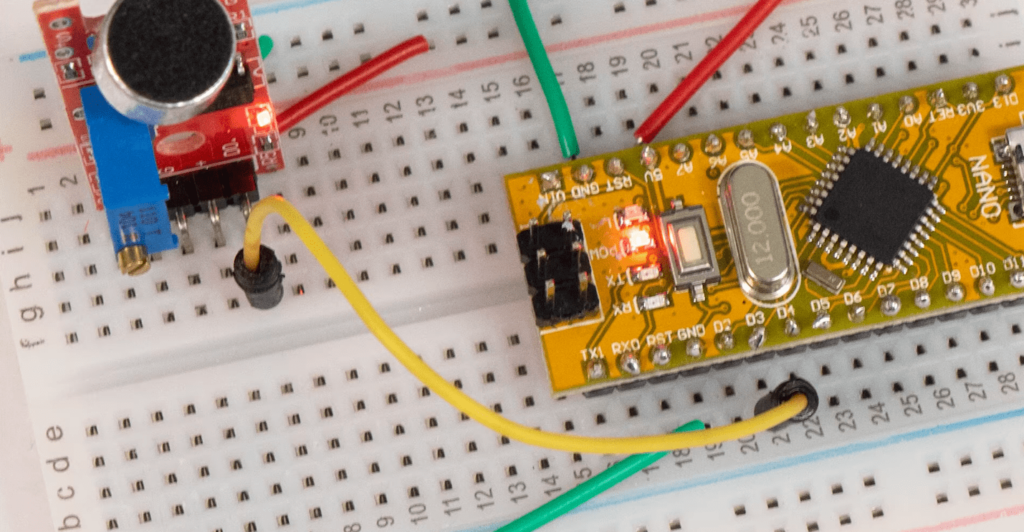
And you can also create your own light, which will be turned on by a clap of the hands or a snap of the fingers.
int ledPin=13;
int sensorPin=7;
boolean val =0;

void setup(){
  pinMode(ledPin, OUTPUT);
  pinMode(sensorPin, INPUT);
  Serial.begin (9600);
}

void loop (){
  val =digitalRead(sensorPin);
  Serial.println (val);
  // when the sensor detects a signal above the threshold value, LED flashes
  if (val==HIGH) {
    digitalWrite(ledPin, HIGH);
  }
  else {
    digitalWrite(ledPin, LOW);
  }
}
After loading the code you can snap your fingers near the sensor. If the LED does not light up, you must change the sensitivity of the sensor by turning the potentiometer switch.
You can adjust the sensitivity so that the LED follows the rhythm of a certain music track.
FAQ
Can an Arduino hear sound?
Yes, an Arduino can hear sound. There are various sound modules that can be used with an Arduino, such as the MAX98357 I2S DAC+AMP or the KY-038 Microphone Sound Sensor Module. These modules allow the Arduino to detect and amplify sound.
How do you use a microphone sensor?
There are many different ways to use a microphone sensor. Some common applications include recording sound, amplifying sound, and detecting movement.
What is a microphone sensor?
A microphone sensor is a device that converts sound waves into electrical signals. These signals can then be processed by a computer or other electronic device to convert the sound into a digital format.
Is sound sensor analog or digital?
There are both analog and digital sound sensors. Analog sound sensors convert sound waves into electrical signals, while digital sound sensors convert sound waves into digital signals.
What is the cost of sound sensor?
There is no definitive answer to this question as the cost of sound sensors can vary greatly depending on the specific make and model. However, you can expect to pay anywhere from $10-$100 for a quality sound sensor.
What is a noise sensor?
A noise sensor is a device that detects and measures noise levels in the environment. It can be used to monitor noise pollution levels or to assess the acoustic environment of a particular location.
Related Video: Using and Coding a Microphone Sound Sensor With Arduino
Conclusions
Today we have talked about how you can wire a sound sensor to the Arduino. We hope this information was useful to you! See you soon!


