Raspberry Pi Zero is a member of the Raspberry Foundation’s Raspberry PI family of single-board computers. The miniature size, low cost, and seriousness of the series have made them famous and widely used in various technical projects. Below is an overview of the mini-PC models, their features, and capabilities.
Raspberry Pi Zero
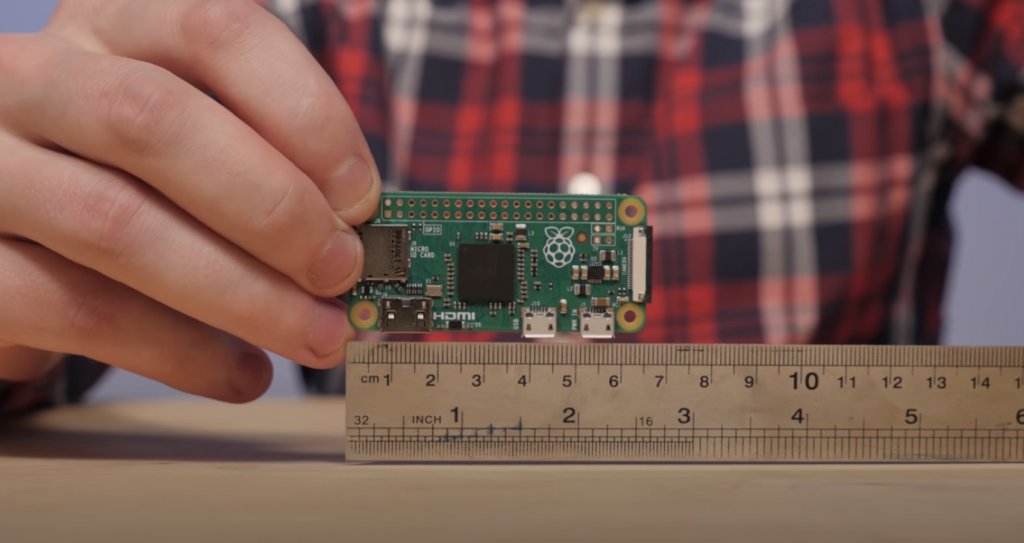
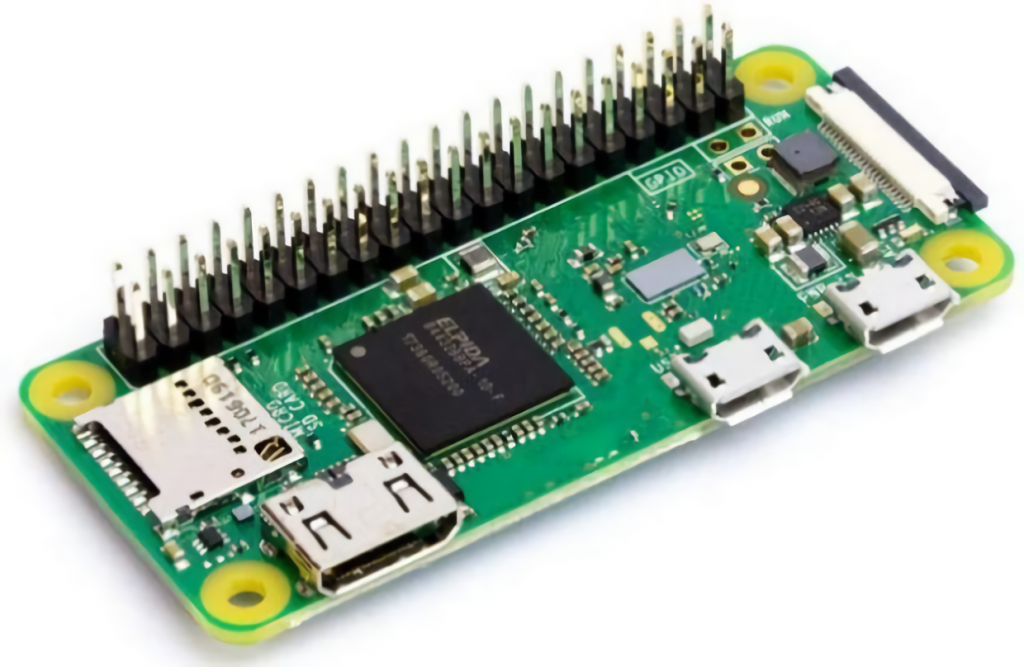
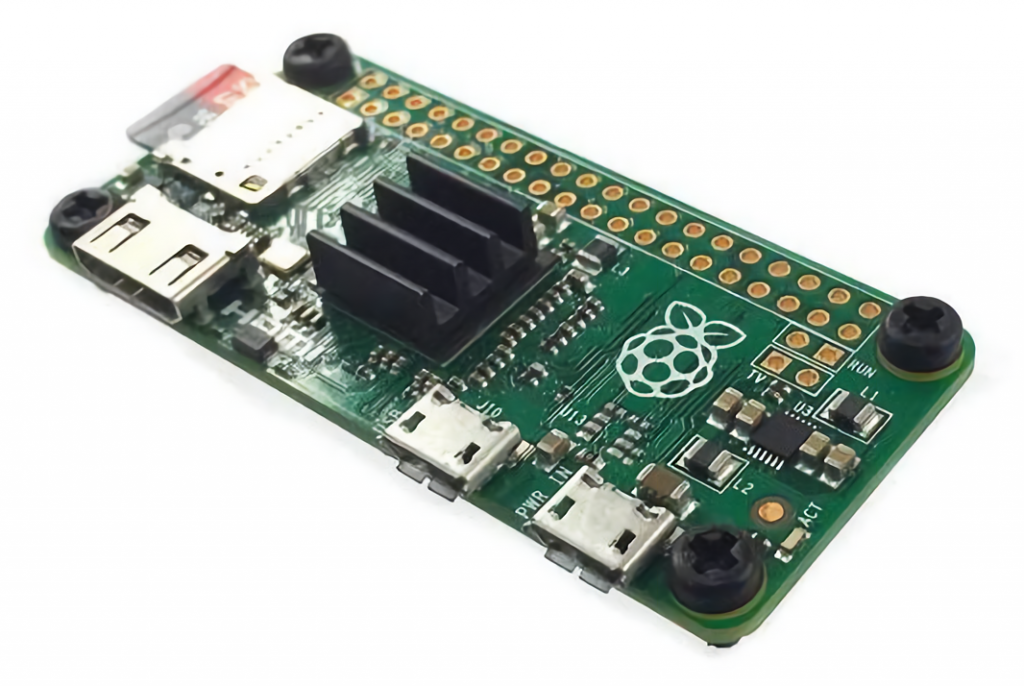
This is the first minicomputer of this series, which appeared in 2015. It differs from other minicomputers by its size: its engineers managed to put all the functionality into a 2.55 × 1.18 × 0.19 inches board without any performance loss.
The main characteristics of Raspberry Zero:
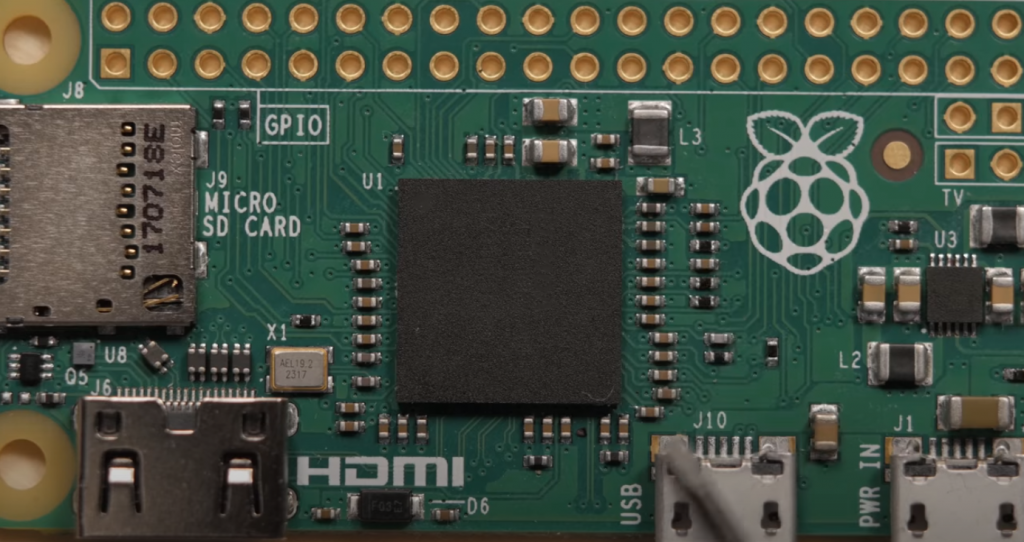
- Processor – single-chip Broadcom BCM2835. The SoC carries an OpenGL supporting video core;
- Built-in RAM – 512 MB LPDDR2 SDRAM;
- USB ports (one OTG, one for power);
- Mini HDMI port, capable of displaying images in FullHD;
- MicroSD card slot (the card loads the operating system);
- 40-pin GPIO comb;
- camera connector (added in version 1.3);
- pin pads for composite video output.
There is no network support initially, but a variety of accessories are available for purchase, expanding the system’s functionality with expansion cards and adapters. For some time, even Pi Zero and the accessory kit were offered for 59 USD.
The price of a single board at the start of sales was only 5 USD. Interestingly, MagPI magazine buyers could get the Zero for free along with the December 2015 issue. Because of the low price, the computer to the letter is sometimes referred to as the “Raspberry Pi 0,” interpreting “zero” as “zero price.”
The system is usually controlled by the Raspbian operating system, specially created for the capabilities of the “Raspberry.” It can be downloaded from the developer’s website; the installation process will be described below. It is also possible to use other operating systems based on the Linux kernel and the Android system.
Raspberry Pi Zero W Review
Despite the compactness and low cost of the first version, the minicomputer had objective disadvantages. Users noted weak hardware and lack of built-in network interface; Raspberry Pi Zero ethernet port does not have, there is no Wi-Fi. But wireless and wired communication modules were required by many, and in the pursuit of miniaturization and cheapening, engineers sacrificed these and other integrated features. As a result, the board had to be “encumbered” with various adapters to connect the network, keyboard, mouse, and other peripherals, which canceled all its advantages.
But the developer listened to the community’s opinions, and in February 2017, a new model with the index W was released. Raspberry Pi Zero W’s specifications do not differ from its predecessor, but the board also got a Wi-Fi module (802.11 b/g/n) and support for Bluetooth 4.1 communication. The model’s cost increased to about 10 USD, but these changes made the use of the “single board” much more convenient.
The Cypress CYW43438 chip is responsible for the wireless interfaces of Raspberry Zero W.
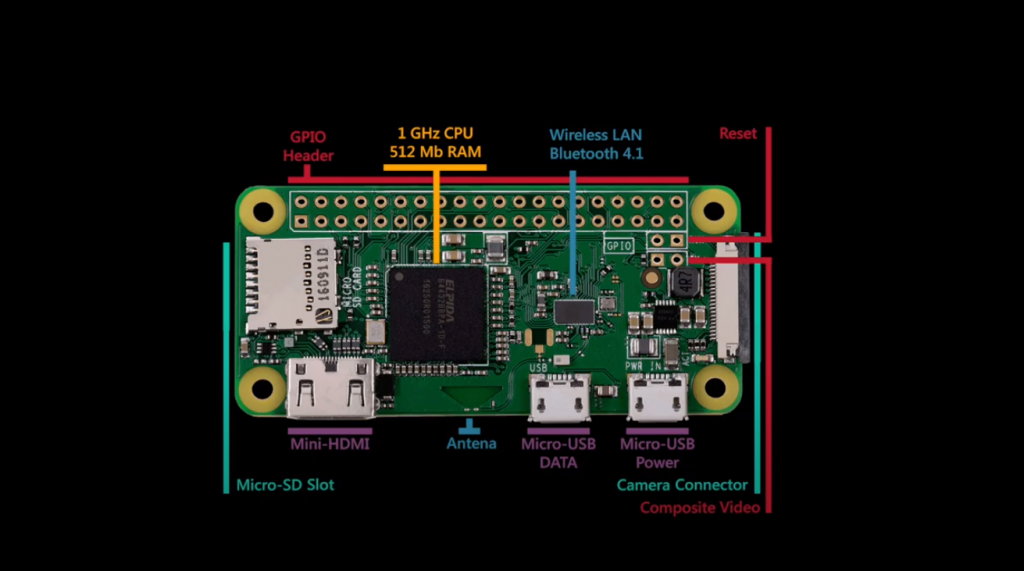
Board Elements with Description
A GPIO connector is used to connect the main mass of the slave devices. In Zero W (as well as in the previous model), it is not unsoldered; there is only a contact pad, “comb” to which you need to connect with a soldering iron. Unlimited support for any expansion boards from the “older” versions.
Raspberry Pi Zero W GPIO Pinout
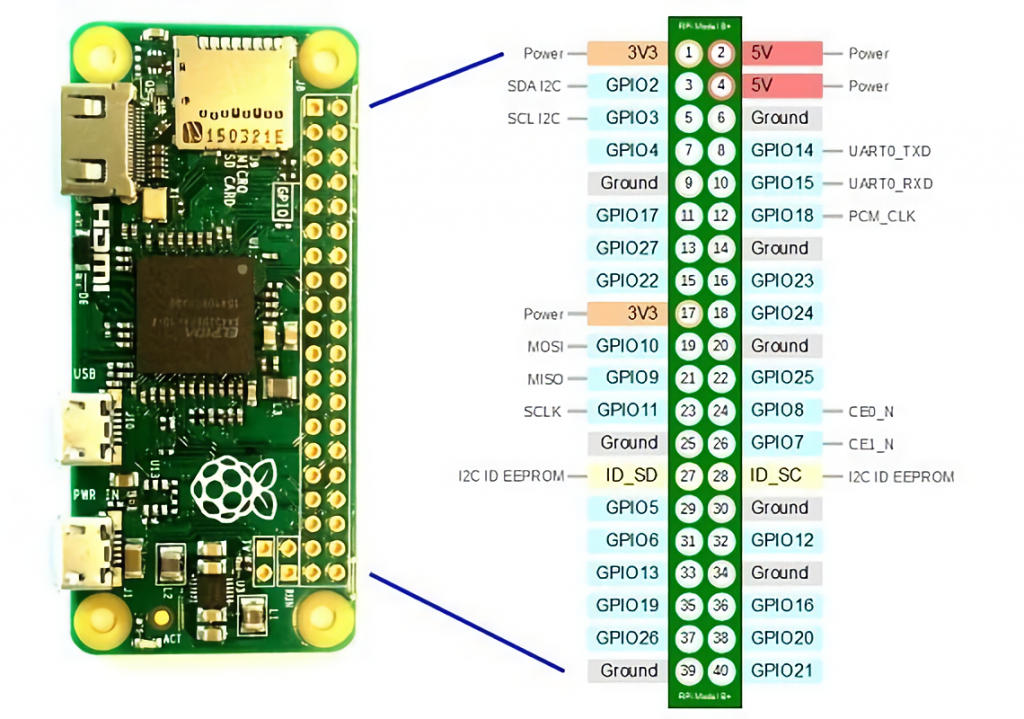
As you can see, there are pins for 5-volt power among the pins. The Zero can be powered not only via USB but also via GPIO with the appropriate power source.
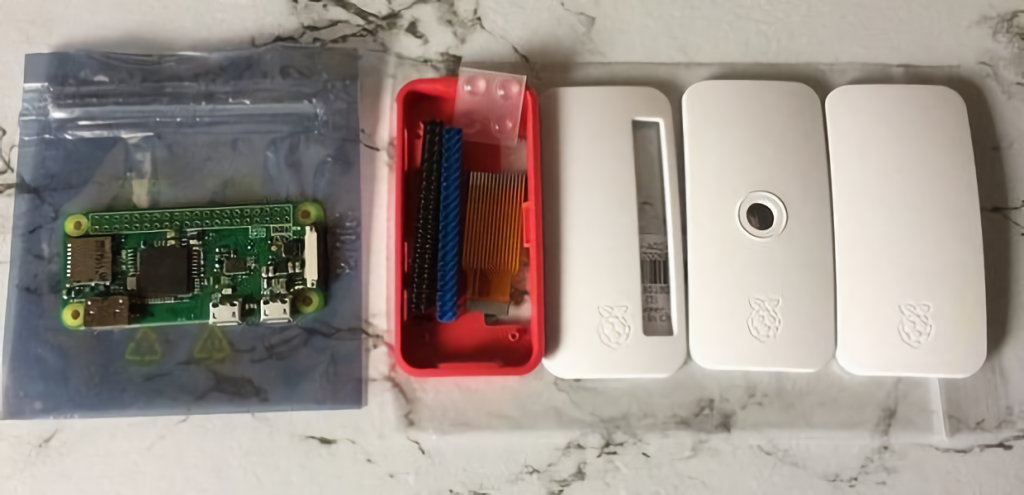
Package Contents
The Zero W comes to the buyer in an anti-static package. Depending on the seller, a separate package may include accessories – two “combs” with Male and Female connectors, camera adapter, and housing. This option includes a plastic case with interchangeable covers (for I/O ports, comb, and camera).
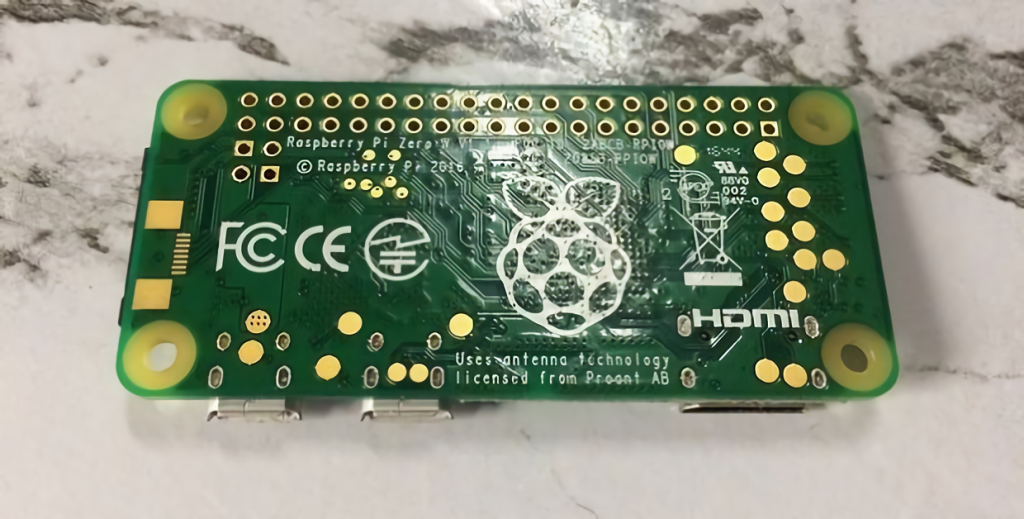
The backside of the board is smooth and has no functional elements. It only has copyrights on it: in particular, the inscription indicates that Proant’s licensed technology was used for the wireless antenna.
Raspberry Pi Zero WH
This model does not differ from W apart from already soldered GPIO pins. The developer added it to its single-board lineup in 2018.
Appearance:
The cost of such a prepared Raspberry Pi is about $15.
Installing the OS on the Raspberry Pi Zero
Even the most advanced hardware has to be managed by something. Let’s look at the process of installing an operating system using Pi Zero W and Raspbian as examples.
You can install the system and connect the computer to the network without a monitor and keyboard, in so-called Headless mode. First, it is necessary to download the Raspbian OS image from the developer’s website.
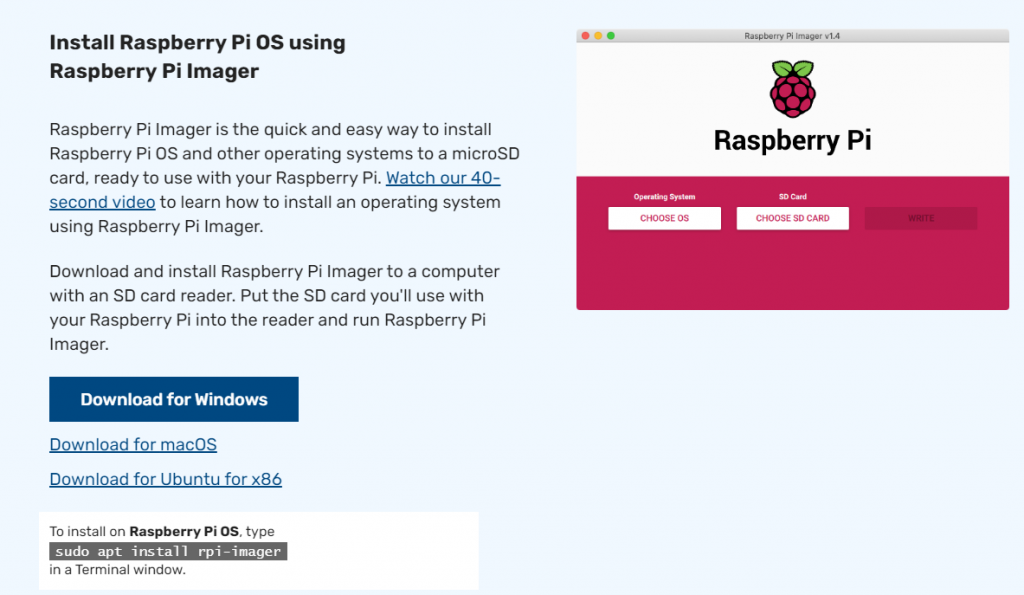
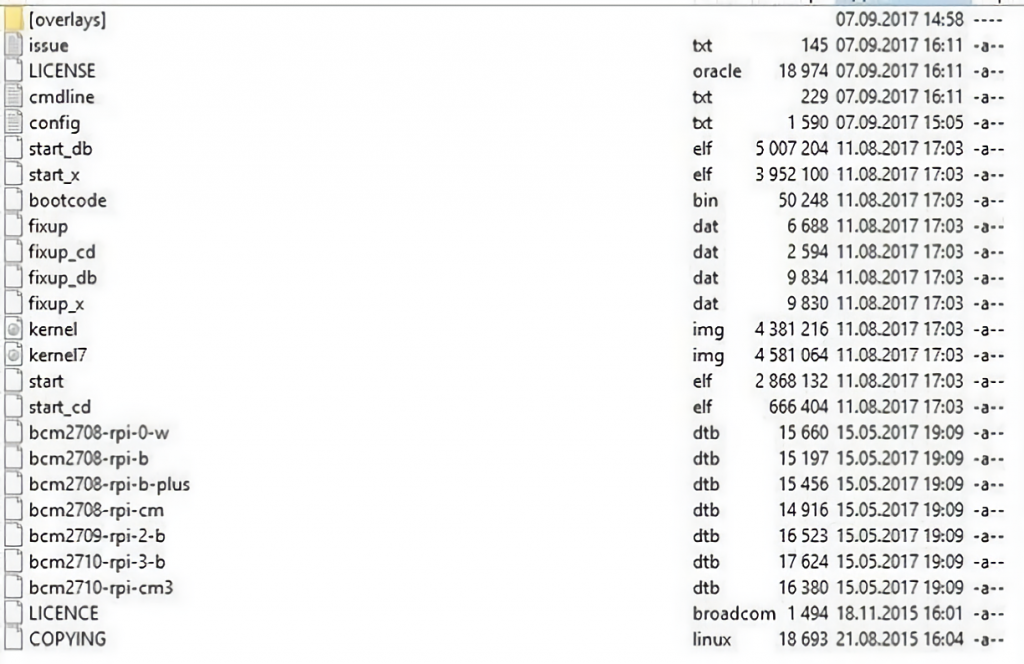
After downloading it, you will need to write it to the SD card using any convenient utility – Win32 Disk Imager, Rufus, and others. When the recording of the image is completed, the file system structure will appear on the card:
OS installation completed. Next, you need to:
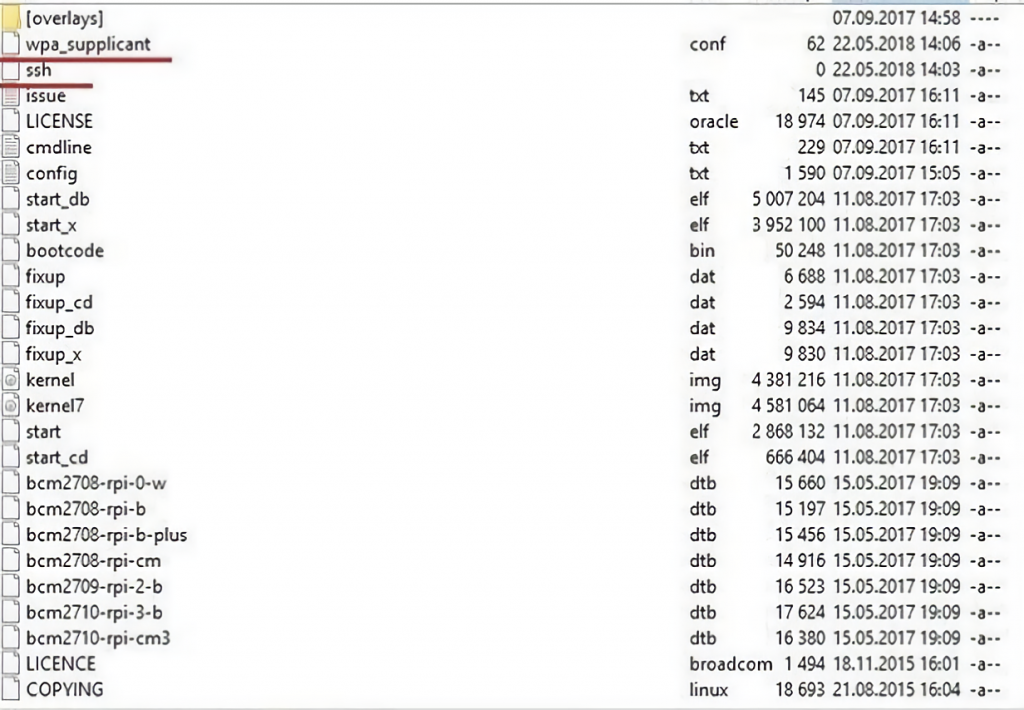
- enable ssh access, which is disabled by default;
- make settings for auto-connection to the wireless network.
For the former, just create an ssh file without an extension with empty contents in the memory card’s root. This will tell the running OS that login via this protocol is enabled. To allow the computer to join the network, you must also create a file wpa-supplicant.conf in the root folder. And fill it with the following sample content:
ctrl_interface=DIR=/var/run/wpa_supplicant GROUP=netdev
update_config=1
country=RU
network={
ssid="WIFI POINT NAME"
psk="WIFI PASSWORD"
key_mgmt=WPA-PSK
}
As you can see from the example, the network section lists your wireless network name as SSID and its password as PSK. The KEY_MGMT line indicates the type of encryption used. It can be specified in the router/access point settings.
Important: the network name and password are case-sensitive.
As a result, the file system should look similar:
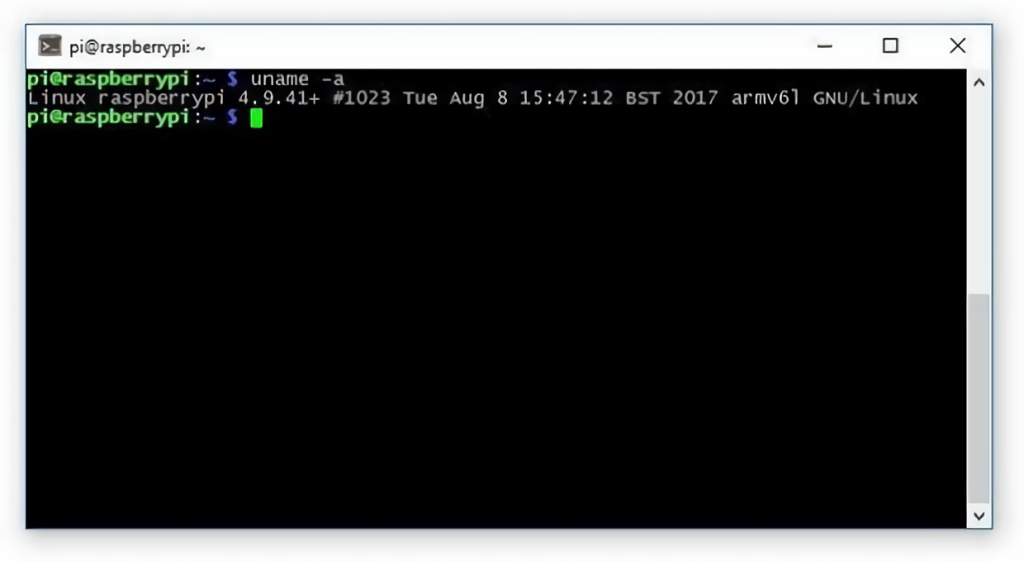
This completes the preparatory stage. You can insert the card into the minicomputer and start the boot process. If everything is entered and set correctly, “Raspberry” will connect to the network and obtain an IP address. The latter is found out in the router/access point settings through a list of connected devices.
Knowing the IP, the user can connect to the PC using any familiar SSH client. The standard login and password for pi:raspberry access.
After a successful login, the system can be configured; to simplify management, many users put a Webmin administration shell.
Cooling and Heating
The photos show that the chips don’t even have passive cooling in the form of radiators. In this regard, the question may arise – whether the device overheats during operation?
The stress utility is used to estimate the heating and to carry out stress testing. We install it and run a 15-minute test.
Load and command syntax:
sudo apt-get install stress
while true; do vcgencmd measure_clock arm; vcgencmd measure_temp; sleep 10; done& stress -c 4 -t 900
On average, the processor temperature rises to about 131 °F (55.1 °C) degrees under this load and stabilizes at this level. After the test is stopped, it starts to decrease gradually. In idle mode, the operating temperature stays between 105,8 and 107,6 °F degrees.
This proves that the microcomputer does not need additional cooling. But some enthusiasts still take extra precautions by gluing small copper or aluminum radiators and slightly improving the heat dissipation. An overview of the appearance of the board with the SoC heatsink:
The critical temperature of the processor is 212 °F (100 °C) degrees, and it starts to trot at 176 °F (80 °C).
Raspberry Projects
So the Raspberry has produced a compact single-board PC, but how to use it? Of course, the hardware is not powerful enough for modern PC gaming or cryptocurrency mining. But this computer wasn’t made for that. Its application area is various controllers and automation devices, smart house systems, and home appliances, where you need compactness, low power consumption, and enough computing power. Raspberry Pi Zero W is used for a wide variety of projects: let’s look at a few examples within this review.
IP-camera
Network cameras based on the Zero W are quite popular. Especially since there is a special slot on the board for cameras, let’s take a closer look at an example of such a project.
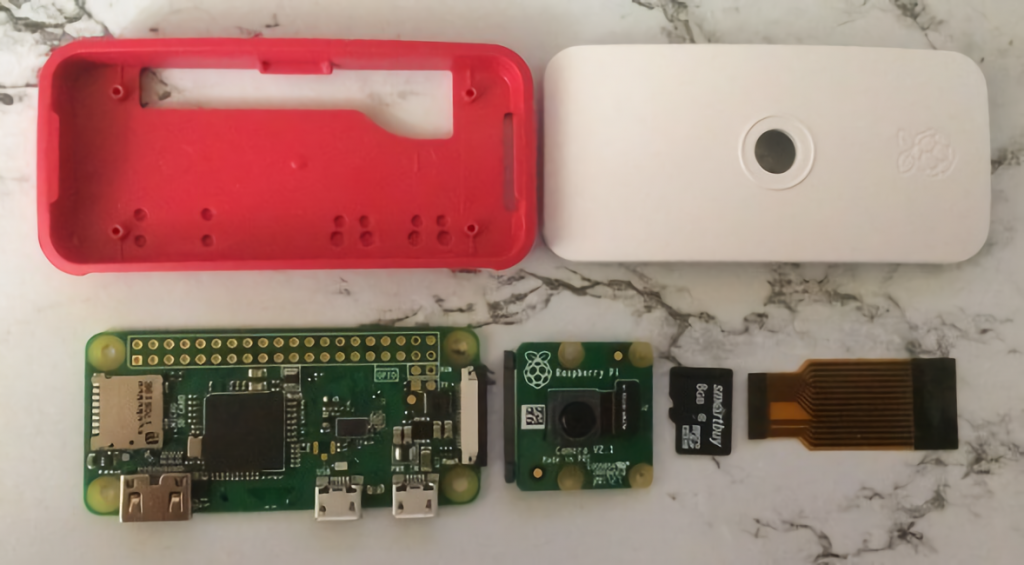
To implement the project, you will need:
- The camera itself. You can buy the original Raspberry Pi Camera Board with or without an IR filter. The cost of such equipment is about 20-30 USD when buying on Aliexpress or Amazon, a little more expensive in local stores;
- CSI-miniCSI daisy chain (in the set with the camera itself, instead of it may be CSI-CSI, incompatible with the “zero” interface);
- housing with a hole for the camera.
Approximate appearance of the kit:
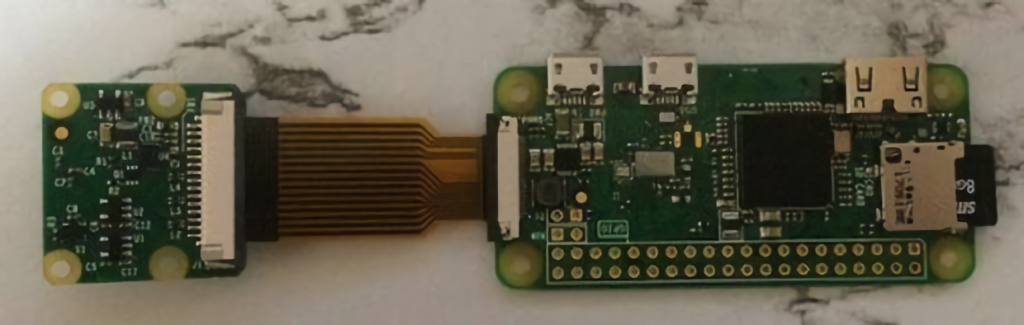
Looped camera connected:
The finished construction fits into the housing:
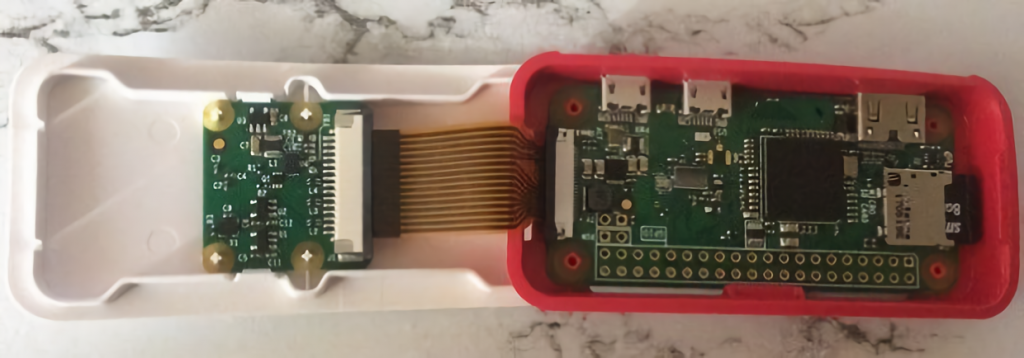
The cover is then snapped on, and the camera is ready to use. Only the software part remains to be set up. RTSP video stream can be read by any suitable client, e.g., the VLC player: To do this, you must first install the player via apt-get:
sudo apt-get install VLC
Then start translation. Command syntax:
raspivid -o - - -t 0 -n -w 640 -h 480 -fps 30 | cvlc -vvv stream:///dev/stdin --sout '#rtp{sdp=rtsp://:8554/}' :demux=h264
Where -w and -h are keys indicating video resolution, fps is the frame rate limit. If everything is set and run successfully, the RTSP stream becomes available for reading by any suitable client at the address:
rtsp://microcomputer_address:8554/
But this method has a disadvantage – a small video delay, about 2-3 seconds.
The second way is by installing MotionEye. The package is available for any Linux system, and for Raspberry Pi, there is a special MotionEyeOS build, which is installed instead of the regular Raspbian. The distribution can be downloaded here, where you can also find a detailed overview of the features and installation method. The installation process is the same as described above, including creating the wpa-supplicant.conf file. After installation, the MotionEyeOS interface is available via the controller’s IP address, from where all other settings are made.
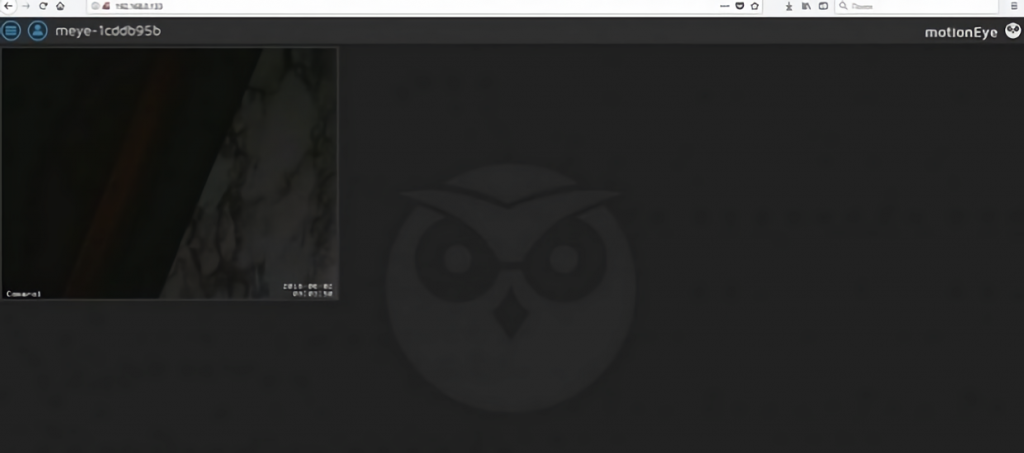
The default login to the web interface is admin, and the password is blank.
This method also has a certain disadvantage in the form of low FPS since the hardware acceleration kernel Motion program in this hardware configuration is not used. But for simple household purposes, it is quite enough.
Mini Laptop
An enthusiast and video blogger under the nickname N.O.D.E. created an ultra-portable notebook based on a micro-PC. This is what it looks like:
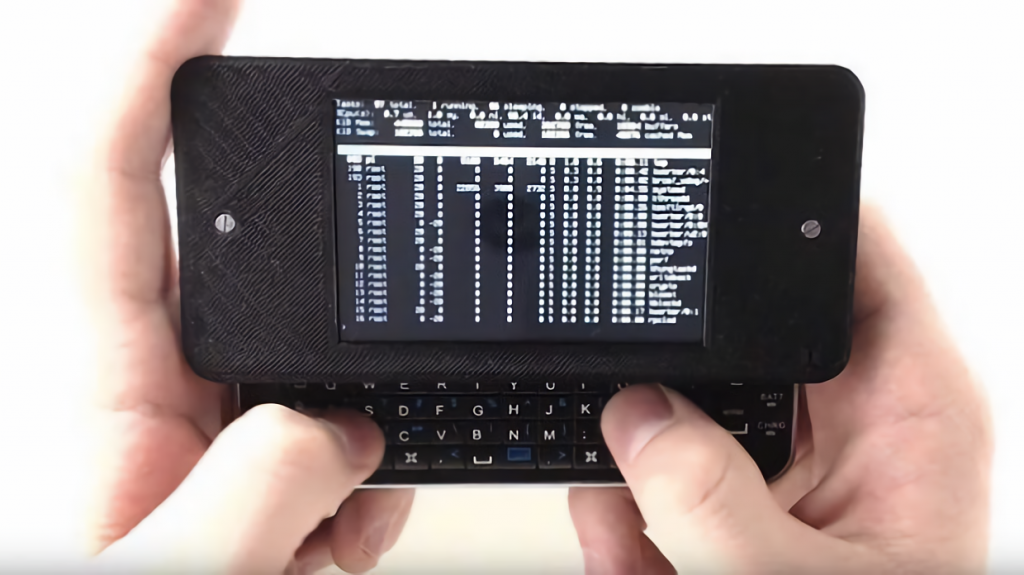
To realize the vision, the inventor needed:
- A Raspberry Pi Zero W platform;
- a 3D printed case;
- an iPhone 5 case with a Bluetooth keyboard;
- 3.5-inch screen with a resolution of 480×320;
- 1500 mAh battery.
The result is a full-fledged pocket PC suitable for everyday tasks, watching movies (including output to an external screen via MiniHDMI), running resource-neutral games, and so on.
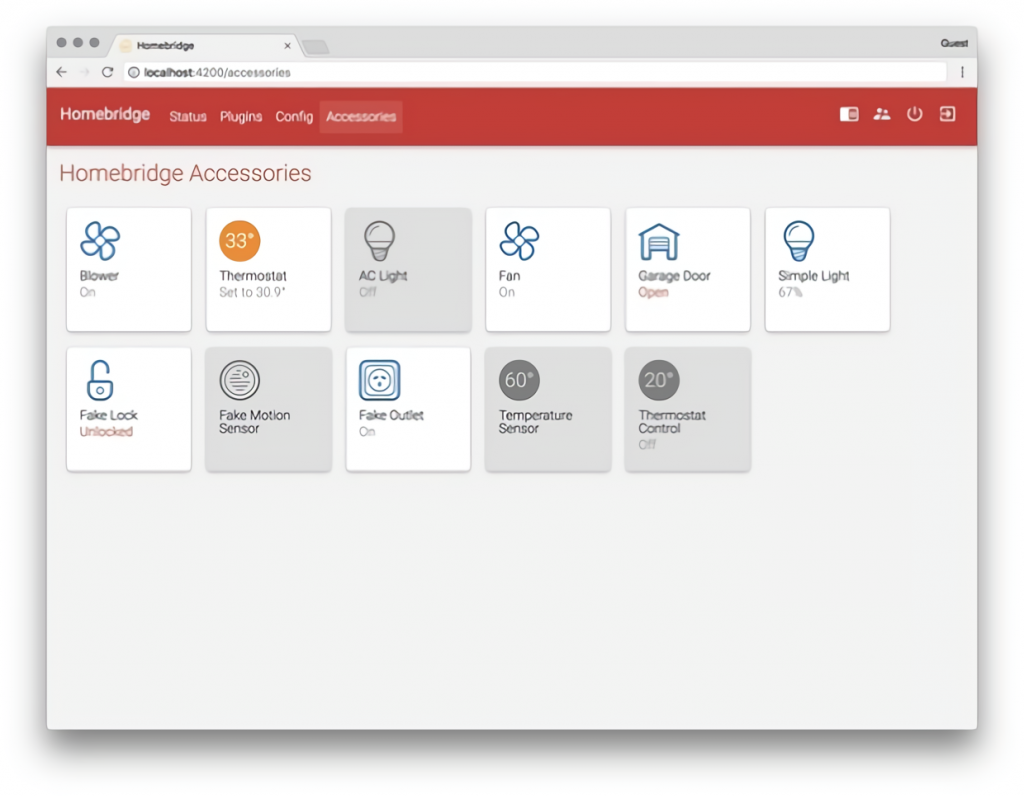
Smart Home
Zero series products are widely used in “smart home” projects. With the ability to connect peripherals via GPIO and Linux as OS, a single board allows to turn itself into a hub for all home appliances. Let’s look at an example of such a solution based on HomeBridge and Raspberry Pi Zero W software emulating HomeKit API.
This will require a configured PC with Raspbian OS. Additionally, you need to install the NodeJS package:
curl -o node-v9.9.0-linux-armv6l.tar.gz https://nodejs.org/dist/v9.9.0/node-v9.9.0-linux-armv6l.tar.gz

tar -xzf node-v9.9.0-linux-armv6l.tar.gz

sudo cp -r node-v9.9.0-linux-armv6l/* /usr/local/
Don’t forget to press Enter after each command!
Next, install the Avahi package and the HomeBridge itself.
sudo apt-get install libavahi-compat-libdnssd-dev

sudo npm install -g --unsafe-perm homebridge
And a plugin to control via the web interface.
sudo npm install -g --unsafe-perm homebridge-config-ui-x
In the last step, the smart home core is added to the autorun:
sudo npm install -g pm2

pm2 startup

sudo env PATH=$PATH:/usr/local/bin /usr/local/lib/node_modules

/pm2/bin/pm2 startup systemd -u pi --hp /home/pi

pm2 start homebridge

pm2 save
After that, the PC should be rebooted. After the restart, the HomeBridge service will start, and it will be available at the computer’s address on port 8080.
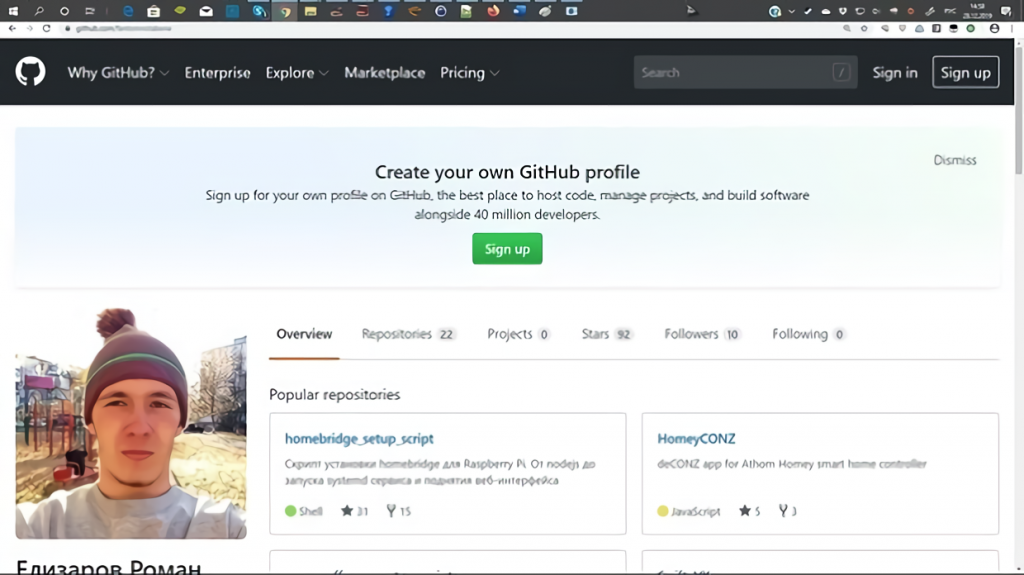
You can go a faster way, available through the efforts of enthusiasts from GitHub. Just enter the sequence of commands:
sudo apt install git

git clone https://github.com/fantomnotabene/homebridge_setup_script

cd homebridge_setup_script

bash install.sh
And in 6-7 minutes, the installation will be finished.
Screenshot of the developer page on GitHub:
Other smart home solutions are installed similarly. And with sufficient knowledge and programming skills, it is possible to create your implementation of such software for “raspberries.”
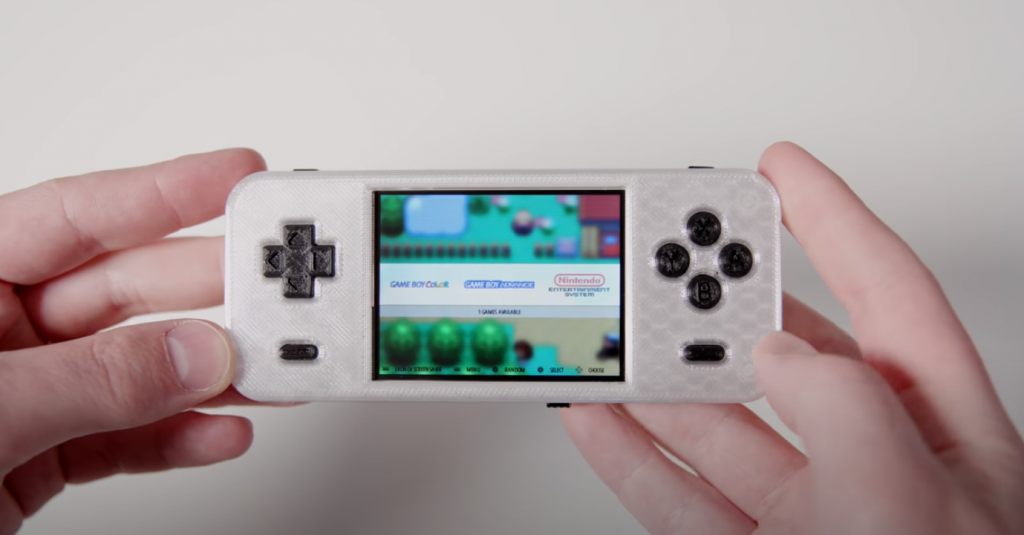
Robotics and Game Consoles
Above is an example of the creation of a laptop. Raspberry Pi can also be turned into a gaming console: compactness, moderate power consumption, low heat, and the presence of 40-pin GPIO contribute to this. An example of such solutions:
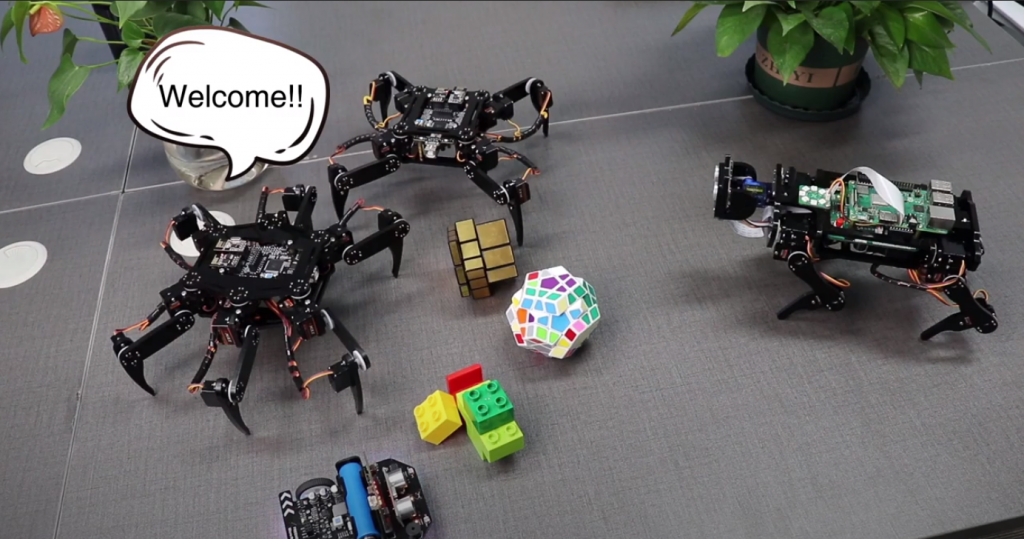
Create based on micro-PC and various robots – from simple controlled “machines” to complex multifunctional devices.
Learning
Small computers of this type have excellent learning potential. Children enjoy learning the basics of programming and software development, robotics, related topics like 3D modeling, etc. Similar courses and hobby groups for children and adults are organized today.
Multimedia Center
The computer can be turned into a compact and silent multimedia system. The Raspberry Pi Zero W-based media center can work as an IPTV set-top box, playing music and videos. Users have successfully implemented such projects based on free Home Theater solutions, such as Kodi software.
Useful Video: Raspberry Pi Zero Review & Setup
Conclusion
The review allows us to conclude that despite its modest size and not the most outstanding technical characteristics, Pi Zero series computers are successfully used in different tasks – from training to smart home systems and many kinds of controllers. Low price, variety of software, available and straightforward documentation, plenty of accessories, and low “threshold of entry” even for the beginners in one-board computer capabilities contribute to this. Probably, further development and appearance of even more exciting devices in terms of capabilities await the line.
It is essential to keep in mind that these boards are not suitable for the most resource-intensive tasks. You will not be able to organize a powerful computing cluster on its basis. But they are not designed for that purpose either.
Raspberry Pi Zero W is the most convenient to use because of the wireless interface. And for those who don’t want to waste time with a soldering iron, the WH variant with a soldered GPIO strip will do.