
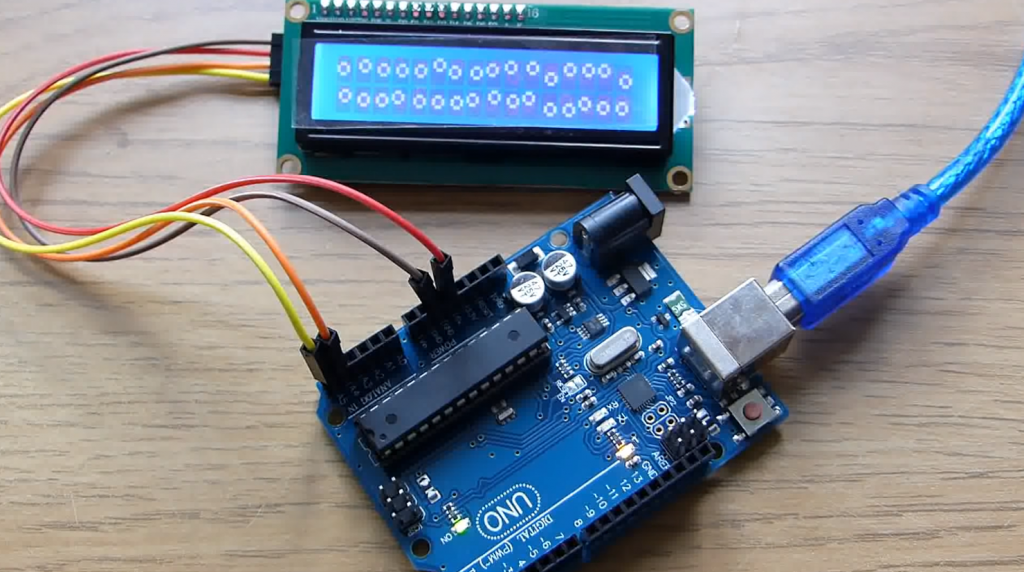
The LCD is a frequent guest in Arduino projects. But in complex circuits, we may have a lack of Arduino ports due to the need to connect a screen with many pins. The way out in this situation can be the I2C/IIC adapter, which connects the almost standard Arduino 1602 shield to the Uno, Nano, or Mega boards with only four pins. This article will see how you can connect the LCD screen with an I2C interface, what libraries can be used, write a short example sketch, and break down typical errors.
Arduino LCD 1602
The LCD 1602 Liquid Crystal Display is a good choice for displaying character strings in various projects. It is inexpensive, there are different backlight colors, and you can easily download ready-made libraries for Arduino sketches. But the most important disadvantage of this screen is the fact that the display has 16 digital pins, of which at least six are mandatory. So using this LCD screen without i2c adds serious limitations for Arduino Uno or Nano boards. If the pins are not enough, you will have to buy an Arduino Mega board or save the pins by connecting the display via I2C, among other things.
Short Description of the LCD 1602 Pins
Let’s take a closer look at the pins of LCD1602:
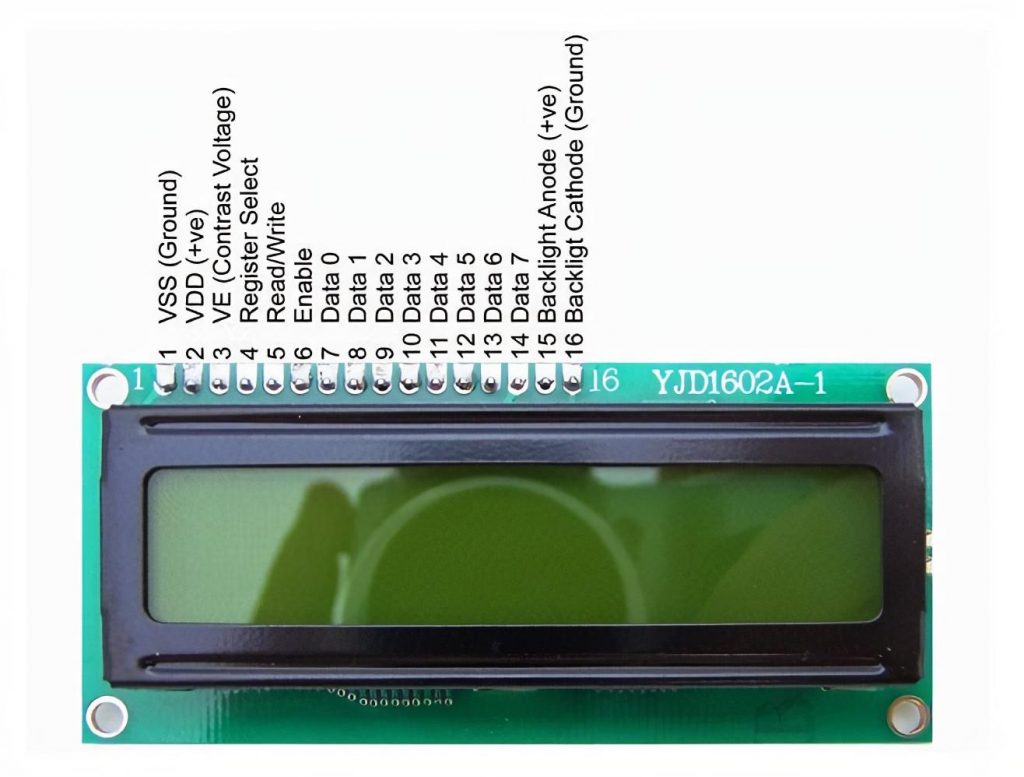
Each of the pins has a different function:
1. Ground GND;
2. Power 5V;
3. Contrast setting of the monitor;
4. Command, Data;
5. Write and read data;
6. Enable;
7-14. Data Lines;
15. Illumination Plus;
16. Minus backlight.
Display Specifications:
- Symbol display type, there is an option to load symbols;
- LED backlight;
- Controller HD44780;
- The supply voltage of 5V;
- Format 16h2 characters;
- Operating temperature range from -4F to +158F, storage temperature range from -22F to +176F;
- The viewing angle is 180 degrees.
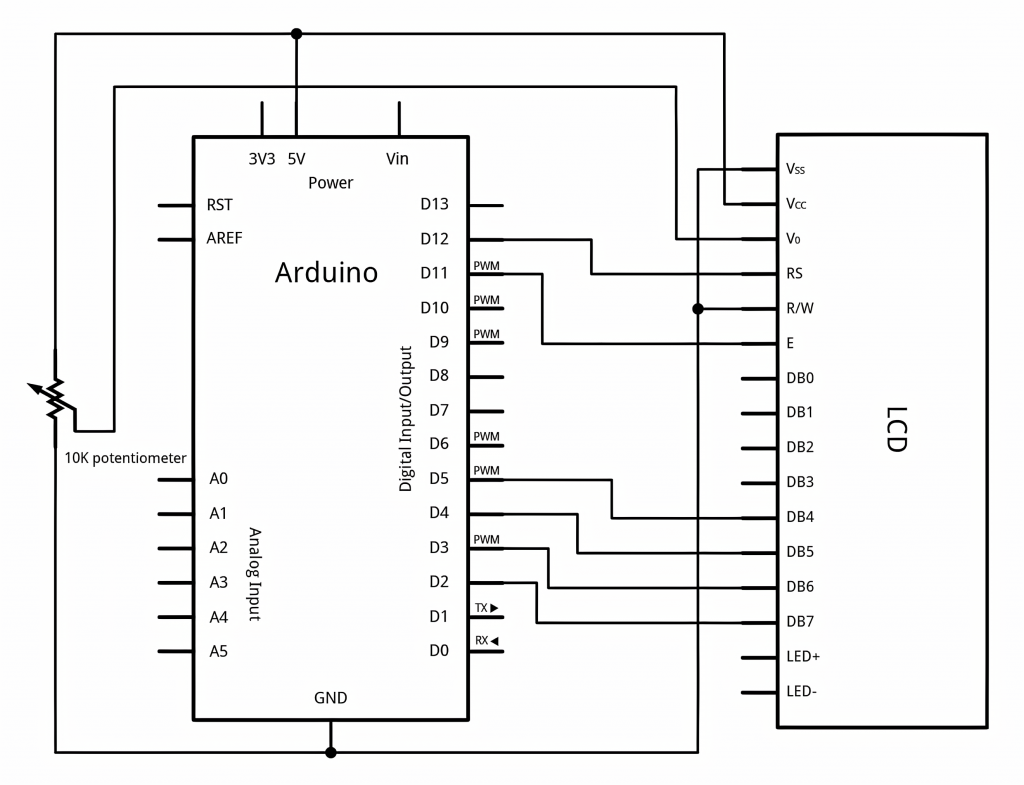
Diagram of LCD Connection to Arduino Board Without I2C
The standard circuit for connecting the monitor directly to an Arduino microcontroller without I2C is as follows.
Because of the number of pins you have to connect, you may not have enough space to connect all the parts you need. Using I2C reduces the number of wires to 4 and the occupied pins to 2.
Description of the I2C Protocol
Before discussing connecting the display to the Arduino with an i2C adapter, let’s talk briefly about the i2C protocol itself.
I2C/IIC (Inter-Integrated Circuit) – is a protocol originally created to communicate integrated circuits in an electronic device. The development belongs to Philips. The i2c protocol is based on an 8-bit bus, which is needed to link the blocks in the control electronics, and an addressing system that allows you to communicate on the same wires with multiple devices. We simply send data back and forth to one device or the other, adding the desired item’s ID to the data packets.
The simplest I2C circuit can have one master device (most often an Arduino microcontroller) and several slaves (such as an LCD). Each device has an address in the range of 7 to 127. There must not be two devices with the same address in one circuit.
The Arduino board supports I2C at the hardware level. You can use pins A4 and A5 to connect devices using this protocol.
There are several advantages to I2C operation:
- Only two lines are required for operation – SDA (data line) and SCL (clock line).
- Connection of a large number of master devices.
- Reduced development time.
- Only one microcontroller is required to control the whole set of devices.
- The possible number of microchips that can be connected to one bus is limited only by the capacity limit.
- High data integrity because of the special surge-suppression filter built into the circuits.
- Easy diagnosis of failures that occur and quick troubleshooting.
- The bus is already integrated into the Arduino itself, so there is no need to develop an additional bus interface.
Disadvantages:
- There is a capacitive limitation on the line – 400 pF.
- Difficult to program the I2C controller if there are several different devices on the bus.
- With a large number of devices, there is difficulty locating a failure if one of them sets the low-level state incorrectly.
I2C Module for the Arduino LCD 1602
The fastest and most convenient way to use the I2C display in the Arduino is to buy a ready-made screen with built-in protocol support. But there are not many of them, and they are not cheap. But a variety of standard screens have already been released in huge numbers. Therefore, the most affordable and popular option today is to buy and use a separate I2C module – adapter, which looks like this:
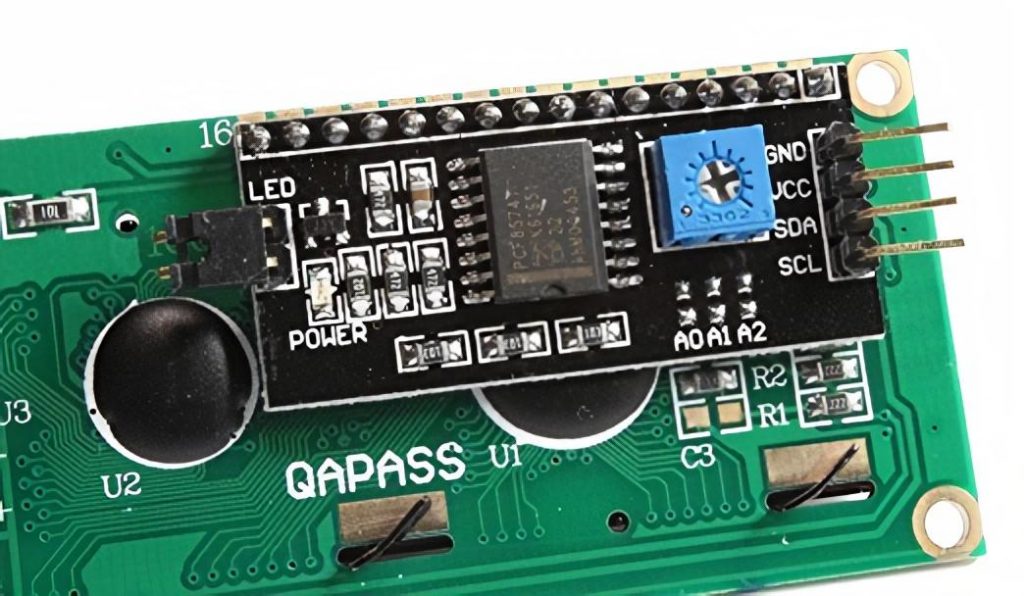
On one side of the module, we see I2C pins – ground, power, and 2 for data transfer. On the other side of the adapter, we see external power connectors. Of course, there are many pins on the board, with which the module is soldered to the standard pins of the screen.
The i2c outputs are used to connect to the Arduino board. If needed, we connect an external power supply for the backlight. With the built-in trim resistor, we can adjust the adjustable contrast value J.
You can find LCD 1602 modules with already soldered adapters on the market, and they are as simple as possible to use. If you bought a separate adapter, you have to solder it to the module beforehand.
Connecting the LCD Screen to the Arduino via I2C
To connect, you need the Arduino board itself, the display, a breadboard, connecting wires, and a potentiometer.
If you use a special separate I2C adapter, you need to first sell it to the screen module. It’s hard to make a mistake there, and this diagram can guide you.
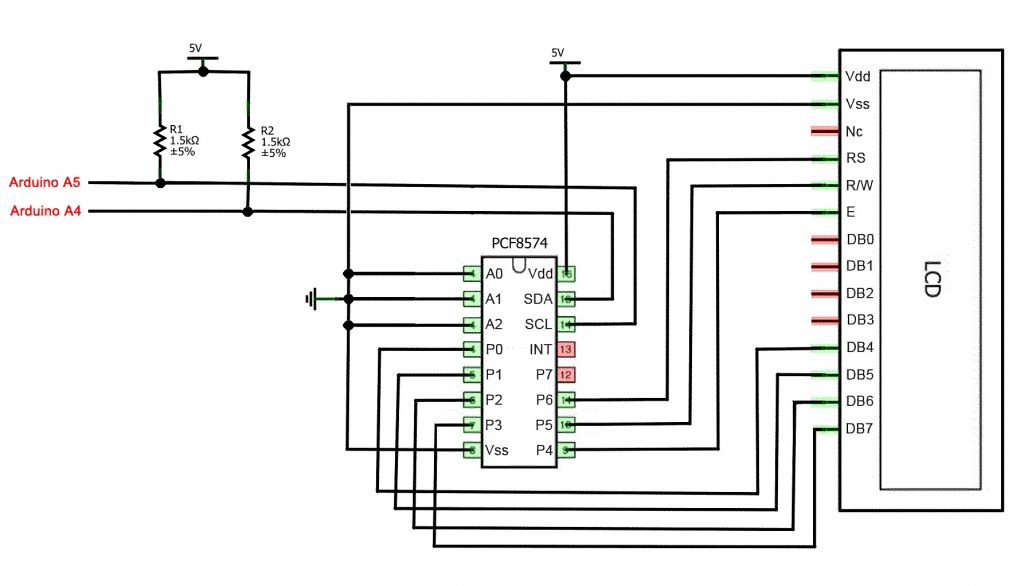
The I2C enabled liquid crystal screen is connected to the board with four wires – two wires for data, two wires for power.
- The GND pin connects to GND on the board.
- The VCC pin is connected to 5V.
- SCL is connected to pin A5.
- SDA is connected to pin A.
And that’s it! No cobwebs of wires that are very easy to get tangled in. That said, we can simply leave all the complexity of the i2C protocol implementation to the libraries.
Libraries for Working with the I2C LCD
To interface the Arduino with the LCD 1602 via the I2C bus, you need at least two libraries:
- The Wire.h library for I2C communication is already in the standard Arduino IDE program.
- The LiquidCrystal_I2C.h library, which includes a large variety of commands for controlling the monitor via the I2C bus and allows you to make your sketch easier and shorter. You need .to install the library LiquidCrystal_I2C.h after connecting the display additionally
After connecting all the necessary libraries to the sketch, we create an object and can use all its functions. For testing, let’s load the following standard sketch from the example.
#include <Wire.h>
#include <LiquidCrystal_I2C.h> // Connection of the library
// #include <LiquidCrystal_PCF8574.h> // Connection of alternative library

LiquidCrystal_I2C lcd(0x27,16,2); //Indicate I2C address (the most common value), as well as screen parameters (in case of LCD 1602 - 2 lines of 16 characters each
//LiquidCrystal_PCF8574 lcd(0x27); // PCF8574 library variant

void setup()
{
  lcd.init(); // Initialize display
  lcd.backlight(); // connecting backlight
  lcd.setCursor(0,0); // Set the cursor to the beginning of the first line
  lcd.print("Hello"); // Typing text on the first line
  lcd.setCursor(0,1); // Setting the cursor to the beginning of the second line
  lcd.print("NerdyTechy"); // Typing on the second line
}
void loop()
{
}
Description of functions and methods of the LiquidCrystal_I2C library:
home()andclear()– the first function lets you return the cursor to the beginning of the screen, the second one does the same, but it removes everything that was on the monitor before.write(ch)– allows us to write a single character ch to the screen.cursor()andnoCursor()– shows/hides the cursor on the screen.blink()andnoBlink()– cursor blinks/unblinks (if on).display()andnoDisplay()– allows to enable/disable display.scrollDisplayLeft()andscrollDisplayRight()– scrolls the screen one character to the left/right.autoscroll()andnoAutoscroll()– allows to enable/disable autoscroll mode. In this mode, each new character is written in the same place, displacing previously written on the screen.leftToRight()andrightToLeft()– Sets the direction of the text to be displayed – from left to right or from right to left.createChar(ch, bitmap)– creates a character with the code ch (0 – 7), using an array of bitmap bitmaps to create black and white dots.
Alternative Library for Working with I2C Display
In some cases, when using the above library with devices equipped with PCF8574 controllers, errors can occur. In that case, you can offer as an alternative to the library LiquidCrystal_PCF8574.h. It extends LiquidCrystal_I2C, so you shouldn’t have any problems using it.
Problems Connecting the I2C LCD
If you don’t get any writing on display after loading the sketch, try the following steps.
First, you can increase or decrease the contrast of the monitor. Often characters are just not visible due to the contrast mode and backlighting.
If this does not help, then check if the pins are connected correctly and if the backlight power is connected. If you used a separate I2C adapter, check the quality of the solder pins again.
Another common cause of missing text on the screen can be a wrong I2C address. Try changing the device address from 0x27 to 0x20 or to 0x3F. Different vendors may have different default addresses. If this does not help, you can run the I2C scanner sketch, which looks through all connected devices and detects their address by brute force.
If the screen still does not work, try to unsolder the adapter and connect the LCD normally.
Conclusion
This article covers the fundamental questions about using the LCD screen in complex Arduino projects when we need to save some of the available pins. A simple and inexpensive I2C adapter will allow you to connect a 1602 LCD screen taking up only two analog pins. In many situations, this can be very important. The price for convenience is the need to use an additional module – converter and library. In our opinion, it is not a high price for the convenience, and we highly recommend to use this feature in projects.


Tried all kinds of libraries to connect the LCD via I2C, but the display is only highlighted.
Turn the variable resistor on the I2C module of the adapter, and it will work!