
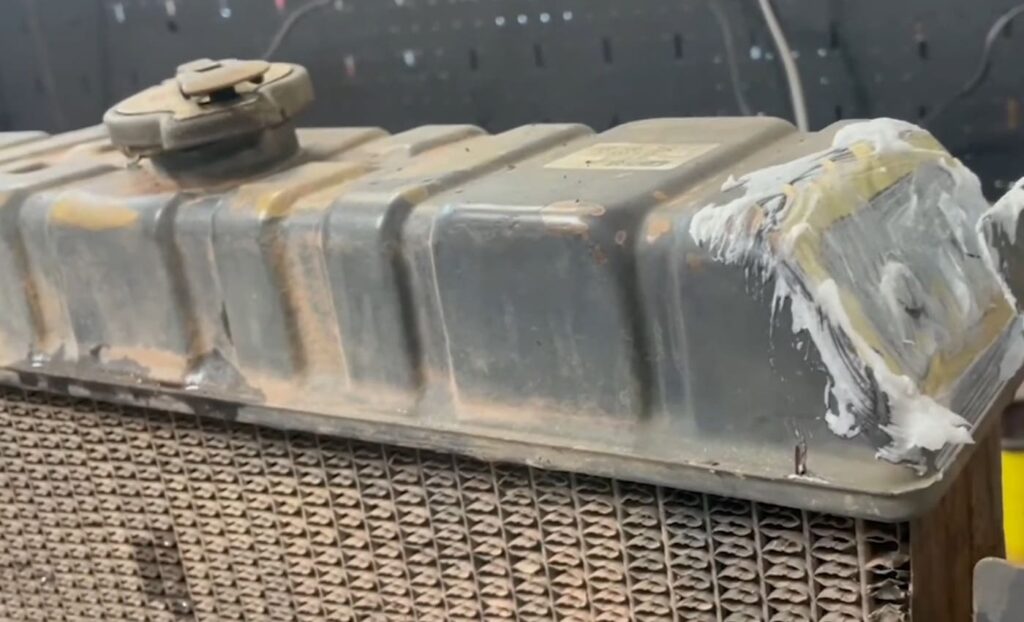
A cloud of steam hisses from under the hood as you pull over to the side of the road. Popping open the lid reveals the culprit – a small leak in one of the joints of your radiator. The good news is this doesn’t have to mean an expensive trip to the mechanic. With the right tools and techniques, repairing a leaking radiator by soldering it yourself can be a satisfying DIY project that saves you time and money.
While soldering a radiator may sound intimidating, understanding the basic steps and equipping yourself with the necessary supplies can make you successful. This straightforward repair could prevent more significant issues down the road and get you back on the road fast. Even those with minimal DIY experience can master this useful skill and prevent getting stranded with a steaming, leaking radiator again.
In this quick guide, we will cover the basic information needed to solder radiators yourself. We will look at the equipment, materials, and precautions needed. Soon, you will be confident in your abilities, save money, and restore the performance of your vehicle’s cooling system.
Quick Glance Highlights
Soldering a radiator is an effective way to repair leaks in the radiator cores. Before starting, be sure to take proper safety precautions, like wearing protective gloves and eyewear. To prep the joint, you’ll need a propane torch, rosin-core solder, and flux. Clean the area thoroughly and apply flux before heating. Use the torch to heat the soldering area evenly, then apply the solder until it flows smoothly into the joint. Allow time to cool and inspect the joint – reheat and add more solder if needed. With care and patience, DIY radiator soldering can extend the life of your radiator and get your vehicle cooling properly again. Let the joint fully cure before reinstalling.
Surface Treatment
Properly preparing the surface of a radiator is crucial when soldering repairs. The goal is to completely clean and flux the joint area so the new solder can adhere tightly. This involves removing all dirt, corrosion, oils, and old solder. Once stripped to bare metal, a two-component mixture of rosin and flux is applied before soldering. Treating the surface correctly helps create leak-free, long-lasting radiator repairs.
For any soldering job, surface preparation is paramount. This ensures the molten solder can form a solid metal bond with the base material. With radiators specifically, you’re often soldering over old joints covered in grime. Thorough cleaning and fluxing set the stage for a durable repair that won’t fail prematurely when the cooling system is refilled. While surface treatment adds time upfront, it can prevent leaks and avoid having to redo the job.
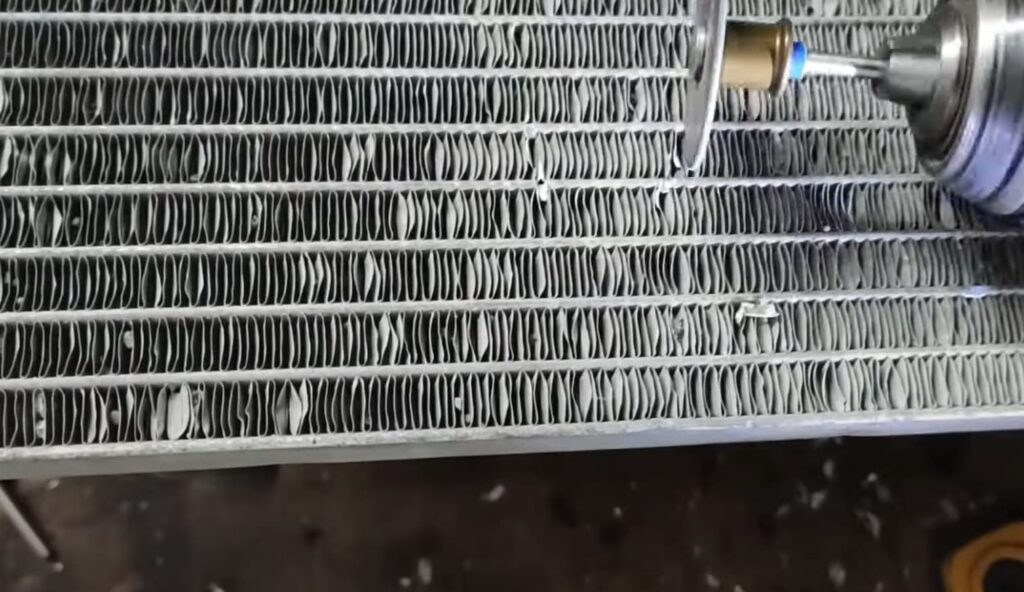
Cleaning the Radiator Surface
The first goal is to clean the soldering area down to shiny, bare metal. Built-up corrosion, grime, oils, and old solder must be removed for the new solder to adhere. Cleansers like acetone or brake cleaner help degrease but won’t strip everything away. Manual scrubbing with abrasives is also required.
Sanding and Scraping
Begin by lightly sanding around the damaged joint to remove any paint and expose the raw metal underneath. Use emery cloth or fine-grit sandpaper to avoid removing too much base material. Also, scrape away old gasket material using a putty knife or razor. This preps the surface for deeper cleaning.
Wire Brushing
Wire brushes are essential for removing corrosion on radiators. Use a standard or rotary brush to scrub surrounding areas until they appear shiny and new. Pay special attention to the solder joint seam, brushing to expose clean metal. Removing every trace of dirt and oxidation enables a solid bond.
Chemical Cleaners
Solvents like acetone or brake cleaner help finalize surface prep by dissolving oils and grease. Wipe the entire joint area thoroughly with chemical cleaner-soaked rags after wire brushing. Avoid petroleum-based solvents that can leave oily residue. The finished surface should look perfectly clean, with no visible debris or contamination.
Applying Rosin and Flux
Once scrubbed to immaculate metal, the radiator joint is prepped and ready for soldering – almost. A two-part rosin and liquid flux mixture should be applied immediately before soldering to aid adhesion. This is often called tacking flux.
Rosin
Most radiator repair solders contain rosin or resin flux cores. This organic compound promotes solder flow when heated. The rosin embedded throughout the solder formulation activates with heat to prepare the surface. Supplementary liquid rosin flux is still recommended.
Liquid Flux
Specialized liquid fluxes for brazing and soldering are preferred for radiators. These feature blends of zinc and hydrochloric acids to quickly dissolve oxidation and surface films. Common brand names include Stay-Silv white Flux or Sta-Brite. The flux breaks the surface tension, so solder flows and adheres perfectly.
Applying the Mixture
Use a flux brush to liberally coat the seam and surrounding repair area with liquid flux. Rosin solder paste can also be applied along the joint line using a putty knife before heating. Apply flux immediately before soldering, as it evaporates quickly when heated. The combined rosin and liquid flux provide ideal surface wetting for leak-free results.
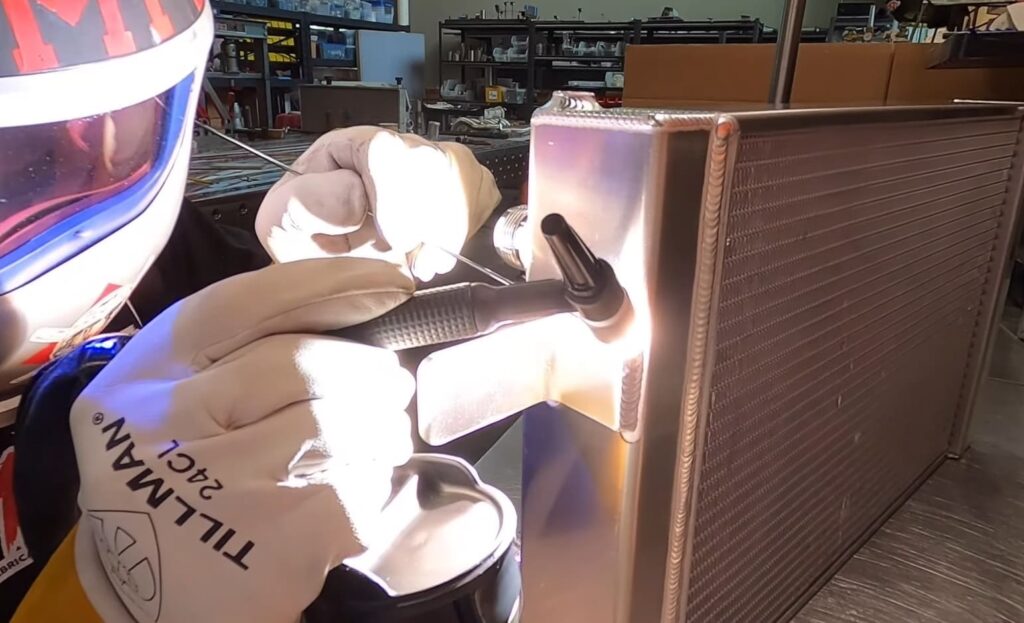
Soldering Process
The act of soldering itself comes after thorough cleaning and fluxing of the repair area. Soldering requires concerted attention to detail and patience to master. But with the right materials and techniques, you can learn to sell radiators for leak-free results reliably. We’ll explore critical steps like selecting the solder, preparing the torch, heating patterns, applying solder, and testing for defects that indicate when more solder is required.
Choosing the Right Solder
Not all soldiers are suited for radiator repair. While standard tin/lead solder works, specialty radiator repair solders are preferred. These contain high tin concentrations above 90% and are rosin cores for built-in fluxing. Common brand names are Stay-Brite 8 or Sil-Fos. The high tin content allows the solder to withstand engine temperatures without melting.
Preparing the Soldering Torch
The most common tool for radiator soldering is a propane pencil torch, either air-pressurized or canned fuel. Inspect the torch head, ensuring the flame adjustment valve and orifice are clear of debris. Partially open the valve to ignite a stable blue inner flame. Adjust intensity by valve position rather than fuel flow. Position the torch 5-6 inches from the work to start.
Heating the Area
The goal is to evenly preheat a broad area around the joint before focusing heat on the solder point. Avoid applying direct flame right away, as this can crack the radiator. Instead, gradually heat 2-4 inches surrounding the seam, slowly moving the torch to warm the entire region. Use a sweeping motion and heat both sides of the joint.
Applying Solder
Once evenly heated, concentrate the torch flame on the solder point itself. Touch the solder to the joint and let capillary action draw it in. Add more solder slowly as needed until it flows smoothly. Take care not to overheat or melt the radiator. Allow time to cool and set before handling. Reheat and add additional solder if the joint looks incomplete or porous after cooling.
Checking for Leaks
Inspect the cooled solder joint closely, looking for gaps, holes, or cracks that could indicate leaks. Tap around the joint, listening for hollow sounds. Black streaking around the seam may indicate burnt flux rather than leaks. Apply more flux and solder to problem areas, reheating gradually. Pressure testing after 24 hours will reveal any minor seepage to correct.
Tips for Successful Soldering
Soldering a radiator relies as much on finesse as on fundamental skill. How you apply heat and solder makes all the difference in joint integrity. Keeping temperatures optimized, using adequate but not excessive solder, preventing overheating, and dissipating toxic vapors through ventilation allows for durable repairs.
Maintaining the Right Temperature
The key is heating the repair area hot enough to melt the solder without burning or warping the radiator. Use a temperature-controlled soldering iron or regulate a torch flame carefully. Heat a wide zone around the joint before focusing on the solder point—gauge the required temperature by solder reliability.
Preheating
Begin by warming a 2-3 inch area surrounding the joint to prevent cracking the radiator. Gradually increase heat while regularly checking temperature by touching the solder to the surface. The goal is to preheat evenly without melting the solder.
Targeted Heating
Once preheated, concentrate heat directly on the soldering spot. Maintain a targeted flame until a touched solder fragment fully melts and flows. This indicates the joint is adequately hot for the solder to penetrate.
Avoid Overheating
While the solder location itself becomes quite hot, temperatures over 400°F can damage the surrounding radiator. As soon as the solder melts and adheres, remove the heat source. Overheating risks warping or burning the radiator beyond repair.
Using the Right Amount of Solder
Sufficient solder is key for filling joints fully, but frugality prevents waste. As a rule of thumb, use 1-2 times the joint width in solder diameter. Heat until the solder liquefies, then add more slowly until it fills the crevice flush. Leave a smooth fillet along seam edges without excessive buildup.
Reapply as Needed
Inspect joints when cooled and reheated if any gaps are evident. Frugality leads to incomplete penetration and leaks. Conversely, too much solder can actually weaken repairs. Find the right balance for your particular repair area.
Avoiding Overheating
While heating sufficiently to melt solder is necessary, excess heat damages the surrounding metal. Keep the torch moving over a wide area and avoid prolonged focal heat on the joint. Discoloration or radiator warping are signs of overheating. Allow cooling between solder passes.
Heat Sinks
Use wet rags or metal blocks to draw heat away from the solder area and dissipate it. Avoid overheating one focused spot. Let joints cool fully before reheating if more solder is needed. Gradual reheating reduces the risk of failure.
Ensuring Proper Ventilation
Soldering produces potentially harmful fumes from flux vapors and lead content. Work in a well-ventilated area using a fan or vent system. Position yourself upwind of fumes and avoid inhaling directly over the work. Proper ventilation reduces health risks when soldering radiators.

FAQ
What are the benefits of soldering a radiator rather than replacing it?
Soldering a radiator can extend its life at a fraction of the cost of fully replacing it. It allows you to repair minor leaks in the radiator cores and tubes rather than purchasing a new radiator. This saves money on parts and labor. Soldering is also less wasteful than replacing the radiator if only a small section is damaged. With proper technique, soldering can provide a durable, long-lasting repair. It gets your vehicle cooling properly again while avoiding the cost and effort of a more major repair.
What safety precautions should I take when soldering a radiator?
Any automotive repair project requires safety measures. Soldering a radiator specifically calls for protective gloves and eyewear at a minimum. Rosin core solder and liquid flux contain compounds that irritate skin and eyes. Proper ventilation is also key when soldering, as lead fumes are toxic if inhaled. Have a fire extinguisher on hand, given the open flame. Allow the radiator and surrounding parts to fully cool before starting work to avoid burns. With safety as the priority, you can confidently take on this repair yourself.
What tools and materials do I need to solder a radiator?
The main items needed are a propane torch, rosin core solder, and liquid flux. The torch evenly heats the soldering area so the solder adheres properly. Rosin core solder contains flux, but supplementary liquid flux helps prepare the joint. You’ll also need an emery cloth and wire brushes to clean the repair area thoroughly. A utility knife removes any gasket material around the joint. Needle nose pliers can aid in holding parts steady. Having all these materials close at hand makes the job easier.
How do I prepare the radiator for soldering?
Prepping the radiator correctly is crucial for a lasting repair. Remove any coolant and drain the system fully. Detach the radiator if needed for easier access. Sand and wire brush the soldering area to expose clean, bare metal. Use a knife to scrape off old gasket material. Wipe with acetone to degrease. Apply liquid flux to help the solder adhere. Avoid applying too early, as it can boil off when heated. Proper prep removes surface debris, so the fresh solder bonds tightly.
What soldering techniques produce the best results?
Effective radiator soldering relies on uniformly heating the area and applying solder properly. Use the torch to warm a wide area around the joint gradually, then focus heat on the solder point. Touch solder to the joint once adequately heated and allow capillary action to draw it. Add additional solder slowly as needed until it flows smoothly. Avoid overheating or melting the radiator itself. Reheat and add more solder if the joint looks incomplete. The proper technique takes some practice but results in leak-free repairs.
How can I tell if my soldered radiator joint is solid?
Check for a uniformly smooth, shiny solder joint once it cools. Visually inspect from all angles, looking for gaps where more solder is needed. Tap lightly around the joint, listening for areas that don’t sound fully bonded. Leaks may appear black initially as the flux burns off. Small leaks can often be resolved with more heat and solder. For severe leaks, remove all solder and start over. Taking the time to inspect ensures you have a durable, leak-free repair.
What mistakes should I avoid when soldering a radiator?
Pitfalls like overheating can ruin the repair. Allowing too much time between applying flux and soldering can boil the flux off. Attempting to solder a highly corroded/dirty joint that wasn’t properly prepped is problematic. Moving the radiator before the joint fully cools or hardens risks cracking the fresh solder seal. Avoid touching or jostling the radiator as the solder sets. Rushing the job often leads to mistakes, so work slowly and carefully. Ensuring proper preparation, material usage, heating, and cooling times helps avoid common errors.
When can the repaired radiator be reinstalled in the vehicle?
It’s critical to allow adequate curing time for the soldered joint. Coolant and pressure testing can wait 12-24 hours after soldering. Let the joint cure fully over 48-72 hours, whenever possible, before reinstallation. This prevents the repair from leaking or failing prematurely, and rushing the job risks wasting time and effort if the solder seal cracks under pressure. Patience goes a long way in getting your vehicle’s cooling system working reliably for the long haul.
Related Video: How to Solder and Repair a Leaking Radiator
Summarize
In closing, soldering a leaky radiator can be a cost-effective and satisfying DIY repair if done properly. Take all necessary safety measures, assemble the right soldering tools and materials, and thoroughly clean/flux the joint. Apply heat gradually and evenly before flowing the solder into the gap. Let the fresh solder joint cool completely before handling. With practice, you can become proficient at radiator soldering and fix minor leaks as they occur. This prevents more costly replacements and keeps your vehicle’s cooling system in working order. With the right techniques, patience, and care, you can take this important repair into your own hands and get your car or truck back on the road.


