
Arduino LilyPad and other analogs, such as LilyPad Simple and Lilytiny Lilypad, are a separate Arduino board line. It was designed and created by Leah Buechley and SparkFun for use with articles of clothing and textiles. According to its main characteristics – the number of ports, processor frequency, and power supply Arduino LilyPad board is similar to the Arduino Nano microprocessor, but there are significant differences in the design and purpose of the board, which we will describe further in more detail.
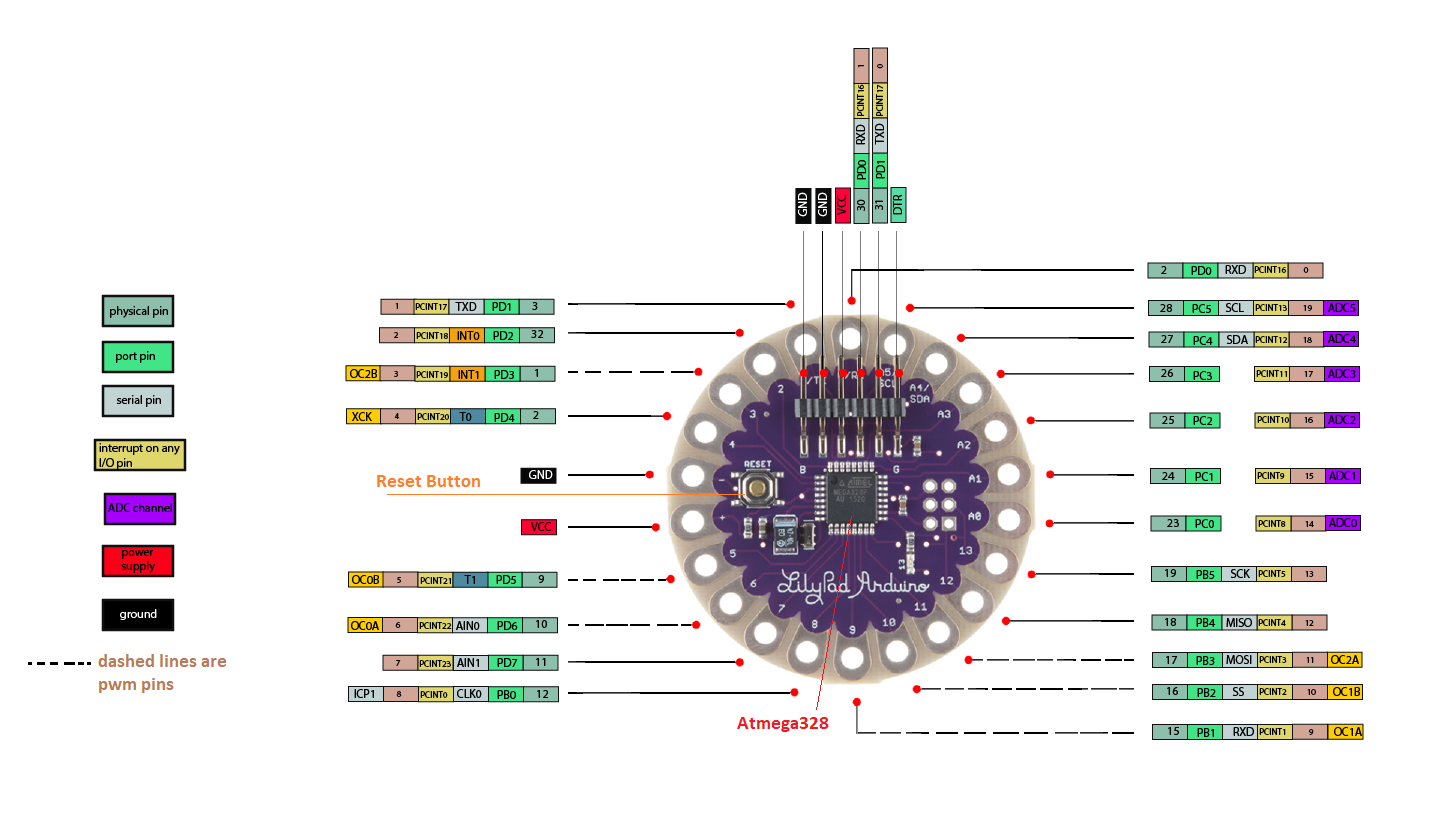
Arduino LilyPad Pinout
The LilyPad 328P board is produced in several variants – with a built-in micro-USB port, which is used on most modern smartphones. There is a more budget version without a built-in micro-USB port, which is flashed through a programmer, like the Arduino Mini. The platform can be based on the ATmega168 microcontroller or the more powerful ATmega328 microcontroller.
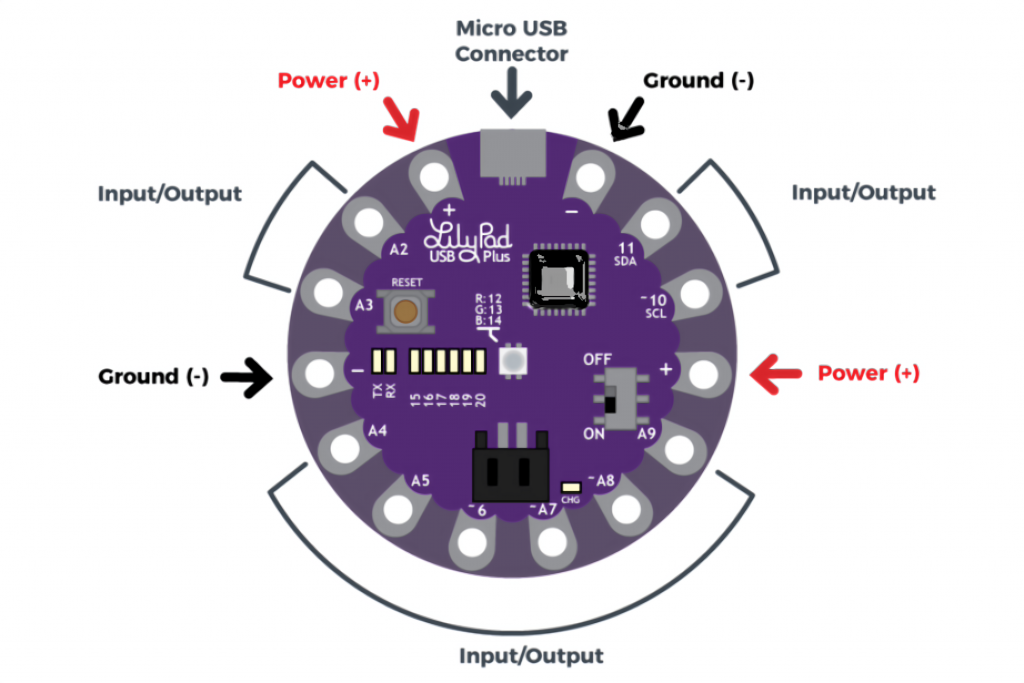
The LilyPad Simple Snap is another variation of this line, which has the pins on the circuit board as rivets. This is quite handy since the board can be detached before washing. The Arduino LilyPad can be connected to a power source from a computer or other device via the micro-USB port, if available, or via the VCC port from a power supply, battery, or battery pack.
The Lilytiny LiLypad ATtiny85 is a simplified version of the LilyPad based on the ATTiny85 microcontroller with 8 KB Flash memory. It is designed to create LilyPad Arduino projects using textiles and clothing. The LilyTiny LiLypad board can be easily sewn onto outerwear with a conductive thread and can be used as a control microcontroller for LEDs and other sensors.
Arduino LilyPad 328P Specifications
- Microcontroller: ATmega328P (check its pinout here)
- Number of digital inputs/outputs: 20
- PWM compatible ports: 6
- Number of analog inputs: 6
- Ports for hardware interrupts: 2
- Flash memory capacity: 32 kB
- SRAM capacity: 2KB
- EEPROM capacity: 1 Kb
- Clock frequency: 8 MHz
- Supply voltage: 2.7-5.5 V
- The maximum current through I/O pin: 40mA
- The diameter of the LilyPad Arduino: 1,96 inches
- LilyPad PCB thickness: 0.8 mm
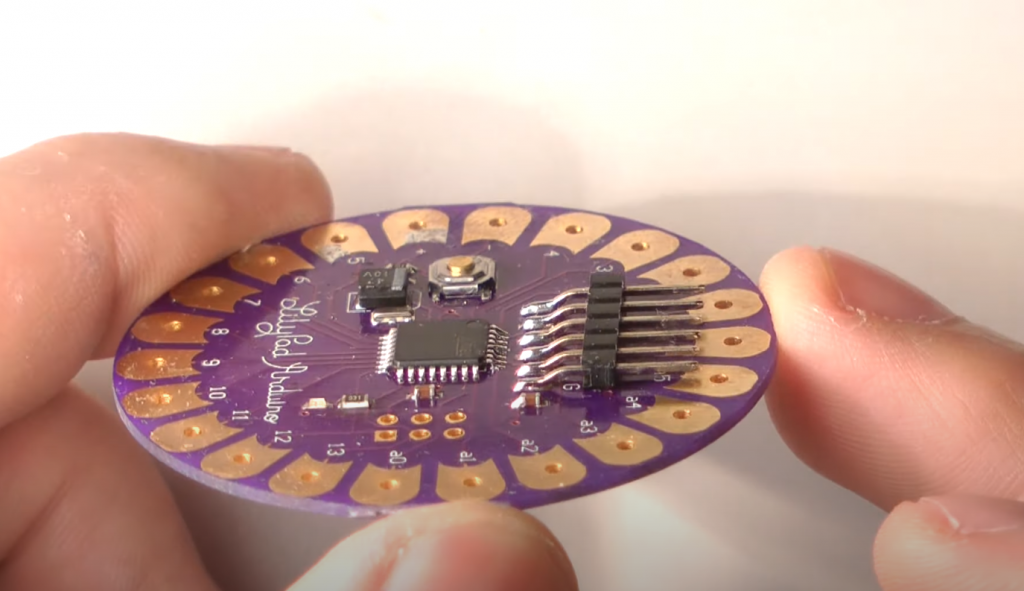
LilyPad 328 PCB Overview
The Arduino platform is not represented by a single board but by a whole family of boards with different features and functionality. One of the most unusual Arduino boards is the Arduino LilyPad. It was designed and created by Leah Buechley together with SparkFun for use with clothing and textiles. The Arduino LilyPad can be sewn onto fabric and used to connect power, sensors, or actuators using conductive threads. The electronic circuitry assembled on the fabric, including the Arduino LilyPad itself, is not afraid of washing. You can wash it manually, of course, by first disconnecting the power. The printed circuit board of the LilyPad Arduino is shaped like a circle with a diameter of about 50 mm. The board is made with ATmega168V or ATmega328V microcontrollers. The board supply voltage is between 2.7V and 5.5V. If the power supply is negative or higher than 5.5V, the board can fail. There are three variants of this board: LilyPad Arduino 328 – based on the microcontroller ATmega328.
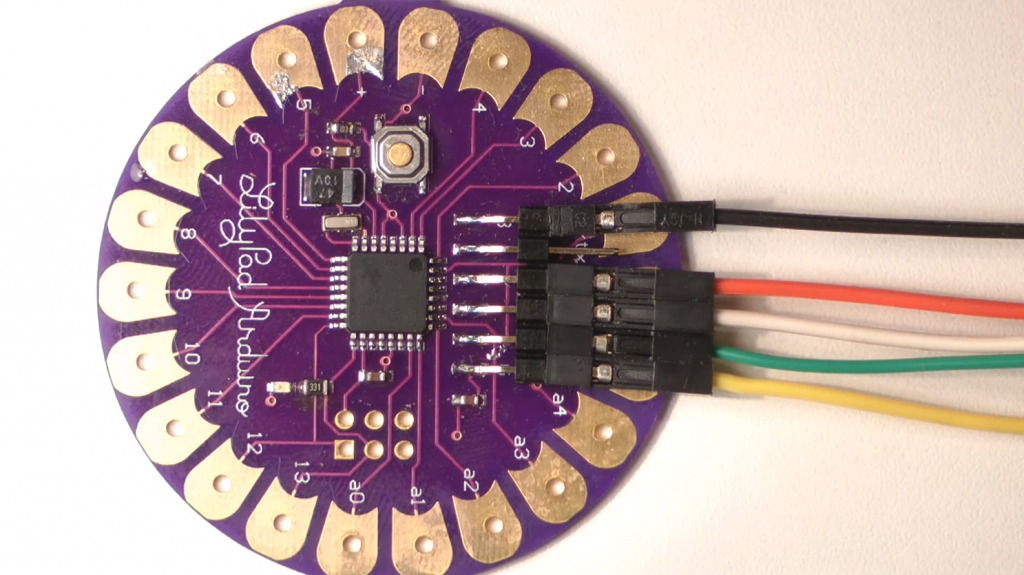
Consider the LilyPad Arduino 328 board – based on the ATmega328 microcontroller. The board has 22 pins. The “+” and “-” pins are for powering the board. The other pins are similar to the Arduino Uno pins. There are also pins on the board to connect the USB-Serial adapter, which is necessary to load sketches from the computer.
LilyPad 328P: I/O Ports, Power
The Arduino LilyPad has nine general-purpose I/O ports, of which six ports can be used as PWM outputs. For connecting analog sensors to the board, there are six ports connected to the ADC. The Arduino LilyPad board itself is made as a circle with a diameter of 50 mm, a height of no more than 4 mm, and weighs about 8 grams. The allowable power supply voltage is from 2.7 to 5.5 volts.
The VIN port that most Arduino boards have is missing on this board. The board does not have a voltage regulator, so if the voltage is higher than 5.5 volts or changes the power supply’s polarity, the board LilyPad Arduino 328 can fail. To program the board, use the Arduino IDE, which can be downloaded for free from the official website.
Example of Use
SparkFun Electronics offers additional devices to share with LilyPad Arduino controllers. Here are some of them:
- LilyPad Button Board – Button;
- LilyPad Light Sensor – LED;
- LilyPad Temperature Sensor;
- LilyPad Accelerometer ADXL335 – Accelerometer;
- LilyPad MP3 – MP3 Player;
- LilyPad XBee – for connecting XBee devices;
- LilyPad Coin Cell Battery Holder – battery connection board;
- LilyPad Pixel (WS2812 RGB LED module).
And many others. Let’s look at an example of connecting several LilyPad Pixel modules to a LilyPad Arduino, each of which is a WS2812 RGB LED that can be controlled from a single Arduino pin. Also, these LEDs can be daisy-chained together and controlled individually. If there is no conductive filament, we will connect the LilyPad Pixel modules by soldering wires. We will need the following components:
- Arduino LilyPad board -1;
- A 470 Ohm resistor – 1;
- LilyPad Pixel – 10;
- wire;
- 5V power supply.
All LilyPad Pixel modules are connected to each other in series. The Din input of each one is connected to the Do output of the next one. The control signal must go to the first of them. The control commands come in packets of 3 bytes, one for each of the three colors (Blue, Green, Red – they go in that order). Between the packets, there is a pause of 50 µs, the pause over 100 µs means the end of the transmission. The controller of the first LilyPad Pixel module takes the first packet of 3 bytes, sets its color in accordance with the content, the next packet goes on, where the second takes it, and so on, until there is a 100 µs pause in the stream. Let’s proceed with writing the sketch. We have the Adafruit_NeoPixel library to work with WS2812 LEDs. Every second we will send ten new packets for ten modules, the color will be chosen randomly. The contents of the sketch are shown in the listing below.
#include <Adafruit_NeoPixel.h>
//the number of the connection port of the first LilyPad Pixel module
#define LED 4
// number of modules
#define count 10
//create object
Adafruit_NeoPixel ledsWS2812 = Adafruit_NeoPixel(count, LED, NEO_GRB + NEO_KHZ800);

void setup() {
  ledsWS2812.begin();
  // turn off all modules - black
  ledsWS2812.show();
}
void loop() {
  for(int i=1;i<= count;i++) {
    // send color for the next LED
    ledsWS2812.setPixelColor(i, pixels.Color(random(0,255), random(0,255), random(0,255));
  }
  ledsWS2812.show();
  // pause for 1 second
  delay(1000);
}
Conclusions
The Arduino LilyPad platform is designed for creating “smart” clothing and textiles, as the board has tiny dimensions. The LilyPad microprocessor can be sewn onto the garment, and LEDs and sensors are connected to the board using conductive threads. Clothes with the microcontroller can be washed in hand-wash mode, without spinning, by prudently disconnecting power from the LilyPad board.


I think the Arduino Lilypad is amazing. I’ve never seen anything like it before. It’s so small and portable, yet it has so much power. I can’t believe how easy it is to use. I was able to get started right away, and I had a lot of fun experimenting with it.