
Arduino boards are very popular among electronic engineers and inventors. This is a fact: the cost of the original controllers is relatively low, while many Chinese clones are almost 3 times cheaper. With this controller, you can come up with and design anything you want.
But unfortunately, the board is very susceptible to external influences: at the slightest misstep, the controller is ready to fail immediately.
Here are ten undesirable experiments, after which you can safely throw the controller in the trash.
Mistake 1: High Voltage
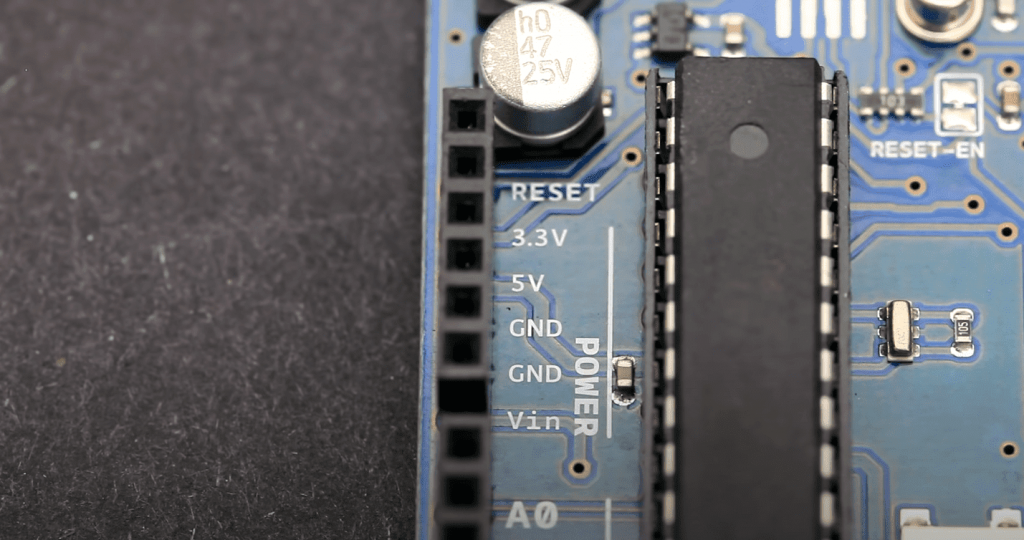
Do not supply any voltage higher than 5V to the Arduino via the pin pins (or higher than 3.3V for controllers with this operating voltage)!
People sometimes confuse the 5V and vin pins and apply voltage exactly to the pin marked 5V. It is a pin, so don’t be surprised if your Arduino doesn’t turn on anymore after such an experiment.
Mistake 2: Two Power Supplies
Do not power the Arduino from two different sources at the same time! This leads to a voltage distortion, and as a consequence, after a while, the controller can fail.
Mistake 3: Software Resistance
Never enable resistance in Arduino controllers programmatically! When a pin is engaged, it should always be connected via a 10k ohm pull-up resistor to the ground. This is done to eliminate the interference from external power supplies.
The Arduino controller has internal pull-up resistors on each pin. They are enabled via program code and can be used as protection against false positives. But if such a pin is overloaded or accidentally short-circuited, it will simply burn out and won’t work anymore.
Mistake 4: Short Circuit
Never short the supply wires to the controller! You have probably already guessed that the chip is afraid of almost any short circuit. In general, any equipment is afraid of such an oversight. Many manufacturers put special fuses on their devices that break the circuit at the slightest overcurrent or overvoltage. But don’t push your luck.
There is already so-called “foolproofing” and protection against inattentive users on boards like the Arduino Mega. But there is no fuse on Nano-type boards because of physical limitations. It is good if it only burns out the wiring on the board. To change a diode or a resistor is not a problem, but to burn the controller because of a careless movement is a great shame.
Mistake 5: Shorting Without a Load
Do not short the Arduino pins together without any load! Just don’t do it that way. At the very least, if you think it should work this way and can’t be any other way, connect only through a resistor.
Mistake 6: Overloading
Do not overload the Arduino pins with voltage and current. The controller’s outputs are designed for a total current of up to 200mA. If this threshold is exceeded, the controller will overheat and will fail.
The connection of a powerful motor or any other device to the outputs should be made through a bundle using MOSFETs or optocouplers. The power supply must either be separate or powered directly, bypassing the controller.
Mistake 7: Re-Polarizing, the Controller
Ground reversal is also terribly harmful to the controller: you will end up with a completely burned-out board! However, there is a chance that only the controller’s wiring, e.g., the protection diode, is burnt out. Try to replace it first: maybe the controller will come back to life, but it’s uncertain.
Mistake 8: Static Electricity
The microcircuit is sensitive to all kinds of external influences, and a strong arc of static electricity will stitch the controller to death. It is better to work with the controller in antistatic clothing. Also, there are special antistatic bracelets for sale: don’t spare the money and buy one for yourself.
Mistake 9: Controller On
Do not assemble the circuit with the controller turned on. People starting with controllers often don’t know that you can’t change or disconnect components in a circuit while it’s running. Program failure is not the worst thing that can happen.
The scary part is when half of the pins stop showing signs of life. Such a controller will never work adequately again (if it works).
Mistake 10: Twelve Volts
Do not apply a voltage higher than 12V to the board. Modules connected to the board can operate at voltages higher than the rated voltage, different from the intended voltage on the board.
The engineers who designed the Arduino have taken this nuance into account, and the chip can withstand high voltages, but it will be very warm. If the voltage threshold of 12 volts exceeds, the controller will burn out!
When working with Arduino boards, be very careful. It is better to double-check all the connections before you start the device.
FAQ
What can I do with an old Arduino?
There are many things that you can do with an old Arduino. You can repurpose it and turn it into something new. You can also use it to do some DIY projects like a robot or a light show.
Is Arduino hazardous?
The Arduino is not considered hazardous because it has a very low risk of harm. There are no known health risks for the user or anyone else in their environment.
Can Arduino overheat?
Yes, it can. If you are working with high current draw circuits, like servos, brushless motors, etc., you may consider adding a heatsink to the Arduino board.
Related Video: Top 10 Ways to Destroy an Arduino – I Did All 10 at Once
Final Words
I hope that you learned something new in this article, and maybe I was able to teach you a few tricks or tips on how to prevent destroying an Arduino board. If there are any questions or anything that you would like to ask me, please comment below.


